Last updated on
Want to know how long it takes to tile a bathroom?
Key takeaways:
- Pro installers complete tiling faster than DIYers.
- Bathroom size directly impacts tiling duration.
- Tile material affects installation time and difficulty.
- Proper preparation reduces unexpected delays significantly.
- Grouting and curing require patience for best results.
Tile Installer’s Skill Level
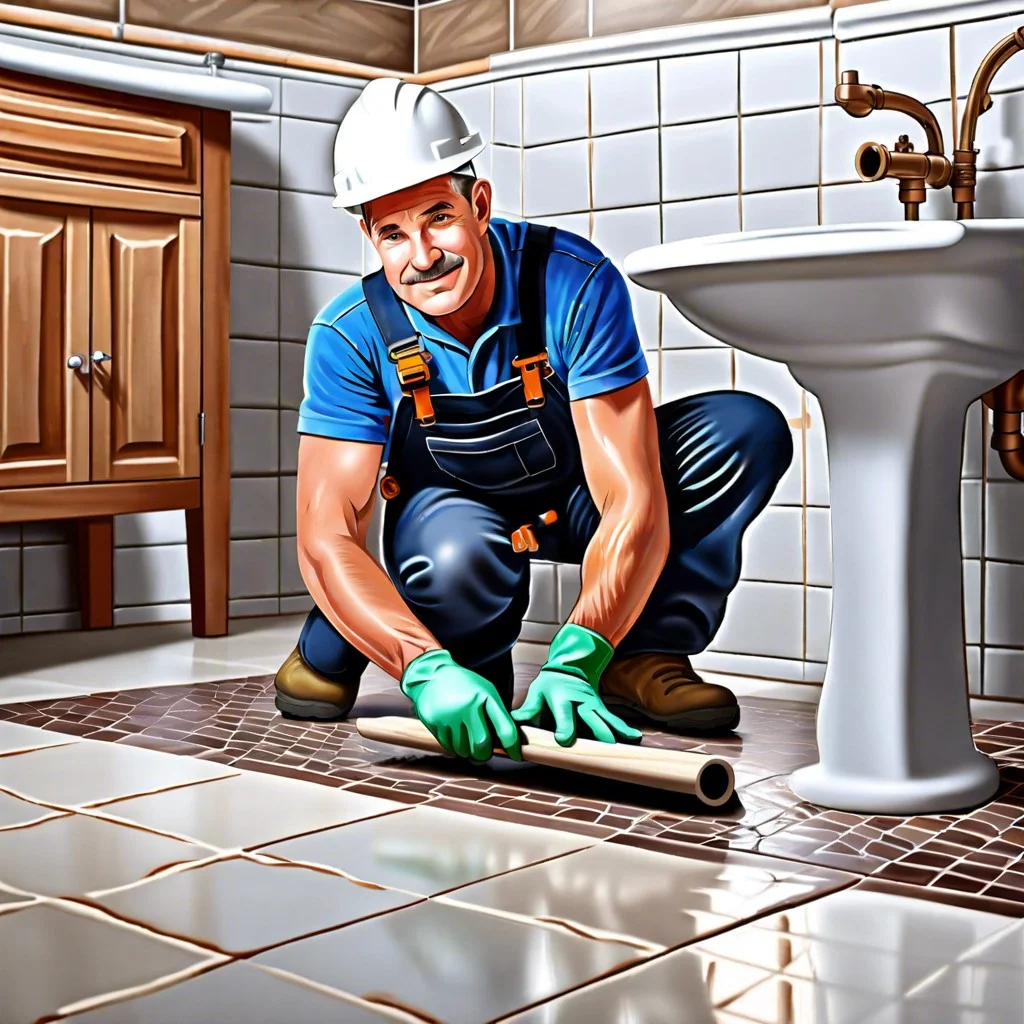
A pro can make tiling look like a walk in the park, finishing even a large bathroom in a matter of days. On the other hand, if your DIY skills are more “enthusiastic beginner” than “seasoned expert,” expect the process to stretch out longer. Experience drastically reduces mistakes and rework.
Skilled tile installers know all the shortcuts and tricks that can shave hours off the job. They also have a knack for handling unforeseen issues without breaking a sweat. Your first time tiling? Think of it as a learning curve — a steep one at that. Added time will be spent just figuring out which end of the trowel to use!
Moreover, experts have all the right tools at their disposal, unlike the average homeowner who might be missing that one crucial gadget, leading to multiple trips to the hardware store. And remember, nothing kills time like uncertainty, so confidence in your tiling abilities can significantly speed things up.
Size of the Bathroom
A small half-bathroom might only need a few days of tiling, while a spacious master bathroom could take a couple of weeks. Imagine trying to tile the floor and every wall of a room that feels like its own zip code. Size matters.
More square footage means more tiles to cut, more grout to spread, and more headaches when you realize you’ve miscalculated. A larger space typically equals more time-consuming detail work.
Oddly shaped rooms can stretch out timelines, too. Corners and alcoves are the universe’s way of reminding us that straight lines are a privilege, not a right. Trying to fit tiles into tricky spots can make you question every life choice that led you to that moment.
Remember, more room also means more prep work. We’re talking in-depth cleaning, leveling, and possibly even waterproofing. It’s kind of like throwing a party: the bigger the guest list, the more chips and dip you need to provide.
Size of the Tiles
Large tiles can give your bathroom a sleek, modern look, but they come with a twist—less grout means fewer grout lines, making them quicker to install. However, larger tiles can be trickier to align perfectly, especially in smaller spaces with more nooks and crannies.
Smaller tiles are great for intricate patterns and adding texture, but each tile needs its own tender loving care. Picture this: instead of five big tiles across your floor, you’re dealing with fifty tiny ones. More grout, more precision, more time.
Think of mosaic tiles as the divas of the tile world. Eye-catching and glamorous, they require meticulous placement. Their small size demands more alignment, spreading the work like peanut butter on dry toast—an effort-intensive task but absolutely worth it for that dazzling finish.
So, the rule of thumb: the smaller the tile, the longer the installation. Choose wisely, or be prepared to double down on your DIY patience reserves.
Choice of Tile Material
Different materials can significantly impact the time it takes to tile a bathroom.
Ceramic tiles are generally straightforward. They’re user-friendly and perfect for those new to tiling. These tiles cut easily, making for speedier installation.
Porcelain tiles, on the other hand, are like the marathon runners of the tile world. Tougher and denser, they require a bit more finesse (and a good pair of tile nippers) to cut and fit.
Natural stone tiles look stunning but can be a diva. Their unique textures and imperfections can slow you down, demanding more precision and care.
Then there’s glass tiles – beautiful but fragile. They need meticulous handling to avoid cracks, which can be a real time-eater.
So, the material you choose isn’t just about looks. It’s also about how much extra coffee you’ll need to keep your tiling project on track.
Preparation Work
You can’t just slap tiles on the wall and call it a day. Good prep work is like marinating before a BBQ – it’s totally worth it. First, clear the bathroom of any fixtures, furniture, and, yes, rogue rubber duckies. Clean the walls and floors thoroughly; any grease or dirt can sabotage your masterpiece.
Next, check for any uneven surfaces. Uneven surfaces lead to uneven tiles, which leads to an uneven temper when tiles start looking like the Rocky Mountains. Use a leveling compound on floors and a plaster patch on walls if necessary.
Don’t forget to install backer boards, because drywall and tiles go together like cats and water. Backer boards prevent moisture damage and provide a sturdy base.
Lay out your tile pattern beforehand, cutting any tiles to fit edges and tricky spots. Think of it like doing a jigsaw puzzle where all the pieces are square.
Finally, gather all your tools: trowels, spacers, tile cutters, mortar. You don’t want to be the person who runs to the store midway covered in adhesive.
Tiling Technique
Ah, the art of tiling – it’s like playing a game of Tetris, but with higher stakes and waterproof grout. The technique used can dramatically affect how long it takes to finish a bathroom.
First, the classic straight lay – simple, effective, timeless. Quick to install because the tiles align perfectly with the walls.
Next, the diagonal lay – fancy but tricky! Adds sophistication but expect more time spent cutting awkward angles.
Third, the herringbone – for those who crave Pinterest perfection. Stunningly beautiful, yet it requires a mathematical mind and a lot of patience.
Lastly, the checkerboard pattern – a throwback to the 50s. Makes a bold statement but takes more time to ensure perfect squares.
The technique you choose can either speed up the process or make you wish you’d stuck to straight-laying simplicity. Choose wisely, padawan.
Grouting Process
When it comes to the grouting part, it’s like adding the final touches to a masterpiece. First off, mixing the grout correctly is crucial. Too watery and it won’t set right; too thick, and you’ve got a mess on your hands. Aim for that Goldilocks consistency—just right.
Spread the grout using a rubber float, working it into the gaps between the tiles. Think of it as filling in the blanks of a crossword puzzle, but way more satisfying.
After applying it, let it sit for about 15-30 minutes. This is when you can kick back a bit. Then, it’s time for the wipe-down. Use a damp sponge to clean the tiles’ surface, wiping diagonally to avoid pulling grout out of the joints. Two birds, one sponge.
Finally, give it a day or two to cure. This waiting part is tough, but Netflix helps. Once it’s set, a final buff with a dry cloth will make your tiles look like they’ve been dressed to the nines.
Curing Time
Ah, curing time—the period where your tiles play hard to get. After all that effort carefully placing and grouting, you now have to let everything set. Patience is key.
Generally, grout needs about 24 to 48 hours to cure. Think of it as a mini-vacation for your bathroom. But larger tiles and certain materials may take longer. Check the manufacturer’s recommendations to avoid any awkward moments later.
Stepping on tiles before they’re ready is a surefire way to create a whole new level of slapstick comedy. For added safety, extend the curing period by an additional day or two if your bathroom is heavily used.
Humidity and temperature matter too. High humidity and cold can slow things down. So if it’s winter, grab some hot cocoa and surf the web for a couple more days. In summer, maybe go for a swim. Less stress, more cure.
Hurrying this step can lead to cracked grout or loose tiles—the bathroom equivalent of a pratfall. So sit back, relax, and give your tiles the honeymoon they deserve.
Final Cleaning and Finishing
Alright, you’ve laid every tile with the precision of a fencing master. Now, let’s talk clean-up.
First, grab a damp sponge and wipe away the excess grout from the tiles. Think of it like erasing chalk from a board, but way messier. Make sure to rinse the sponge frequently to keep things neat.
Next, take a break. Really. Let the grout haze settle for about 24 hours. This isn’t a Netflix cliffhanger; patience is key.
When you come back, use a dry cloth to buff the tiles. Your aim is to remove any remaining grout haze. It’s a bit like polishing a trophy, except the trophy is your bathroom floor or wall.
Finally, apply a grout sealer to protect your work from water and stains. Use a small brush for precision, much like painting by numbers but with fewer artistic decisions. Let it dry as per the manufacturer’s instructions.
Voilà! You’ve just completed the unsung heroic act of tiling: the final clean-up.
Professional Vs. DIY Installation
Going the DIY route sounds like an adventure, right? You get to wear a cool tool belt and channel your inner Bob the Builder. But beware—those YouTube tutorials sometimes skip the three-days-later part where everything is a mess and grout ends up in places it shouldn’t be.
On the other hand, calling in a professional might feel like cheating, but they bring a level of expertise akin to tile-wielding ninjas. They’ve seen every tile disaster imaginable and know how to avoid them. Plus, they work much faster—what might take you a week of weekend warrior effort, they could hammer out in just a couple of days.
Also consider materials. If you decide to go DIY for custom tile patterns or exotic materials, you might find they’re trickier than they look, leading to costly mistakes and potential heartbreak. Pros, conversely, handle complex materials and patterns like they’re playing a game of Tetris—quick, efficient, and with a little bit of swagger.
Lastly, while DIY might save you money initially, you might end up paying the tile fairy twice if you have to call in a pro to fix your enthusiastic but misguided efforts. So, think about what your time and sanity are worth before jumping in with that tile cutter.
Browse More
 Baking Soda and Vinegar Drain Cleaning: Simple Steps for a Clog-Free Life
 Smelly Drain: Banish Odors with Easy Fixes
 How to Remove Bathroom Fan Without Losing Your Cool
 How to Remove Bathroom Vent Cover Without Losing Your Mind
 Bathroom Fan Installation Cost: What You Need to Know
Recap