Last updated on
Learn the step-by-step process to safely remove your bathroom sink drain with ease.
Key takeaways:
- Proper equipment: Pliers, wrench, basin wrench, bucket, towels, penetrating oil, safety goggles.
- Types of sink drains: Pop-up, grid strainer, plunger type.
- How to remove a pop-up sink stopper: Twist or unscrew cap, remove screw if necessary, lift stopper.
- Assess drain for corrosion or damage before removal.
- Call a professional if drain is stuck, complex plumbing, or modifications are needed.
Recommended Equipment
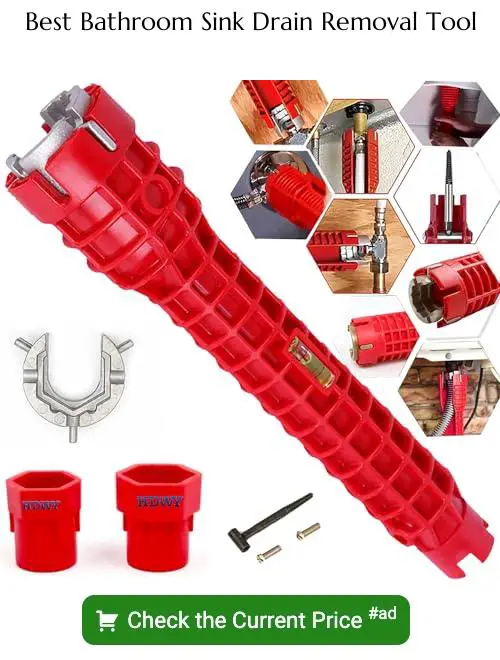
Delving into a DIY sink drain removal starts with proper tools. Pliers and a pipe wrench are indispensable for gripping and turning, while a basin wrench will offer access in tight spaces beneath the sink. Channel-lock pliers also come in handy for stubborn components. Don’t forget a bucket to catch any residual water and old towels for unexpected spills. Penetrating oil such as WD-40 can loosen rusted or tight fittings, ensuring smoother removal. Lastly, safety goggles are a must to protect your eyes from debris or drips. Being equipped might not make the task glamorous, but it’ll certainly make it less of a battle.
Types of Sink Drains
Understanding the variety of sink drains is crucial before you attempt removal. The common ones include the pop-up, grid strainer, and the plunger type, each with a unique mechanism.
Pop-up drains, often found in residential bathrooms, operate via a lever mechanism, allowing the stopper to move up and down.
Grid strainers, typically without a stopper, are a fixed mesh grid that catches debris, offering an uninterrupted flow.
Lastly, the plunger types, also known as lift-and-turn or twist-and-close, use a simple rotating motion to seal the drain.
Identifying which type you have installed is the first step in planning its removal.
How to Remove a Pop-Up Sink Stopper
Begin by holding the stopper in place and twisting the knob or cap that’s on top—counter-clockwise should do the trick. Sometimes, it’s a pull-and-twist maneuver you’ll need, if the cap is fixed.
If the cap doesn’t budge, it’s likely set with a screw underneath. Carefully, flip the stopper to its side and look for a small screw on the stem. Use an appropriate screwdriver to loosen it, but don’t remove the screw entirely— a few twists should allow the cap to come off.
Once the cap is off, you should be able to lift the stopper out of the drain with ease. It’s not uncommon for it to be a little grimy, so have a cloth at hand for immediate clean-up.
If the stopper refuses to cooperate, peek under the sink. You’ll find a horizontal pivot rod connected to the vertical strap with holes in it. Unscrew the pivot nut connecting the rod to the drainpipe, and you can extract the stopper above.
When reassembling, it’s vital to ensure the pivot rod slips through the hole in the lower part of the stopper. This is the mechanism that allows the stopper to move up and down. If this alignment is off, your stopper won’t seal properly or might not move.
Assessing Drain for Corrosion or Damage
Before proceeding to remove the drain, a close examination for any signs of corrosion or damage is crucial. Spotting rust on the flange or the drain body can indicate the need for replacement rather than a simple cleaning. Likewise, inspect for hairline cracks or chips, especially in porcelain sinks, as these can lead to leaks or further deterioration over time.
Damaged threads on the locknut or drain pipes could complicate removal and require a more delicate approach. Identifying these issues early helps prevent unexpected setbacks and ensures you’re prepared with the necessary supplies or replacement parts before you begin the actual removal process.
When to Call a Professional
Tackling plumbing tasks can evoke a sense of DIY pride, but knowing when to hand the wrench over to a professional is crucial. If the sink drain is stuck due to rust or corrosion and refuses to budge despite using penetrative lubricants, it’s a sign to call in an expert. Improper handling of corroded pipes can lead to irreparable damage or, worse, a plumbing disaster.
Complex plumbing configurations often found in older homes are another red flag. These systems can be labyrinthine and delicate, increasing the risk of a misstep in the untrained hand. A professional plumber has the nuanced understanding required to navigate these systems without causing damage.
Finally, if any modifications are needed that go beyond simple replacement, such as resizing the drain pipe to fit a new type of sink, professional skills will ensure the job is done correctly and up to code. A skilled plumber not only brings tools and expertise to the table but also offers peace of mind that the job is done right, preventing costly issues down the line.
Recap


