Last updated on
Redefine your bathroom aesthetic with inventive molding ideas, because a well-appointed trim can turn your ordinary bath area into an extraordinary haven.
I’ve designed these ideas myself, so some of them might be a bit exaggerated for effect. Enjoy!
The bathroom is more than just a functional space; it can be an oasis of style and creativity that mirrors your unique aesthetic. As we dive into this topic, we’ll explore a range of new angles on bathroom molding ideas, aiming to inspire you with fresh designs that break away from the norm.
Yes, we’ll acknowledge the best of existing ideas – you’ll find resources tagged at the end – but our journey together is primarily about discovering something unexpected. Let’s reshape your perspective and redefine your bathroom’s allure with these unique molding concepts.
Tune in, get creative, and let’s transform your bathroom into a blend of comfort and style!
Customization of Moulding Based On the Bathroom Theme
When personalizing moulding to align with your bathroom’s specific theme, consider these key points:
- Harmony and Contrast: Pair moulding with the color scheme and textures in your space to create a harmonious or contrasting effect, depending on your preference.
- Theme Consistency: For example, in a nautical-themed bathroom, opt for crisp white crown moulding to complement the marine palette.
- Scale and Proportion: Ensure the size of the moulding matches the scale of the room—larger bathrooms can accommodate more ornate or wider mouldings, while simpler styles are better suited for compact spaces.
- Material Selection: Choose moisture-resistant materials such as PVC or tile that can withstand the bathroom’s humidity while enhancing the overall theme.
- Detailing: Adding specific details to the moulding can echo the bathroom’s style, like beadboard for a cottage feel or sleek lines for a contemporary setup.
Matching your moulding to the bathroom theme creates a cohesive look that elevates the overall aesthetic.
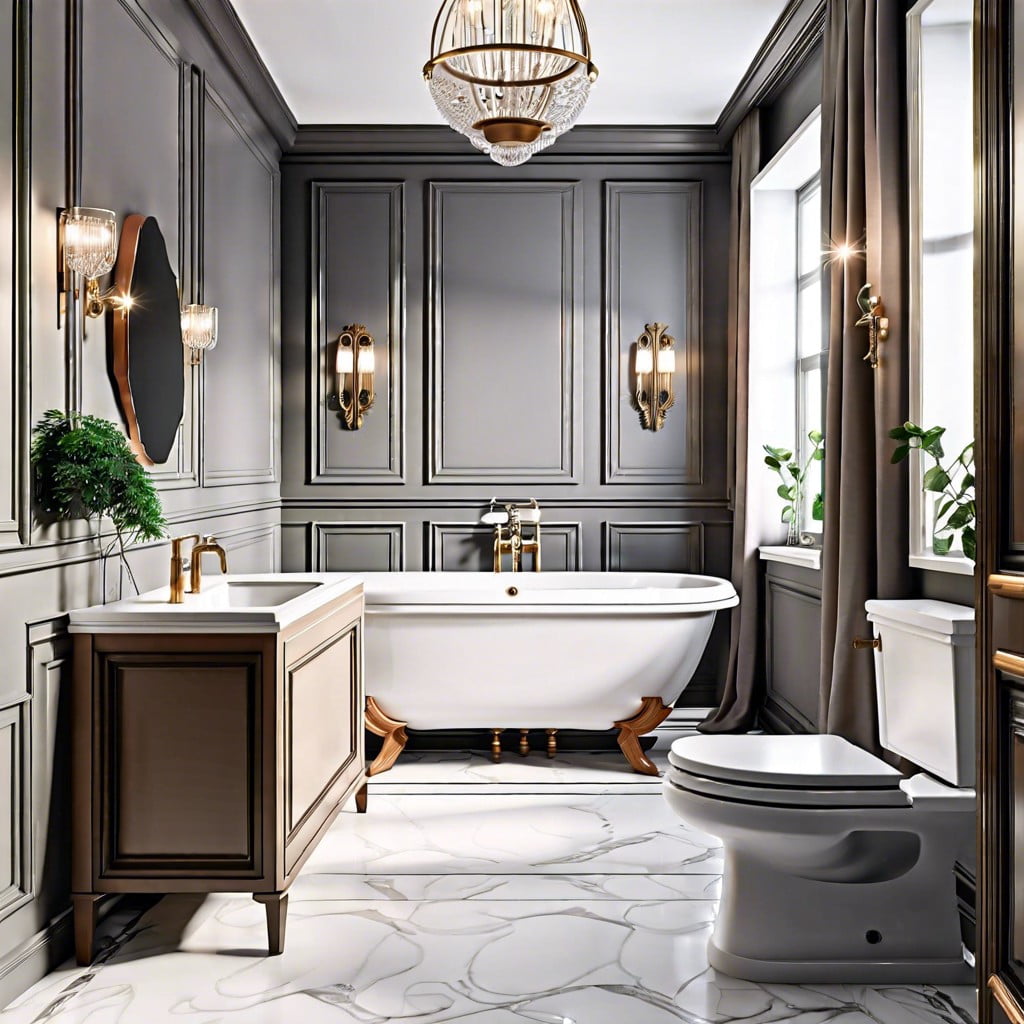
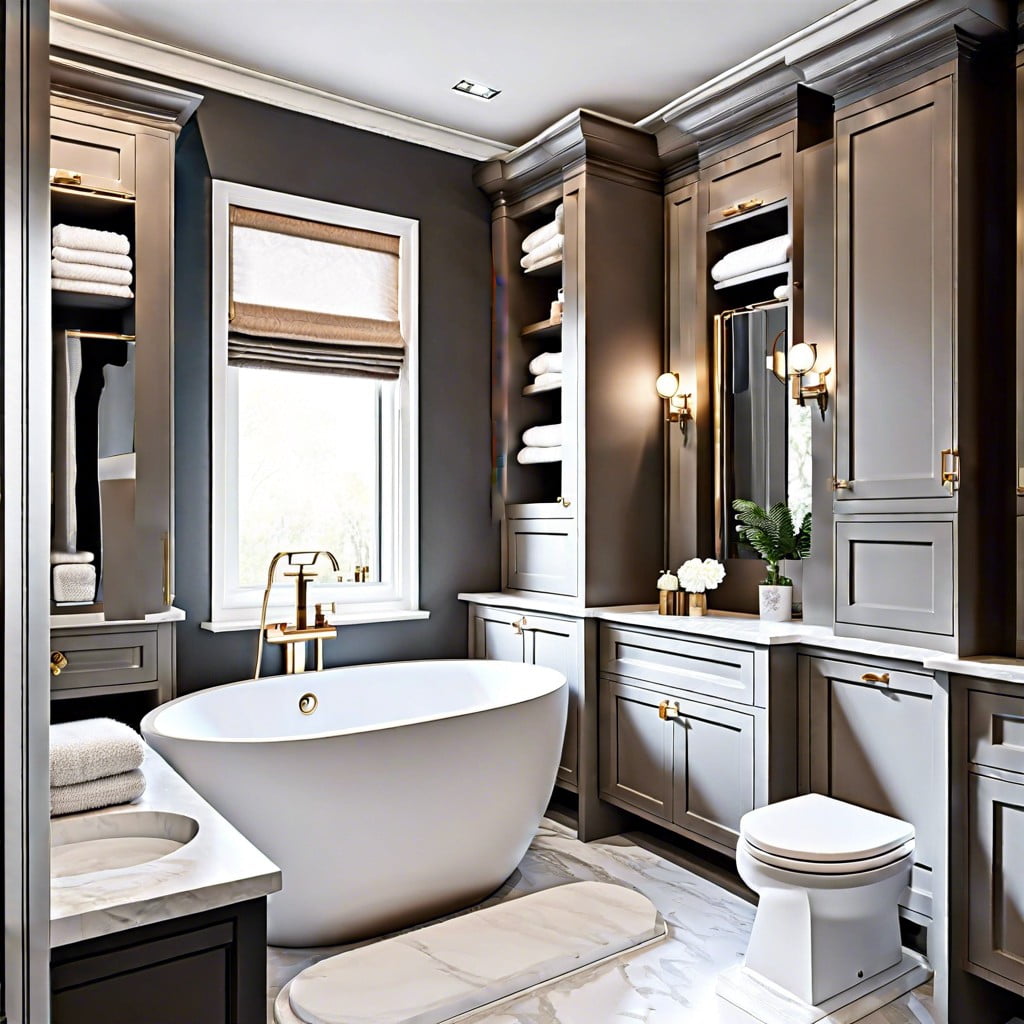
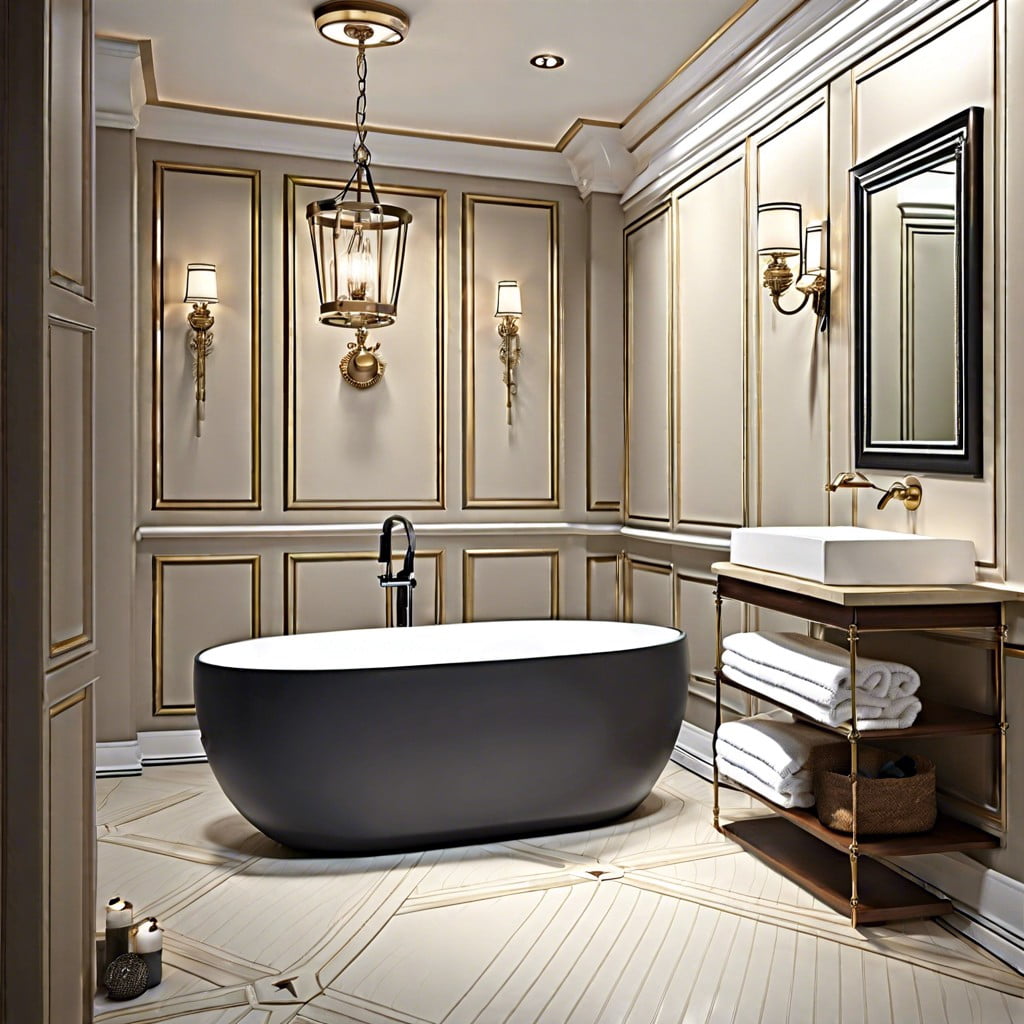
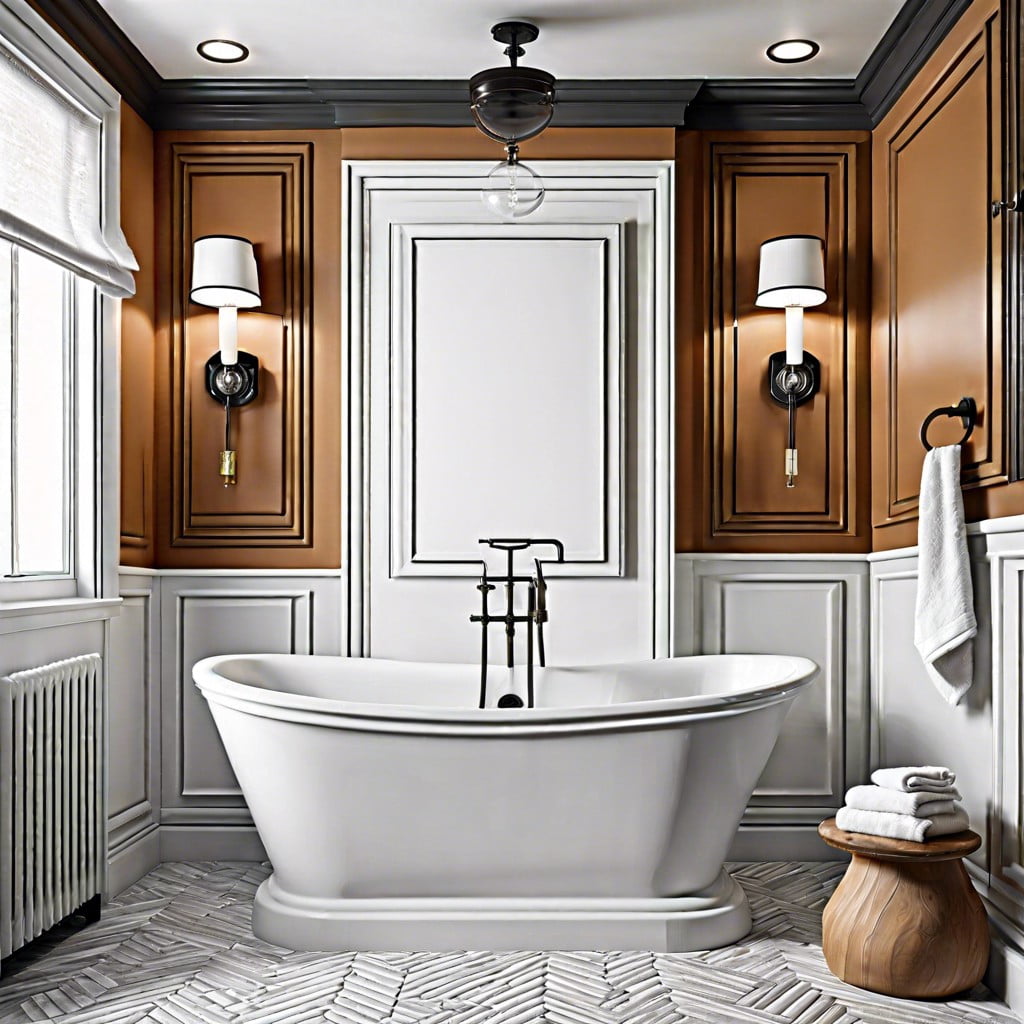
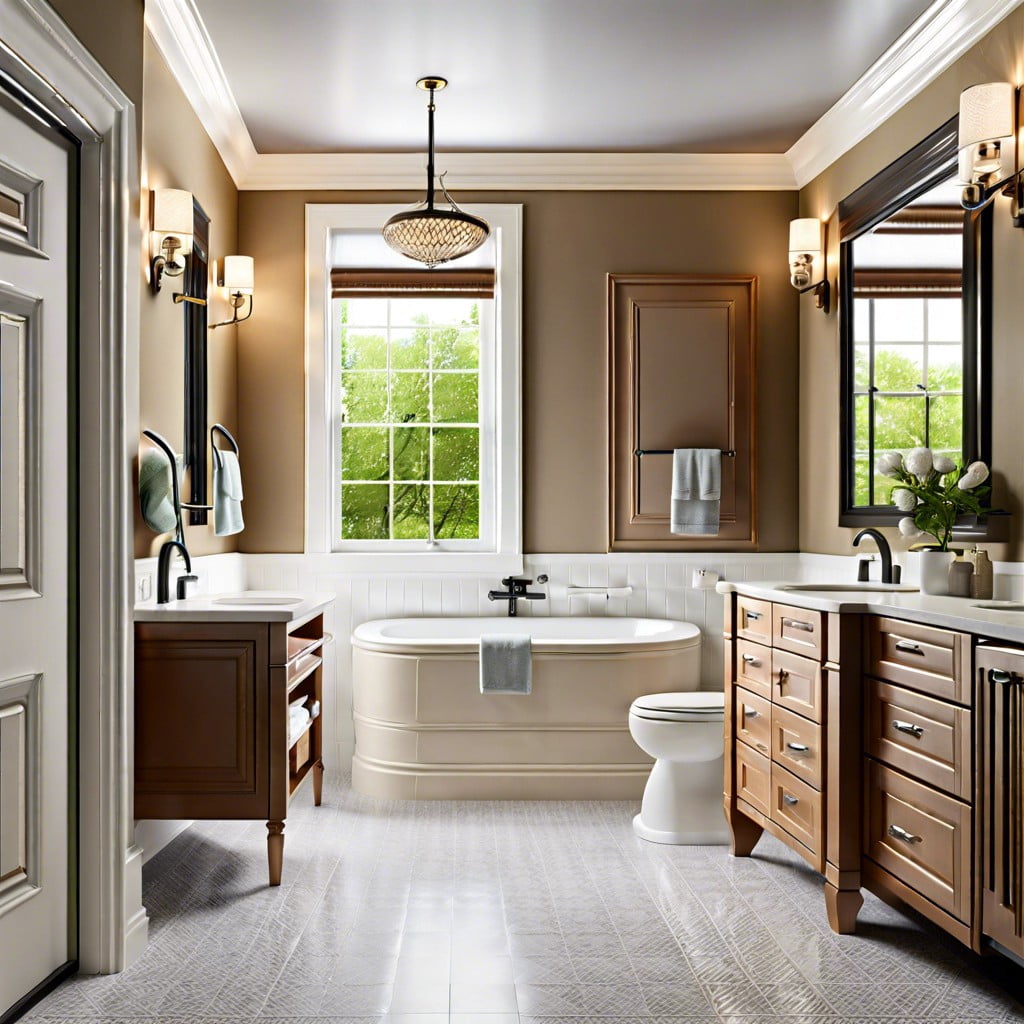
Leveraging Moulding for Luxury Bathrooms
Elevate your bathroom’s elegance with carefully selected moulding. Opt for wide crown moulding to create a sense of grandeur, or apply tall baseboards to enhance verticality and refinement.
Intricate designs add depth and character, signaling opulence. Consider using high-quality materials like plaster or polyurethane that embody luxury and can withstand the bathroom’s moisture-rich environment.
For an integrated look, coordinate the moulding with other decor elements such as faucets and lighting fixtures, ensuring a uniform aesthetic. Soft, ambient lighting can accentuate the detailing of your moulding, making it a focal point in the bathroom’s overall design.
Use these ideas to make a statement and inject an air of sophistication into your luxury bathroom.
Sleek Bathroom Molding for Small Spaces
Maximizing visual space is key in a small bathroom, and the right molding can help achieve this effect. Consider using flat or low-profile mouldings that create clean lines without overwhelming the space. A single, unassuming strip of molding painted the same color as the walls can subtly enhance the room’s dimensions without cluttering the visual field.
When selecting materials, opt for light-reflective options that will help bounce light around the room, giving the illusion of a larger space. You could also run the molding horizontally to draw the eye outward, extending the perceived width of the bathroom.
Installation plays a crucial role in maintaining a sleek look. Ensure that the molding is precisely cut and aligned with minimal gaps. This attention to detail keeps the design sharp and the finishes modern, perfect for a compact bathroom where every inch counts.
Adaptive Moulding Ideas for Kids Bathroom
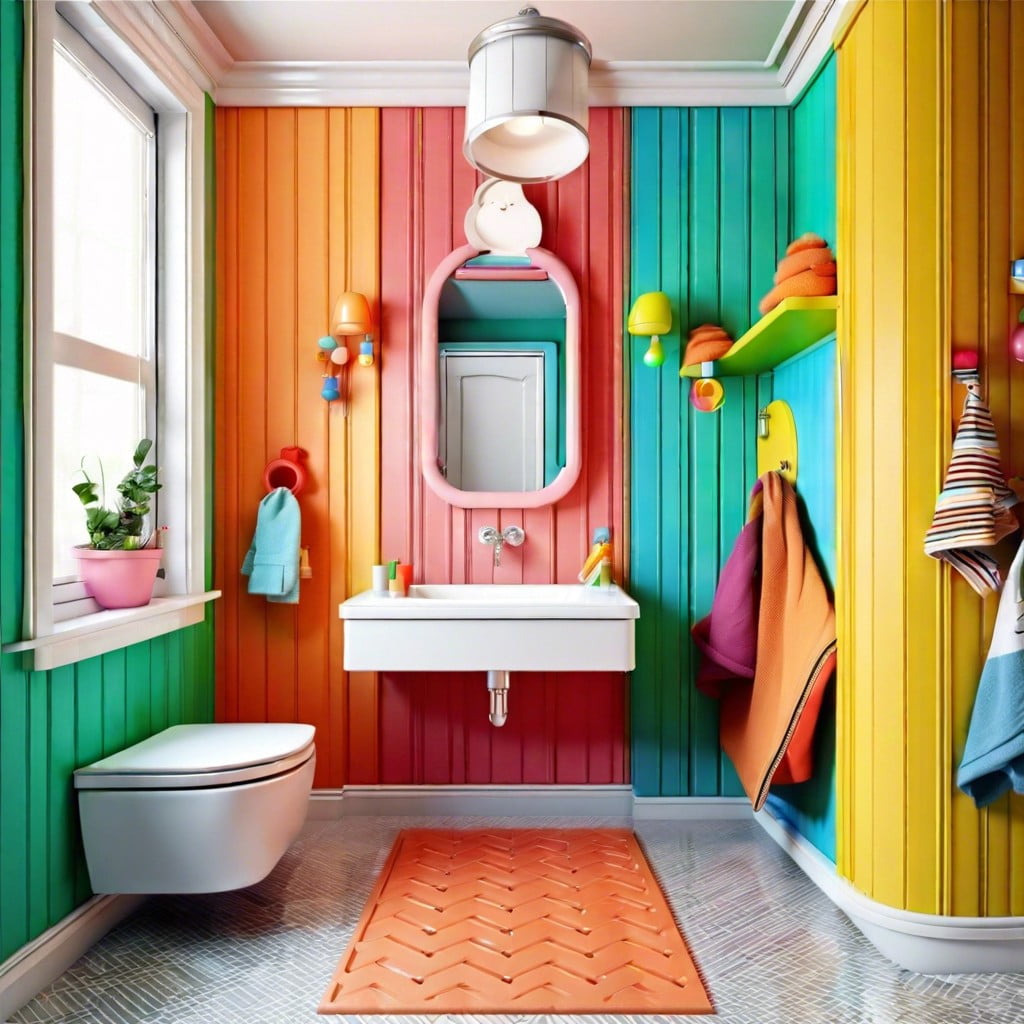
Designing a bathroom fit for children presents a unique opportunity to inject fun and creativity into your home. Start with a bright and playful color palette to set a joyful mood. Soft, rounded molding trim can double as both a decorative and safety feature, eliminating sharp edges for little ones.
Use wainscoting to protect walls from splashes and scribbles, offering durability and ease of cleaning. Incorporate molding into an educational display, such as a ruler design along a vertical strip for height tracking, blending functionality with charm.
Consider chair rail molding not just for aesthetic appeal, but also as a guide for organizing; hang kids’ bath toys and accessories below the rail to keep them within easy reach. Finally, select mold-resistant materials to ensure a healthy and long-lasting finish, accommodating childhood’s energetic and messy adventures.
The Impact of Light On Molding Styles

When considering molding in your bathroom, lighting plays a pivotal role in both functionality and aesthetics. Here are key points to understand how light impacts your molding choices:
- Shadow Play: Strategic lighting can cast flattering shadows on intricate molding designs, adding depth and character to your bathroom walls.
- Highlighting Features: Use directional lights to draw attention to specific features of your bathroom’s molding, emphasizing unique patterns or shapes.
- Color and Reflection: Glossy or metallic moldings reflect light differently than matte finishes, impacting the color tone and ambiance of the space.
- Mood Setting: Soft, warm lights can make even the simplest of moldings contribute to a cozy and inviting atmosphere.
- Accentuation: Install LED strips behind crown moldings to create a modern look that accentuates the room’s height and adds an element of sophistication.
By understanding these concepts, you can use lighting to enhance the impact of your bathroom’s molding, thus elevating the overall design.
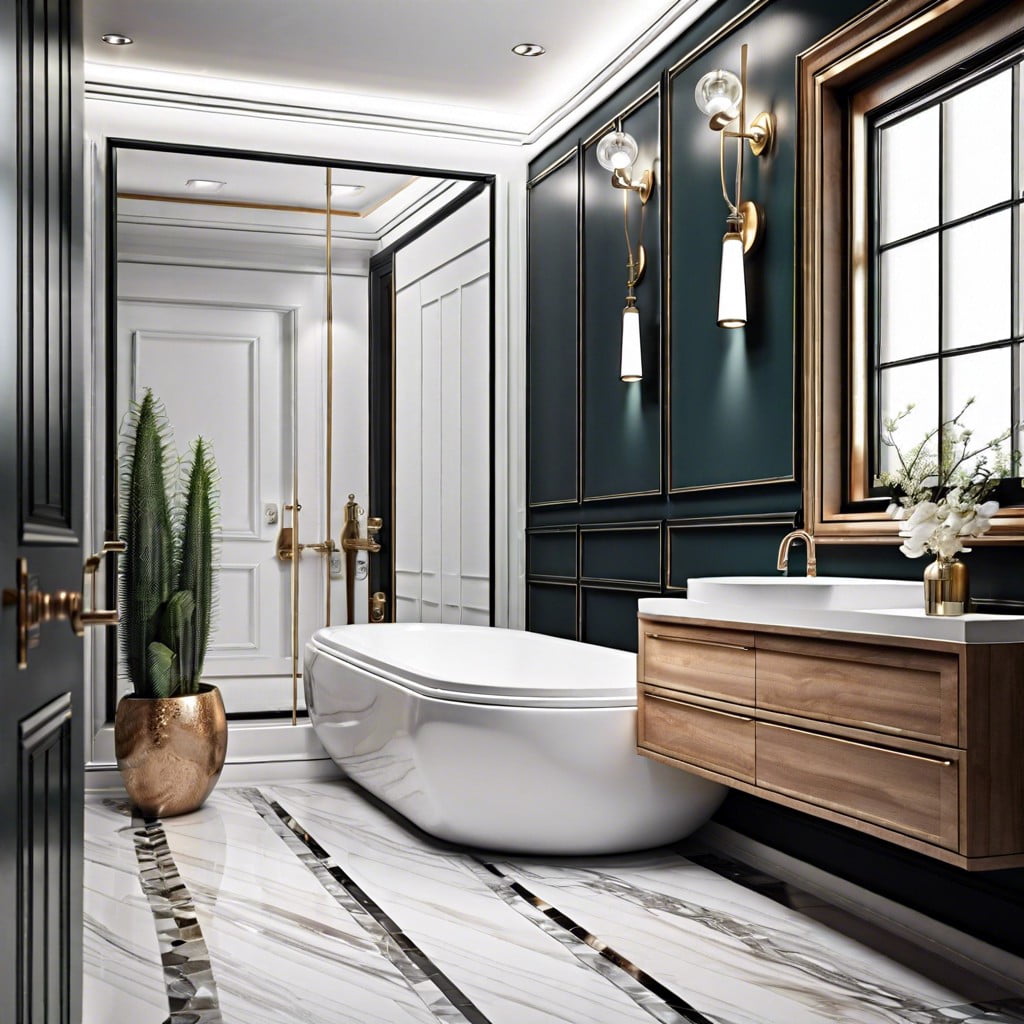
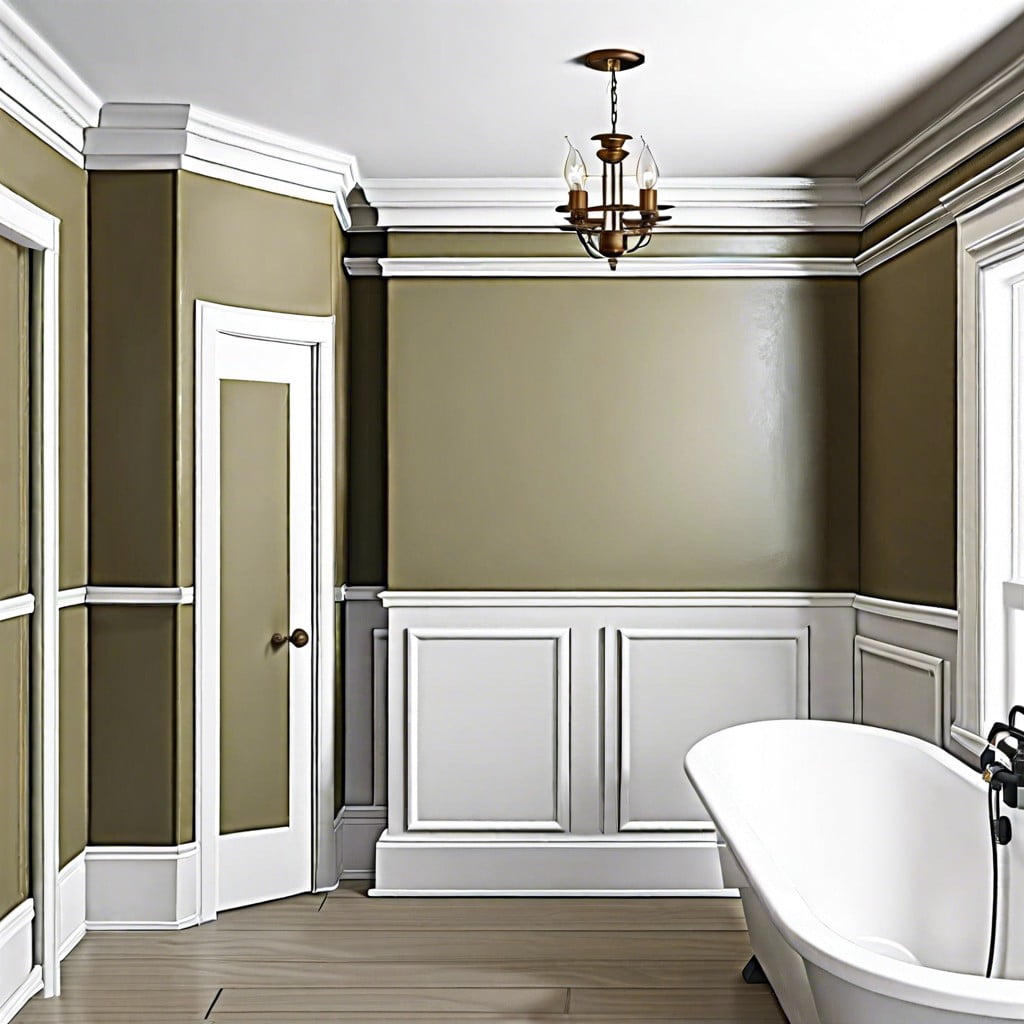
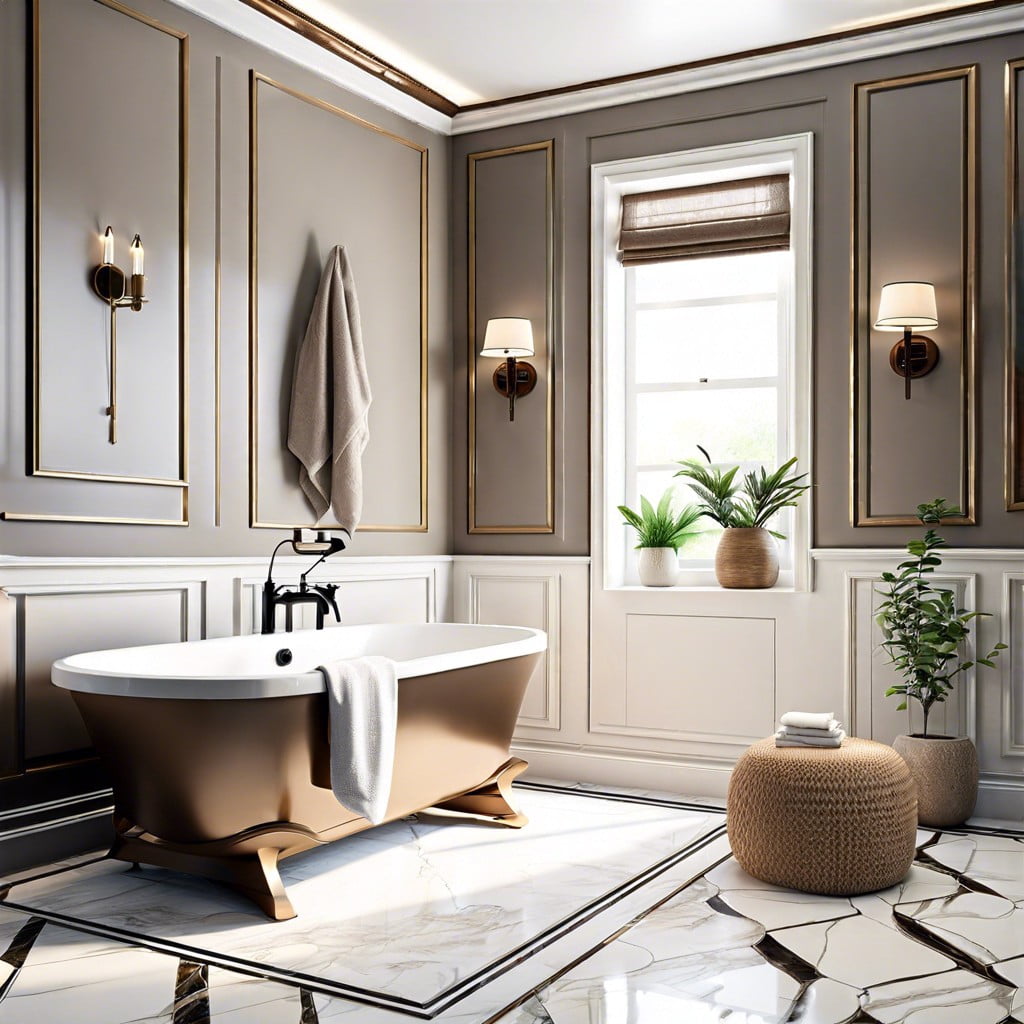
The Wall-Panel Molding for Bathrooms
Elevate your bathroom space by incorporating wall-panel molding, which adds texture and interest. This decorative feature can create a sense of elegance, with raised panels bringing a classical touch to the walls.
For a contemporary twist, opt for flat paneling designs that give a clean, geometric aesthetic.
Consider the following points when integrating wall-panel molding:
- Align with the existing decor to maintain a cohesive look; traditional patterns suit classic bathrooms, while streamlined panels blend well with modern interiors.
- Use moisture-resistant materials like PVC or specially treated wood to withstand the bathroom’s humid conditions.
- Paint the panels in a complementary or contrasting color to your walls for a subtle or bold statement.
- Install chair rail molding with wall panels to add functionality, protecting walls from scuffs and boosting overall design.
- Balance wall-panel size with room proportions; smaller panels can make a compact bathroom feel larger, while larger panels exude luxury in more expansive spaces.
- For a harmonious ambiance, ensure the paneling design resonates with other elements like the vanity or bathtub.
Eco-Friendly Molding Solutions
When considering environmentally conscious options, bamboo stands out as an excellent material for bathroom moulding. Known for its rapid growth and sustainable harvesting, bamboo is both durable and resistant to moisture, making it ideal for bathrooms.
Recycled wood composite is another responsible choice, which repurposes wood fibers and reduces waste. These composites are often engineered to be more resistant to warping and moisture than traditional wood, ensuring longevity even in humid environments.
If a more traditional wood look is desired, seek out moulding made from FSC-certified wood, which certifies that the wood is sourced from responsibly managed forests.
Additionally, low-VOC (volatile organic compounds) finishes and adhesives can provide the perfect complement to your eco-friendly moulding, ensuring indoor air quality is maintained and minimizing exposure to any potentially harmful chemicals.
Water-based, non-toxic paints also contribute to the green theme, bringing color to your moulding without the environmental impact of solvent-based alternatives.
These choices not only serve the planet but also add a conversational piece to your bathroom decor, reflecting your commitment to sustainability.
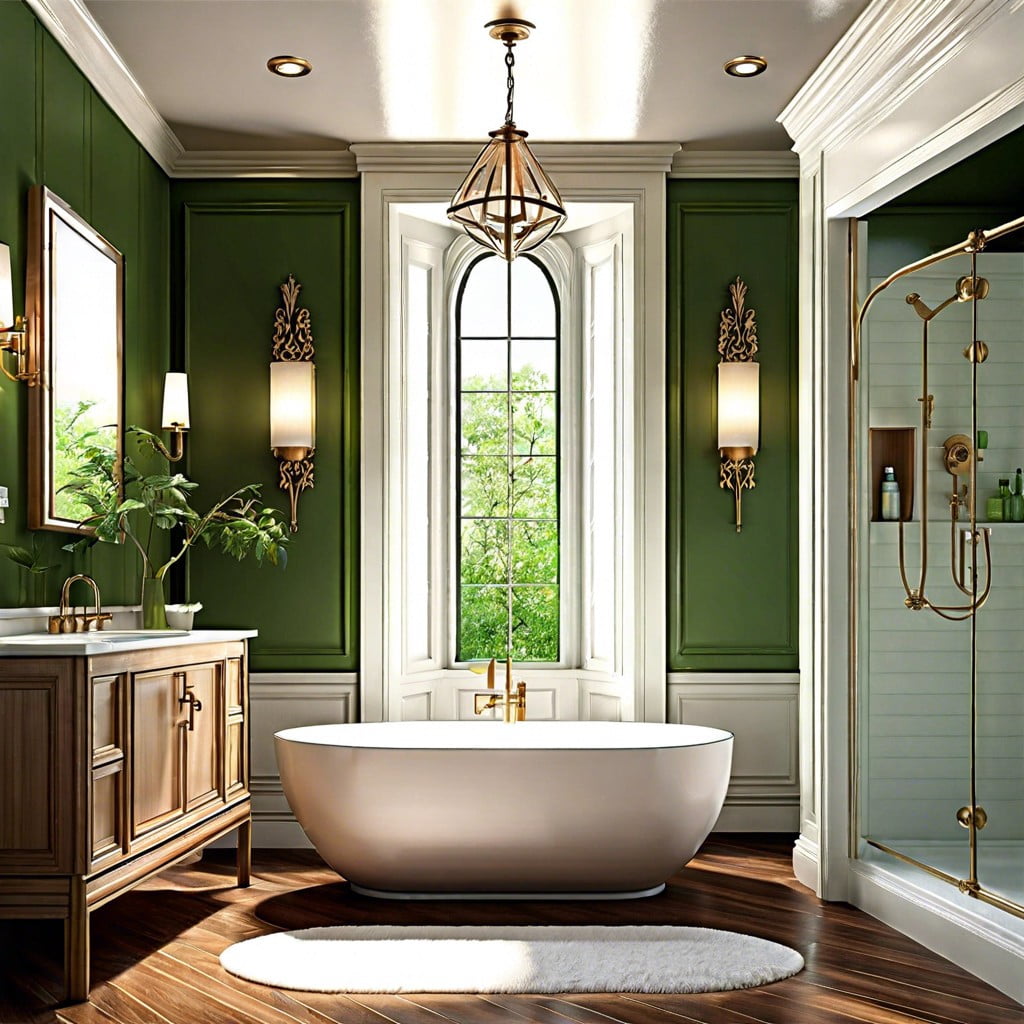
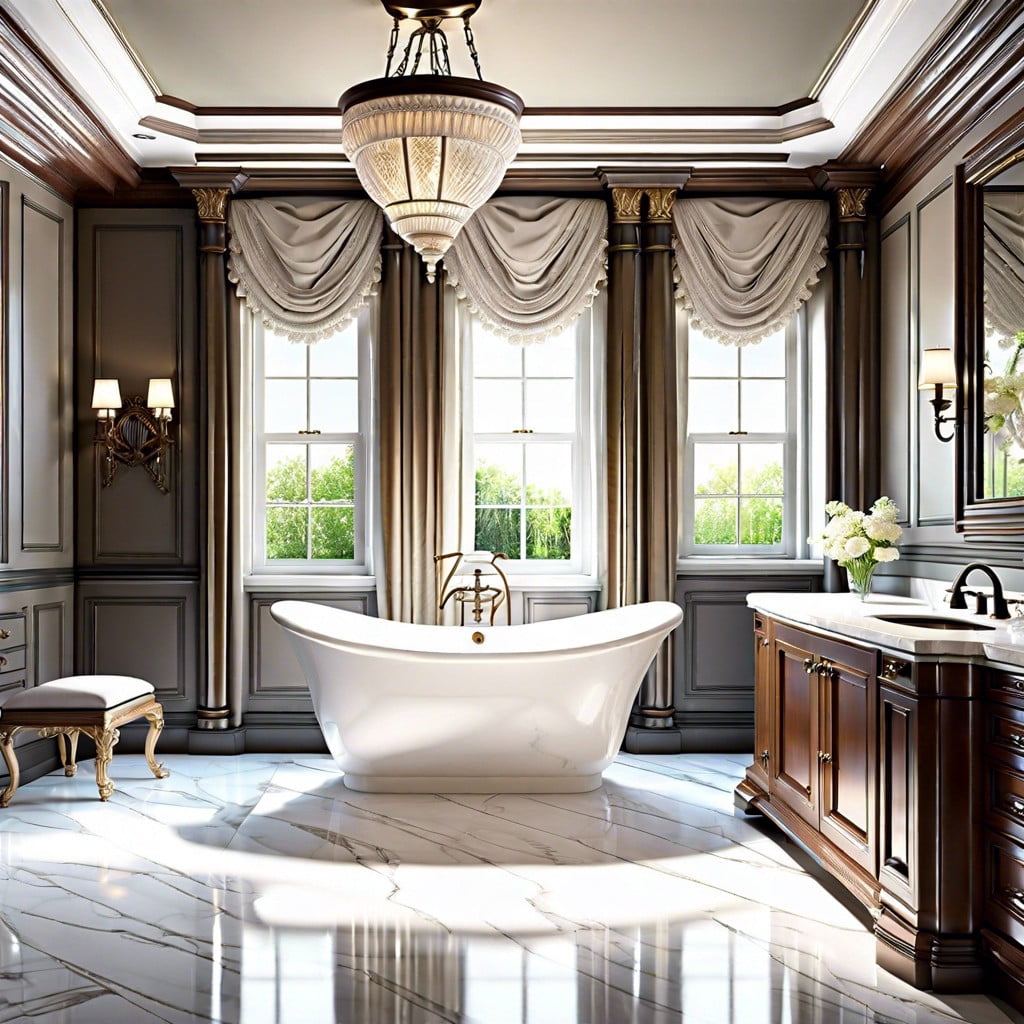
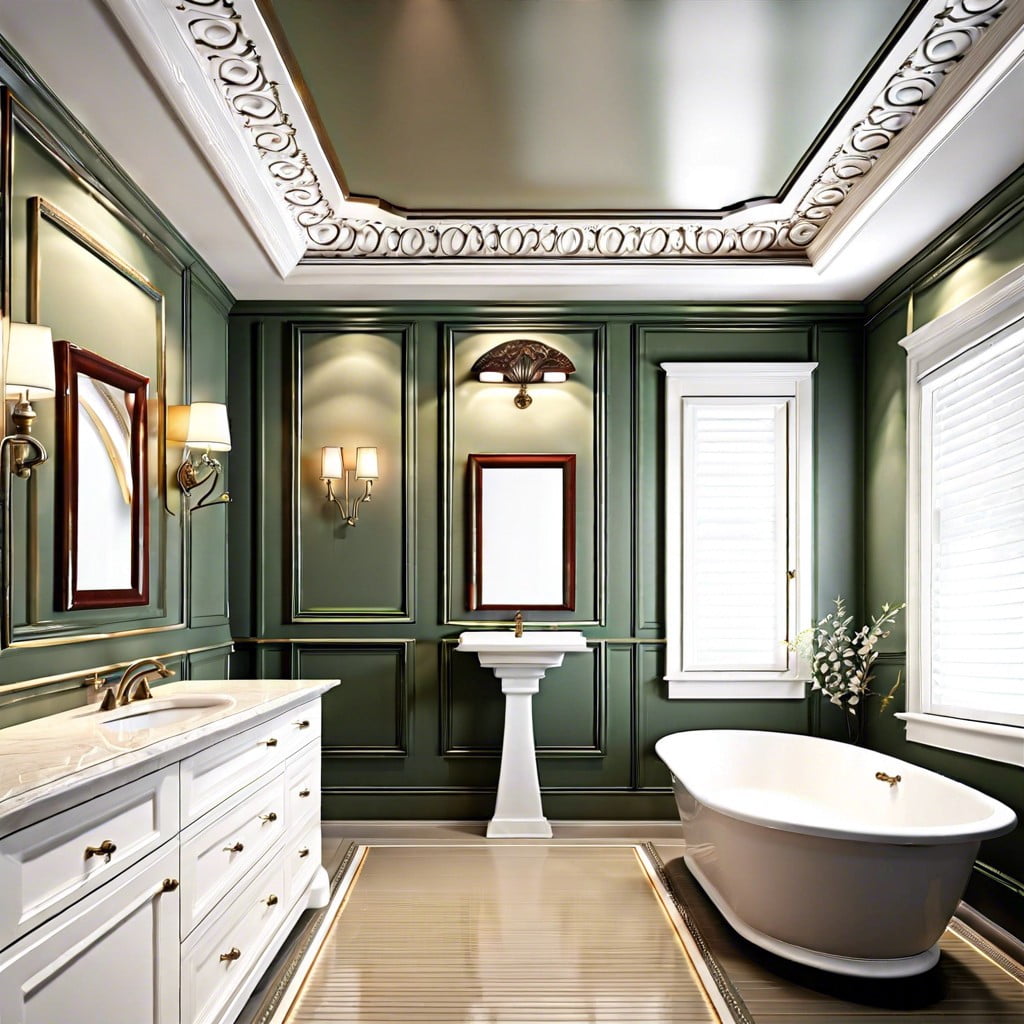
Molding Ideas for Vintage Bathroom Designs
To capture the essence of a bygone era in your bathroom space, consider incorporating decorative Victorian-style cornice moldings to frame the ceiling. This classical design element adds an air of elegance and historical charm. Choose moldings with intricate floral patterns or egg and dart detailing to complement other vintage fixtures and fittings.
For added authenticity, select chair rail moldings with beaded edges to divide wall colors or textures, effectively mirroring period interior designs. This not only protects walls from scuffs but also enhances the overall historical aesthetic.
Incorporate baseboard moldings with taller and more pronounced profiles that were typical in past design trends. Opt for wood with a natural finish or paint with a patina effect to achieve a time-worn look.
Consider adding picture rail mouldings, just below the ceiling line, which offers a practical way to hang artwork without damaging the walls and also contributes to the vintage appeal.
Incorporate wainscoting with raised or beaded panels beneath the chair rail to add depth, dimension, and a touch of sophistication that harks back to the vintage era.
Finally, integrate period-appropriate colors like soft pastels or rich jewel tones through the moldings, while using a semi-gloss or high-gloss finish to reflect natural light, thereby enhancing the room’s vintage character.
Integrating Molding With Modern Bathroom Decors
In modern bathroom designs, molding serves as more than just a traditional decorative element; it’s a tool to enhance the contemporary aesthetic. To achieve this, consider thin, flat moldings that complement the clean lines in a modern space. Opt for materials with a matte finish or those that mimic industrial textures, like brushed metal or concrete, which resonate with a modern palette.
When selecting colors, a monochromatic scheme works well, allowing molding to blend seamlessly with the walls, thus maintaining the minimalist vibe. However, for a striking contrast, choose a molding in a bold accent color that pops against neutral-toned walls.
To incorporate molding without disrupting the modern feel, use it sparingly. For example, a single horizontal strip of molding can create a visual break, adding sophistication without overwhelming the space. In cases where ceiling molding is used, keep it flush with the ceiling to avoid minimizing the height of the room, which is crucial in contemporary designs.
Finally, ensure that the geometric patterns in the molding are simple and understated. Any embellishments should be minimal, aligning with the sleek and functional characteristics of modern decor.
A Practical Guide to Choosing the Right Bathroom Moulding
Selecting the appropriate moulding for your bathroom involves understanding both aesthetics and functionality. Here’s how to make the right choice:
- Measurements Matter: Before shopping, measure your space meticulously to determine the width and thickness that will complement your bathroom without overwhelming it.
- Material is Key: In a bathroom, humidity and temperature vary greatly. Opt for materials like PVC, vinyl, or treated wood, which can withstand these changes without warping or rotting.
- Style Sync: Ensure your moulding design resonates with your bathroom’s existing style—be it contemporary, traditional, or eclectic.
- Color Consistency: Choose a moulding color that either matches or pleasantly contrasts with your wall color. For a harmonious look, consider painting the moulding the same color as the walls.
- Installation Insights: Some mouldings are easier to install than others. If you’re a DIY enthusiast, select a lightweight option with simple cutting requirements.
- Moulding Profile: Consider the profile or the shape of the moulding; intricate designs can add elegance, while cleaner lines suit a modern look.
- Purpose Before Beauty: Beyond aesthetics, moulding also hides gaps and joints. Choose a design that serves this purpose without drawing attention to areas you prefer to conceal.
- Sustainability: If environmental impact is a concern, look for mouldings made from sustainable resources or recycled materials.
Remember, the right moulding will not only enhance the beauty of your bathroom but also serve practical purposes for years to come.
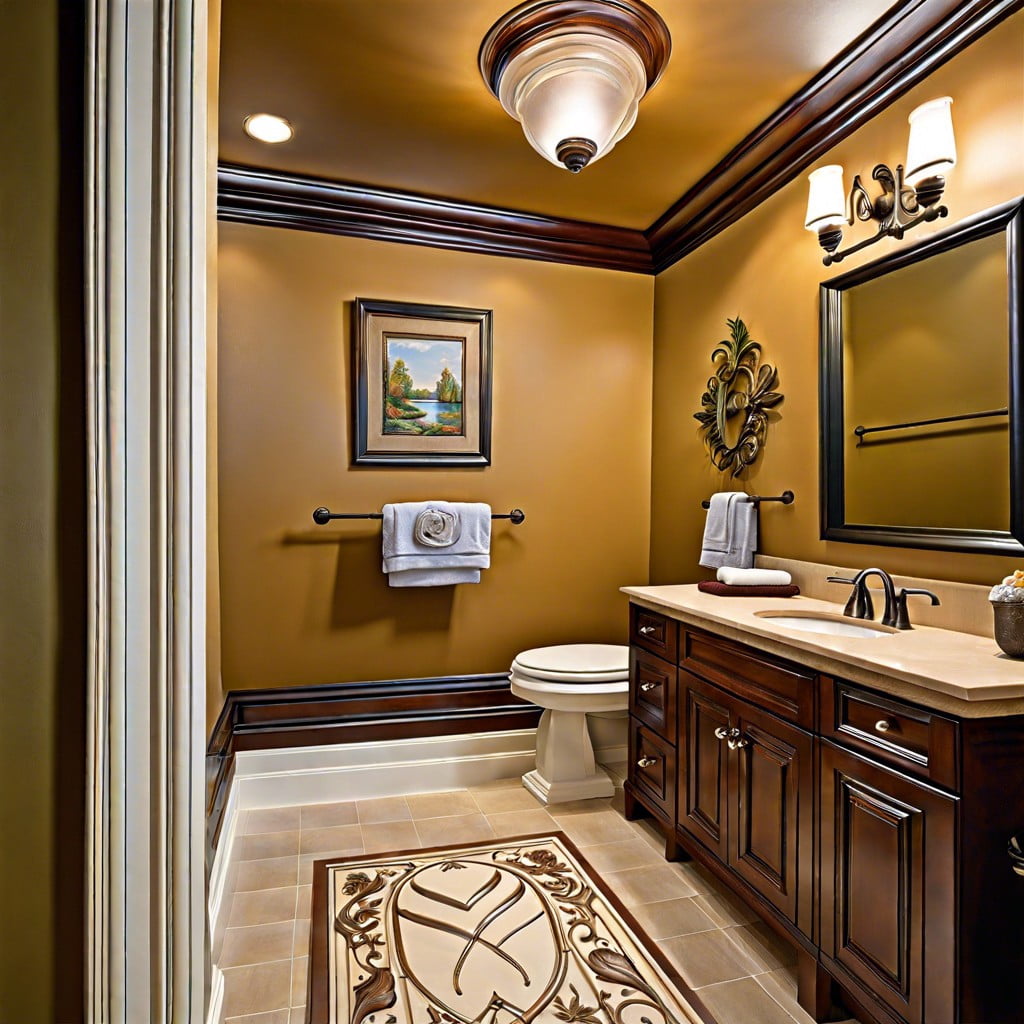
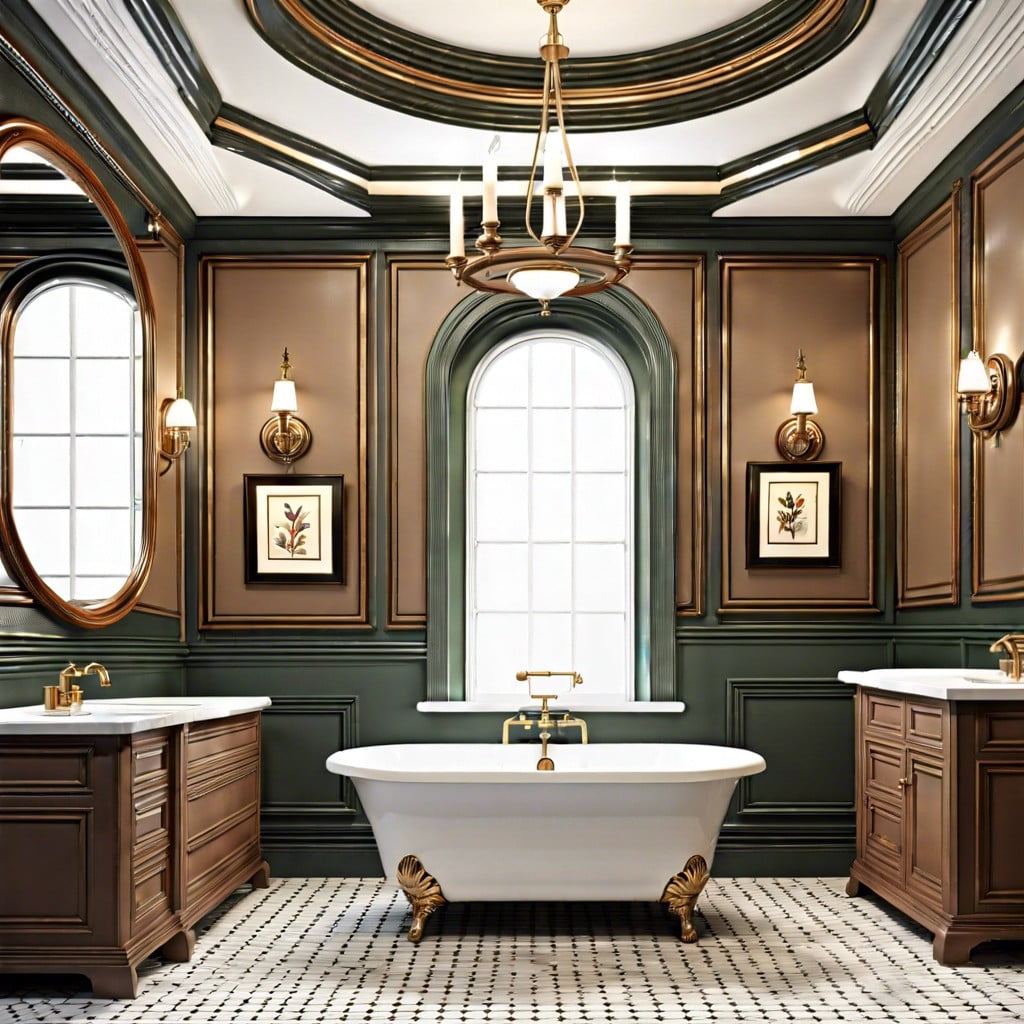
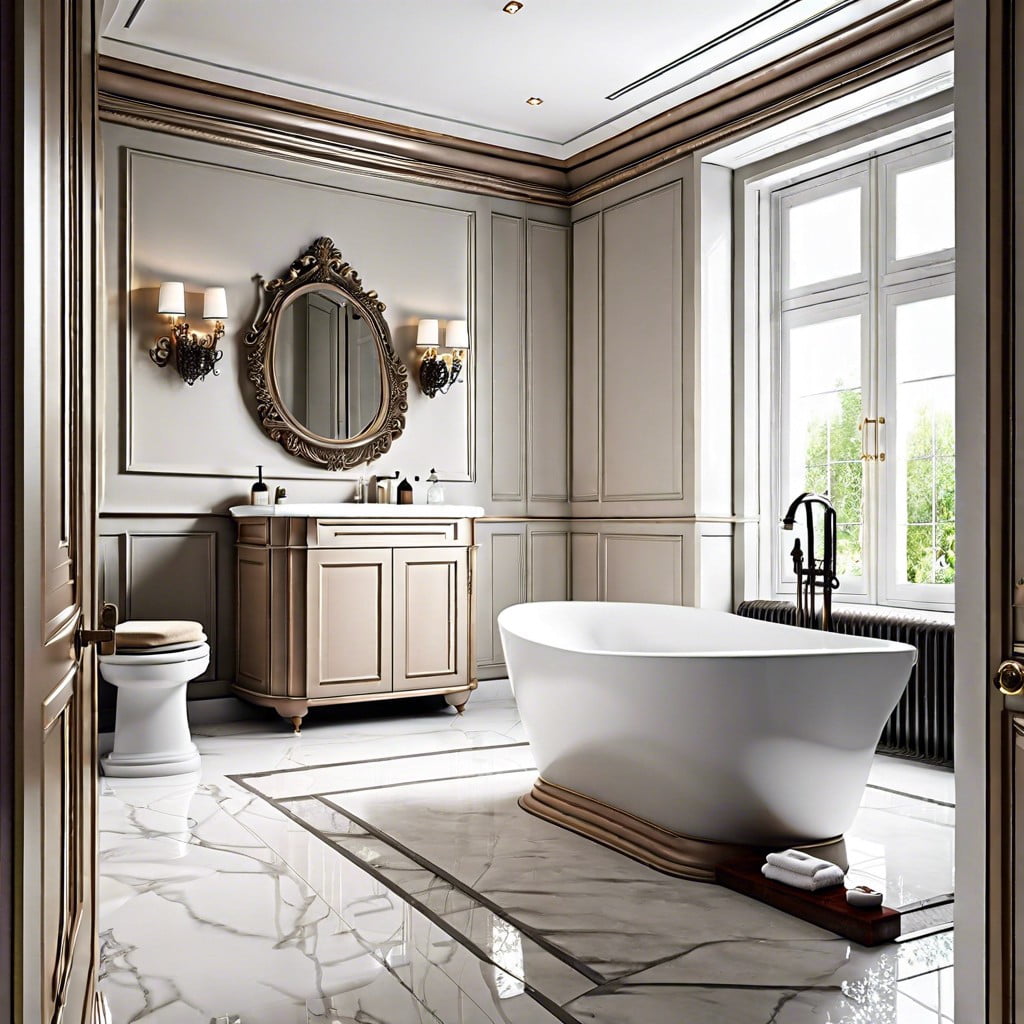
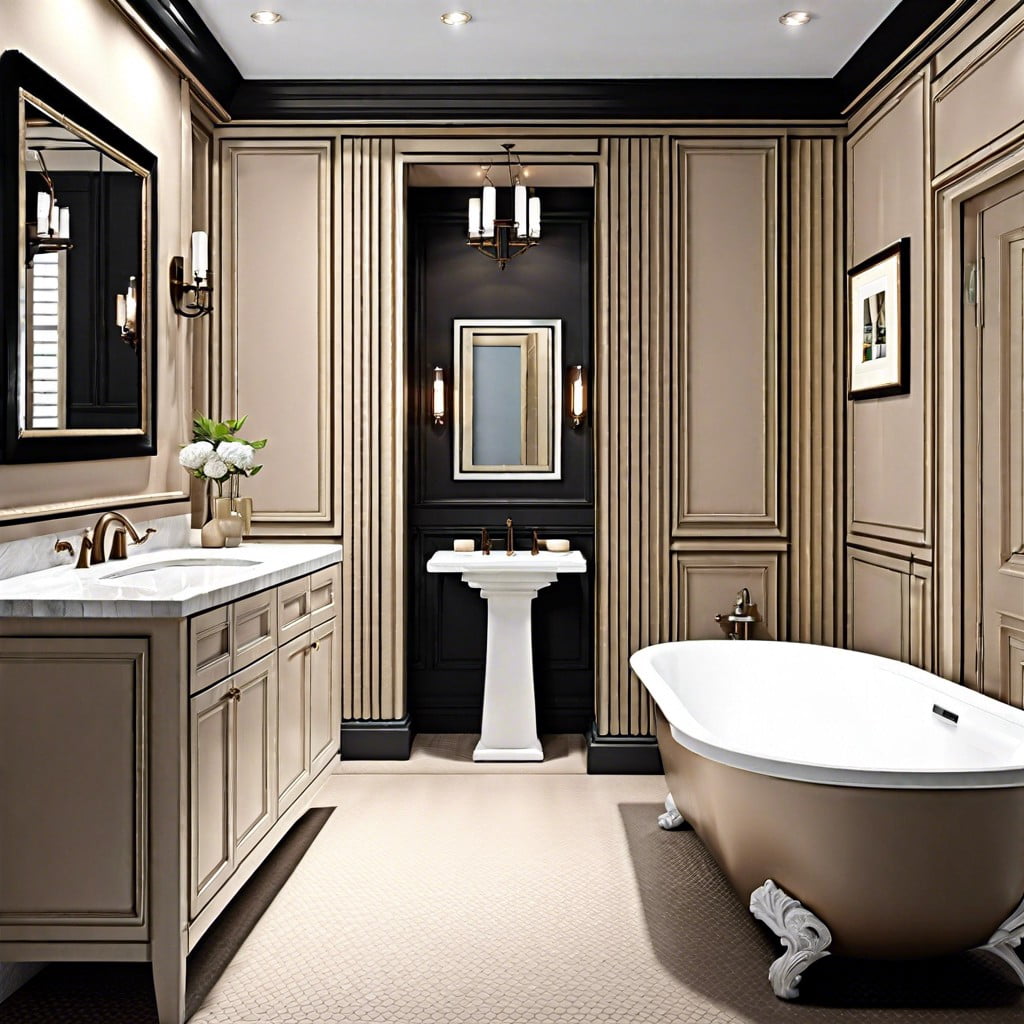
Antique Cornice Molding for Grand Bathroom Designs
Capturing the essence of bygone eras, antique cornice molding is the jewel in the crown for any grand bathroom design. These intricate trims, often adorned with classical patterns, bring a touch of opulence and a stately aesthetic to your space.
Here’s what to consider for incorporating these detailed features:
- Sourcing Authentic or Reproduction Pieces: Look for genuine antique molding at salvage yards or opt for high-quality reproductions that mimic historical designs.
- Material Matters: Traditionally, wood or plaster was used for cornices, but modern waterproof polymers offer longevity in a humid bathroom environment.
- Scale and Proportion: Ensure the cornice size complements the bathroom’s ceiling height and footprint. Oversized cornices can overwhelm a smaller room, while too small a piece may diminish the intended grandeur.
- Complementary Colors: Select paint or finishes that highlight the cornice’s detailing. Gold leaf or antique white can accentuate the beauty of the craftsmanship.
- Lighting: Consider how light plays on the molding. Indirect lighting can cast soft shadows, showcasing the depth of the designs.
- Installation Precision: For a truly grand impact, enlist a skilled craftsman to ensure accurate and seamless installation.
By weaving these elements together, antique cornice molding can transform a bathroom into a luxurious sanctuary that resonates with historical elegance.
Molding Options for Minimalist Bathroom Styles
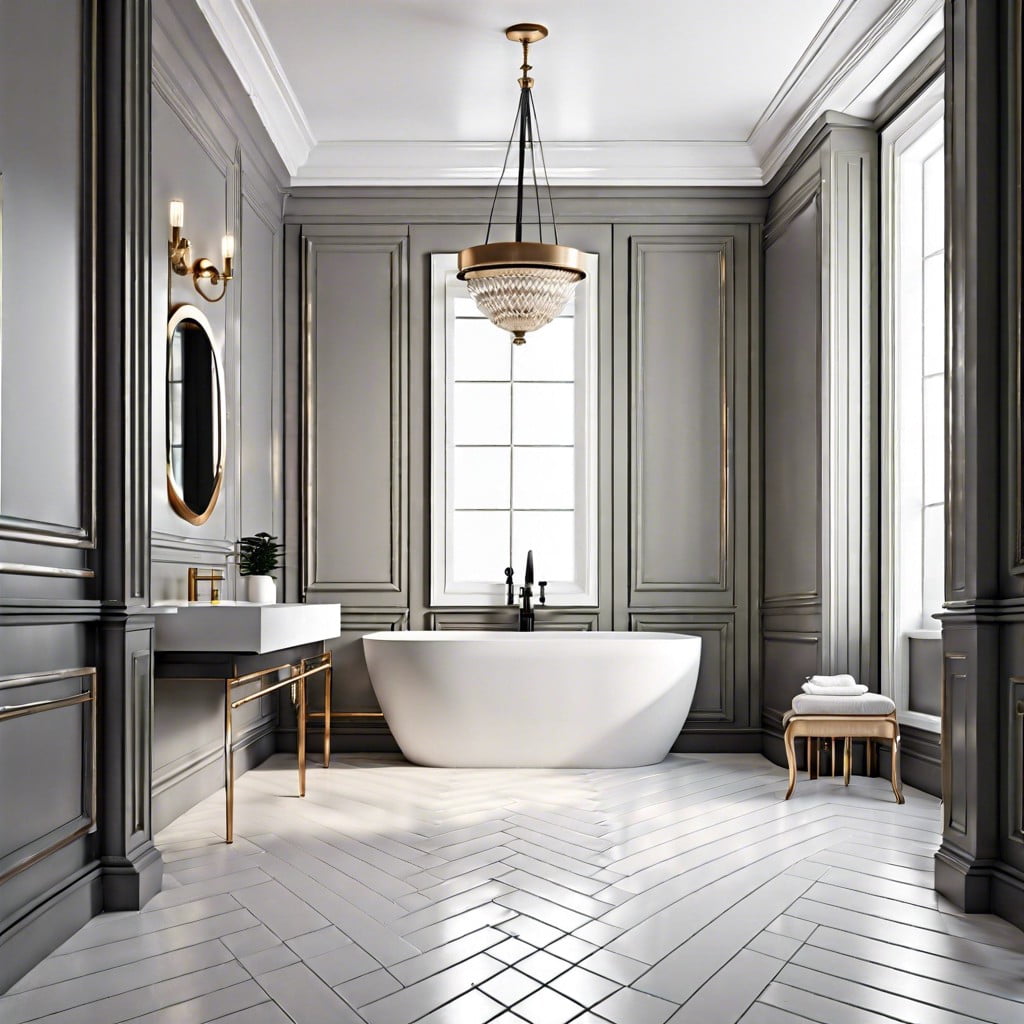
To achieve a minimalist aesthetic, simplicity is key. Opt for straight lines and uncomplicated profiles in materials like painted wood or smooth MDF.
Stick to a monochrome color palette, matching the trim to your wall color for a seamless look. This approach keeps the space feeling open and uncluttered.
Less is more; a single, well-placed piece can act as a focal point without overwhelming the senses.
Think about incorporating flat plank-style moulding around mirrors and doorways to maintain the understated theme.
For an added touch of elegance without extravagance, consider a slender baseboard that quietly anchors the room without drawing undue attention.
DIY Bathroom Moulding Installation
Embarking on a DIY moulding installation can transform your bathroom from ordinary to extraordinary. Here’s a straightforward guide to doing it right:
Measure Carefully: Accurate measurements are essential. Use a tape measure to determine the length of the wall where the moulding will be applied, remembering to consider any corners or tricky areas.
Select Moulding Types: Choose a style that compliments your bathroom’s aesthetic. Waterproof options are best for high-moisture areas.
Cutting: A miter saw will ensure clean, angled cuts for corners. Always cut a little longer than your measurement to account for any errors, as you can always trim it down.
Adhesive Application: Use a waterproof adhesive suitable for bathroom conditions. Apply it to the back of the moulding, then press firmly against the wall.
Nail Securely: For additional support, nail the moulding into place. Space nails evenly and sink them slightly beneath the surface for a smoother finish.
Caulking Gaps: Fill any gaps between the moulding and the wall with silicone caulk to prevent moisture from seeping behind.
Paint to Match: If the moulding isn’t pre-finished, select a paint that can handle bathroom humidity and apply it for a cohesive look.
Final Touches: Once everything is dry and set, stand back and admire your workmanship. Your bathroom now bears the hallmark of your personal touch.
Integrating Storage Spaces With Moulding in Bathrooms
Merging functionality with aesthetic appeal, storage can be seamlessly incorporated into your bathroom’s molding. Think creatively; crown molding can be upgraded to hide LED strip lights or serve as additional shelving over the door frame.
Baseboard cabinetry near the floor not only adds charm but provides a discreet place for towels and toiletries.
Chair rail molding often overlooked in bathrooms, offers a dual purpose as a stylish rail for hanging organizers or baskets.
Even the area around your mirror can be transformed with narrow ledges, adding space for daily essentials without cluttering the sink.
With these smart strategies, your bathroom remains uncluttered while maintaining its stylish flair.
Glossy Finish Molding for Bright Bathrooms
Embrace the transformative power of glossy finish molding to capture and reflect light, amplifying the brightness of your bathroom.
High-gloss trim around mirrors and doorways maximizes natural light and enhances artificial lighting, creating a vivid, airy atmosphere.
Opt for water-resistant high-gloss paints that withstand humidity and offer easy cleaning.
To contrast the sheen, pair with matte walls for a sophisticated texture interplay.
Choose a color complementing bathroom tiles and fixtures for a cohesive look.
Remember, lighter shades of molding not only contribute to the illusion of a more expansive space but also promote a clean, crisp vibe.
Impact of Molding On Bathroom Acoustics
Molding can subtly enhance your bathroom’s acoustics without requiring any major renovations. Here’s how:
– Soft materials absorb sound: Using thicker, soft wood or medium-density fiberboard for molding helps to dampen echoes, creating a more intimate atmosphere. – Contoured surfaces disrupt sound waves: Crown moldings with undulating shapes break up sound patterns, which helps to reduce the intensity of noise. – Seamless connections minimize vibrations: Properly installed moldings that unite walls and ceilings or floors without gaps ensure fewer vibrations and less sound travel. – Strategic placement for sound management: Molding installed along lower parts of the walls can create a sound barrier, especially if complemented with matching baseboard profiles, helping to keep sounds from bouncing. – Complementary textures for noise reduction: Pairing molding with textured wallpaper or acoustic panels provides additional sound-absorbing benefits, contributing to a tranquil bathroom environment.By considering these points, you can achieve a serene acoustic balance, making your bathroom not just a visual retreat but an auditory one as well.
Bathroom Moulding That Matches Your Fixtures Perfectly
When selecting moulding for your bathroom, consider fixtures such as taps, showerheads, and knobs. Aim for a cohesive look that complements the metal finishes. Here are key considerations:
- Material Match-Up: For chrome fixtures, opt for moulding with a glossy finish. Matte moulding pairs well with brushed metals.
- Color Coordination: Align the moulding color with the primary hue of your fixtures. For brass, choose warm-toned moulding. For silver-toned fixtures, select cool-toned or neutral moulding.
- Design Harmony: Match the design elements. Simple fixtures work best with minimalist moulding, while ornate fixtures pair with detailed moulding designs.
- Texture Synchronization: Textured fixtures go well with moulding that has a similar feel. Smooth fixtures are complemented by sleek, untextured moulding.
These tips ensure your moulding and fixtures create a harmonious and aesthetically pleasing environment in your bathroom.
Choose Molding Materials for Damp Bathrooms
When selecting materials for bathroom moldings, prioritize durability and moisture resistance to ensure longevity and prevent warping or mold growth.
PVC: This plastic polymer is inherently water-resistant and won’t rot or corrode, making it ideal for damp environments.
Aluminum: Metal options like aluminum are great for a modern look and are impervious to moisture, though they can be more costly.
Redwood and Cedar: If a natural wood aesthetic is preferred, these varieties are naturally resistant to moisture and decay.
Polyurethane: A synthetic material that can mimic the look of wood without the susceptibility to moisture damage.
Incorporating these materials into your bathroom design will result in a beautiful space capable of withstanding high humidity levels. Always ensure that any wooden materials are properly sealed and treated to extend their durability.
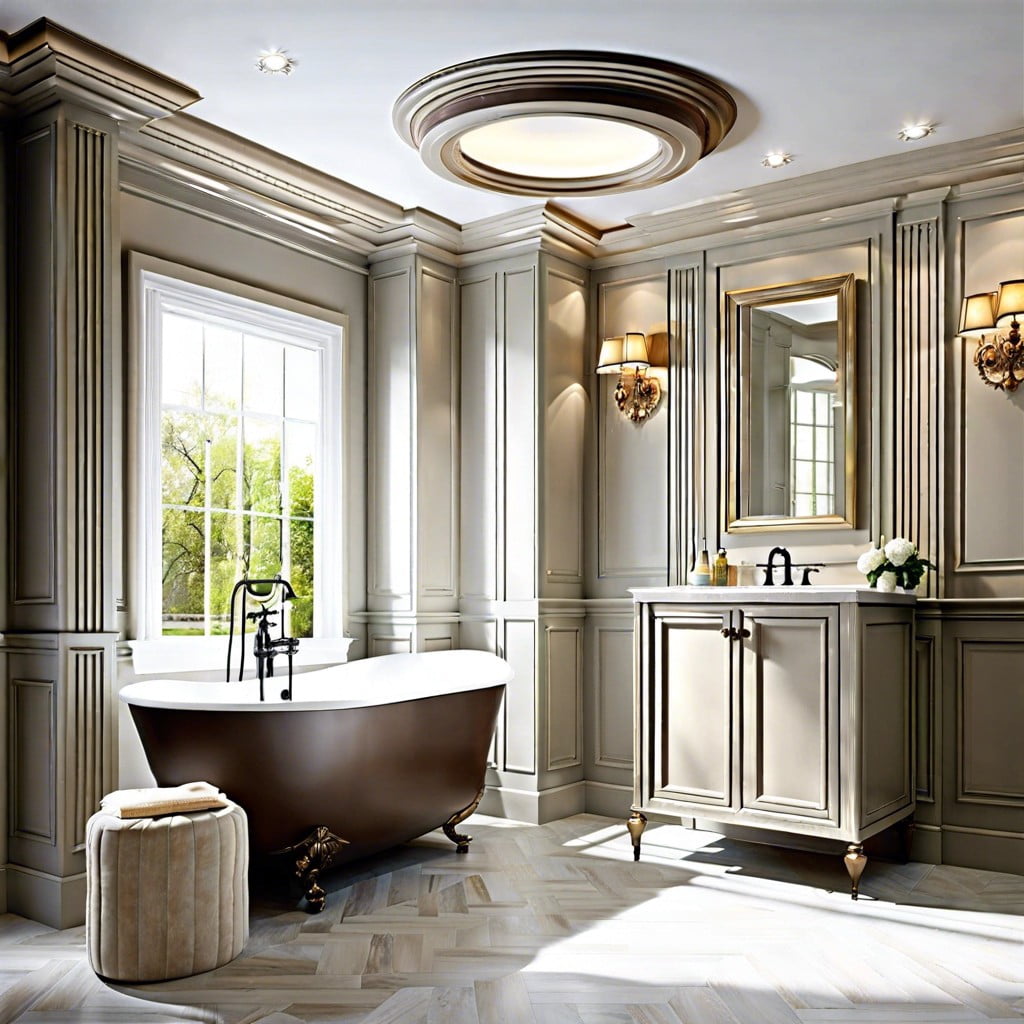
Moulding Ideas for Ceiling Heights
When considering moulding in bathrooms with varying ceiling heights, it’s essential to create balance and visual appeal:
- For high ceilings, consider adding thick crown moulding to create a sense of coziness and reduce the towering effect. Ornate patterns can add character without overwhelming the space.
- In bathrooms with low ceilings, opt for thin, simple moulding to maintain an open and airy feel. Avoid heavy or intricate designs that may make the space feel cramped.
- With average ceiling heights, a medium-sized moulding can provide a polished look. Choose profiles with subtle curves or angles for a touch of sophistication without dominating the room’s aesthetic.
- Consider the colour of your moulding carefully; lighter shades can help open up a space, whereas darker tones add depth and draw the eye upward.
- For a seamless look, continue the same moulding pattern around the room, but adjust the size proportionally to fit above door frames and windows.
- Use moulding creatively around light fixtures or fans to create an elegant focal point that enhances the room’s height and dimension.
Remember, the goal is to complement and enhance your bathroom’s design, ensuring the moulding harmonizes with the overall decor and architecture.
Ceiling Moulding Styles for Big and Small Bathrooms
Ceiling moulding can elevate the aesthetic of any bathroom, regardless of size. Large bathrooms benefit from ornate crown moulding which can create an air of elegance and draw the eye upward, making the space feel even more expansive. Wide, intricate patterns can complement the grandeur of a spacious bathroom without overwhelming the design.
Conversely, small bathrooms require a more strategic approach. Slimmer moulding with simple designs can add character without making the space feel cluttered. Opt for moulding that matches the color of the ceiling to give a seamless look and create the illusion of a higher ceiling, thus opening up the room.
For both large and small bathrooms, consider the material of the ceiling moulding. In high-moisture environments like bathrooms, water-resistant materials such as PVC or polyurethane are advisable. They won’t warp or rot and are easy to maintain.
Lastly, lighting plays a crucial role. Indirect lighting tucked behind crown moulding can provide a soft glow that enhances the mood and ambiance of the bathroom. This technique works well in any size bathroom, contributing both to the decor and the functionality of the space.
Cost-Effective DIY Molding Styles for Bathrooms
Transforming your bathroom doesn’t have to break the bank. With DIY molding, you can add a touch of elegance on a budget. Paint-grade pine or MDF (medium-density fiberboard) are affordable yet chic options you can easily tailor to your bathroom’s decor. They’re also easily cut and installed – a simple miter saw and nail gun are sufficient for most projects.
Consider chair rail molding to protect walls and add a visual break, or a baseboard upgrade for a quick refresh. If you crave more detail, a picture frame molding below or above a chair rail injects character. When painting, semi-gloss paint in a hue complementary to your walls can make moldings pop without overwhelming the space.
For an even more economical approach, repurpose or refresh existing moldings using paint or stain. This method invites creativity – consider a daring color contrast or a subtle tone-on-tone effect. With these tips, you’ll elevate your bathroom’s style affordably and with personal flair.
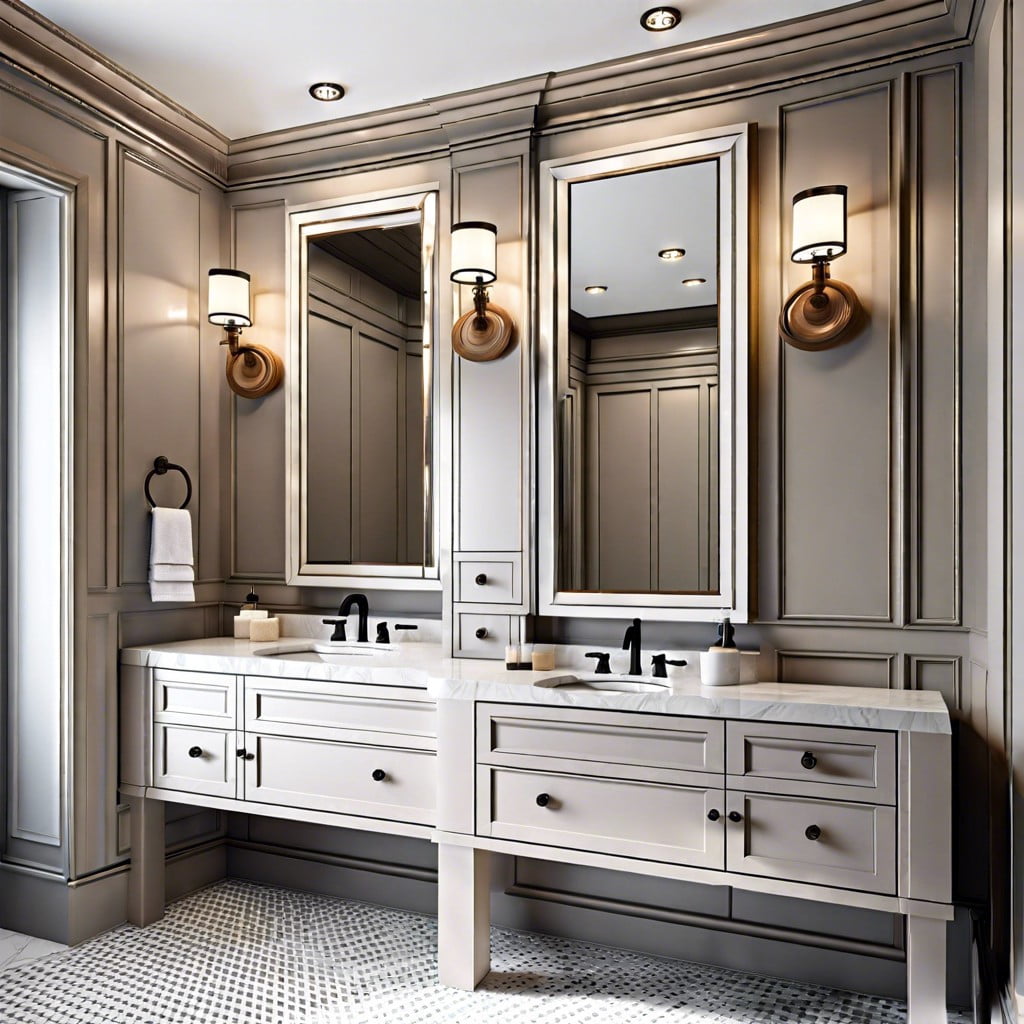
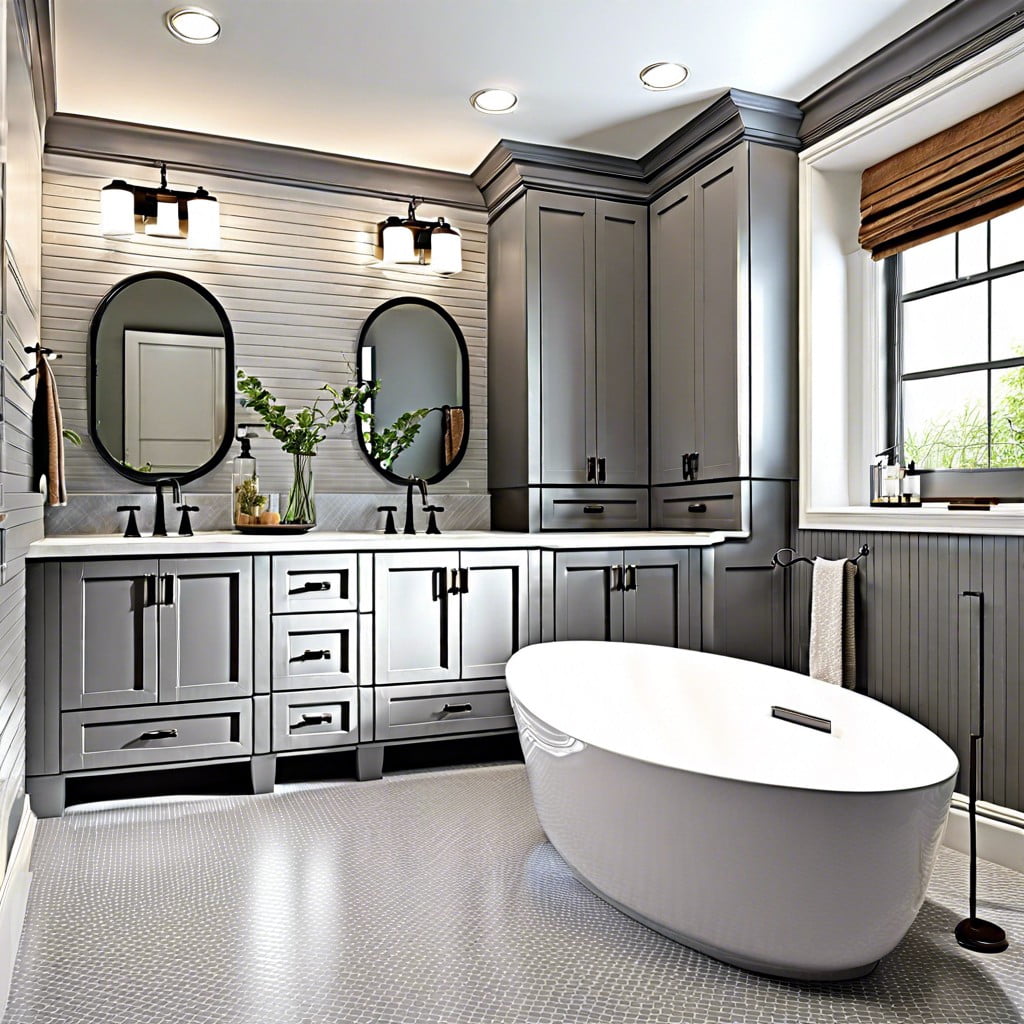
Molding Styles for His & Hers Sinks
Enhancing the personalized space around dual sinks can bring a touch of elegance and distinction. Consider a symmetrical approach, with identical molding styles framing each sink to create a harmonious appeal.
For a bolder statement, use contrasting colors or designs, allowing each area to stand out while maintaining a cohesive look across the bathroom.
Incorporate discrete storage solutions within the molding design to keep essentials handy while preserving a clutter-free counter.
Decorative molding can also serve as a means to conceal lighting fixtures, offering a soft glow that accentuates the individuality of each sink space.
Opt for water-resistant materials that guarantee durability against the humidity and splashes, ensuring your newly styled area remains pristine over time.
Remember, the goal is to achieve both functionality and visual flair, melding the two into a seamless design that fits the daily routines and aesthetic preferences of both users.
Soft Touch Moulding for a Relaxing Bathroom
The essence of a tranquil bathroom retreat lies in the details. Soft touch moulding serves as a tactile delight, creating a sensory experience that promotes relaxation.
Incorporate plush, curved edges to mouldings around mirrors and along walls to evoke a sense of calm. Use materials that are pleasant to the touch, like rubber or soft wood, to reduce the starkness of the space. Opt for matte finishes rather than glossy – they’re less stimulating to the eye and more soothing.
When selecting colors, go for muted tones that blend harmoniously with the rest of your bathroom’s color scheme, thus ensuring an uninterrupted, peaceful ambiance.
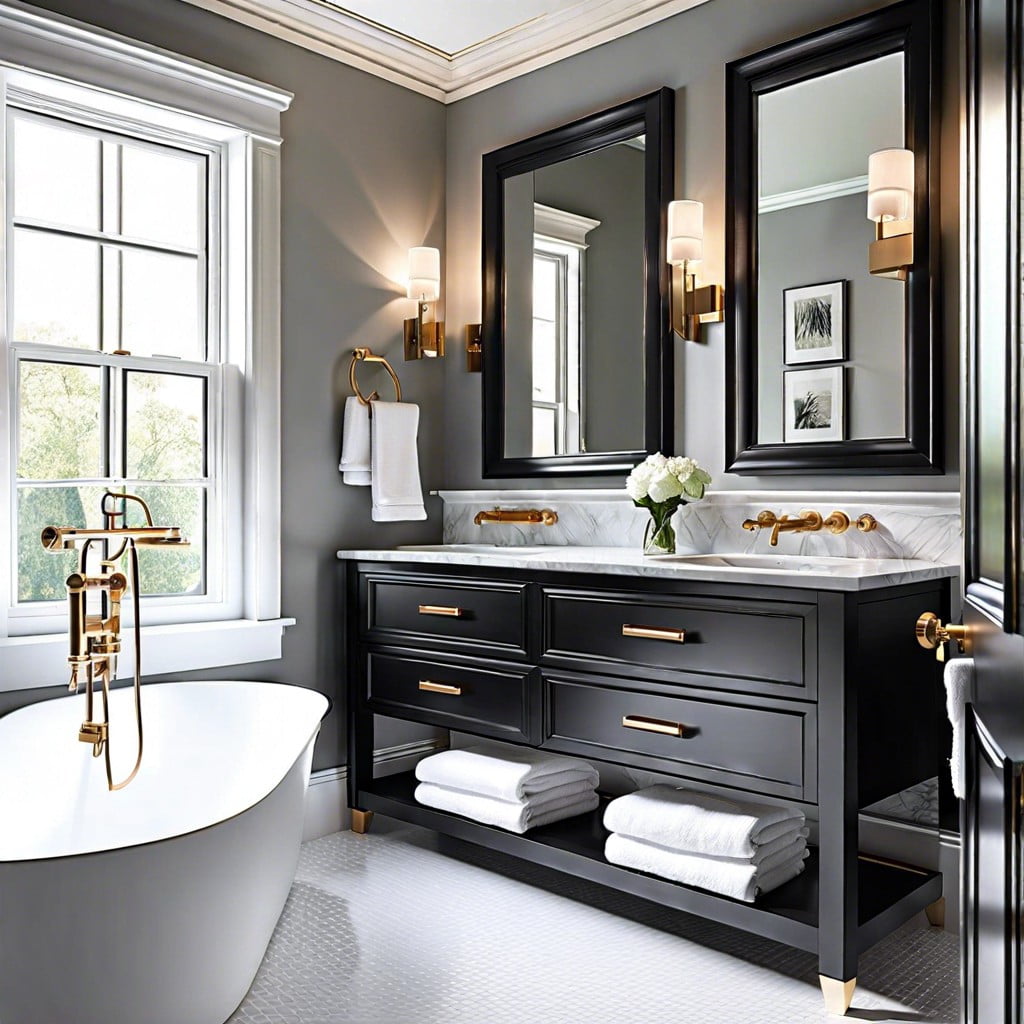
Metallic Moulding Designs for a Chic Ambiance
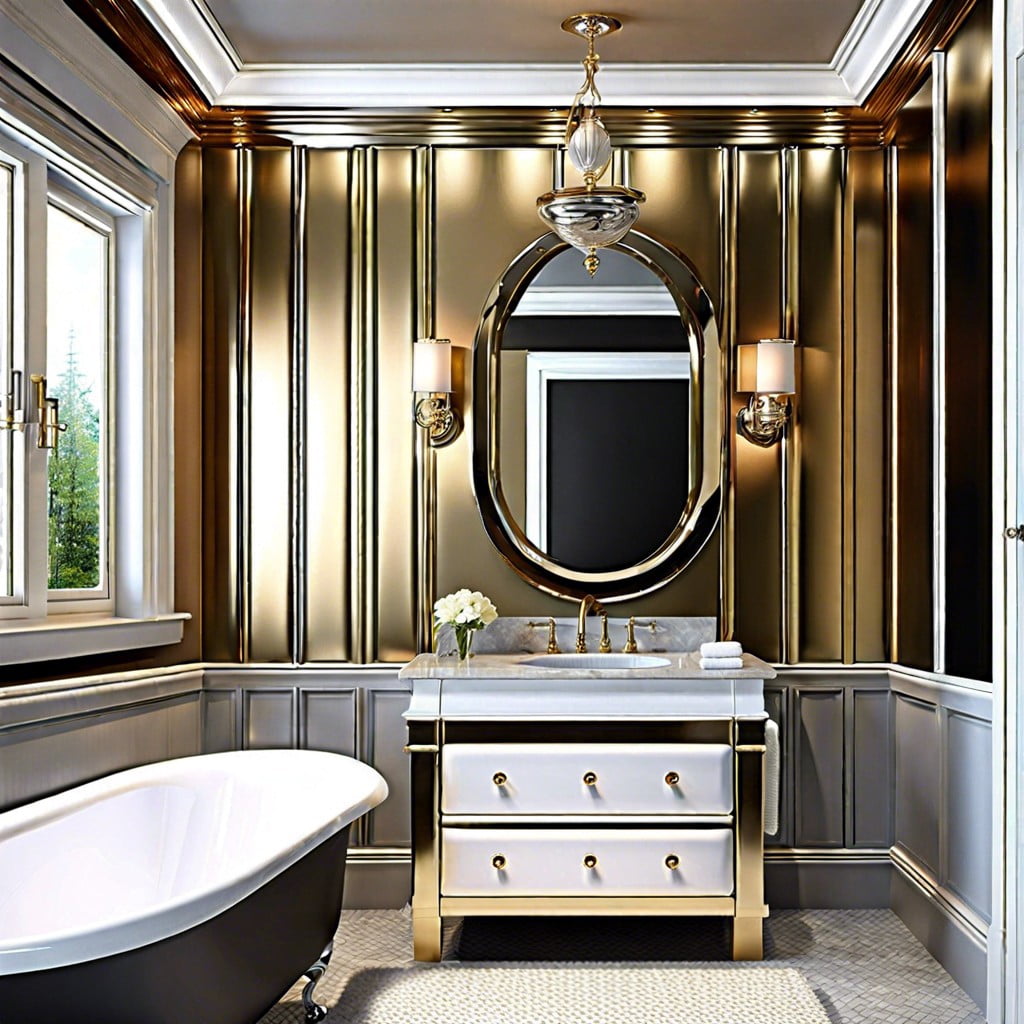
Elevate the bathroom aesthetic with a hint of glamour by incorporating metallic moulding into your design. When choosing a metallic finish, consider a color scheme that complements the existing fixtures and hardware. For instance, brushed nickel or chrome moulding matches modern stainless steel taps and showerheads, creating a cohesive look.
For a warmer ambiance, brass or copper moulding offers a luxurious touch, particularly when paired with similar-toned fixtures. Bear in mind the maintenance required as some finishes can tarnish over time, so opt for treated metals that resist humidity.
The placement of metallic moulding is key. Accentuating mirrors or door frames creates focal points that attract the eye without overwhelming the space. In smaller bathrooms, a thin metallic strip can run along the wall or ceiling to visually extend the space, reflecting light and increasing the sense of openness.
Using metallic moulding also means playing with texture. Hammered or brushed finishes add depth and interest to your bathroom walls, providing character and a tactile quality to surfaces that are often smooth and sterile.
Incorporate these elements thoughtfully to ensure a chic, harmonious environment which feels both timeless and on the forefront of contemporary design.
Moulding Ideas for Bathroom Door and Windows
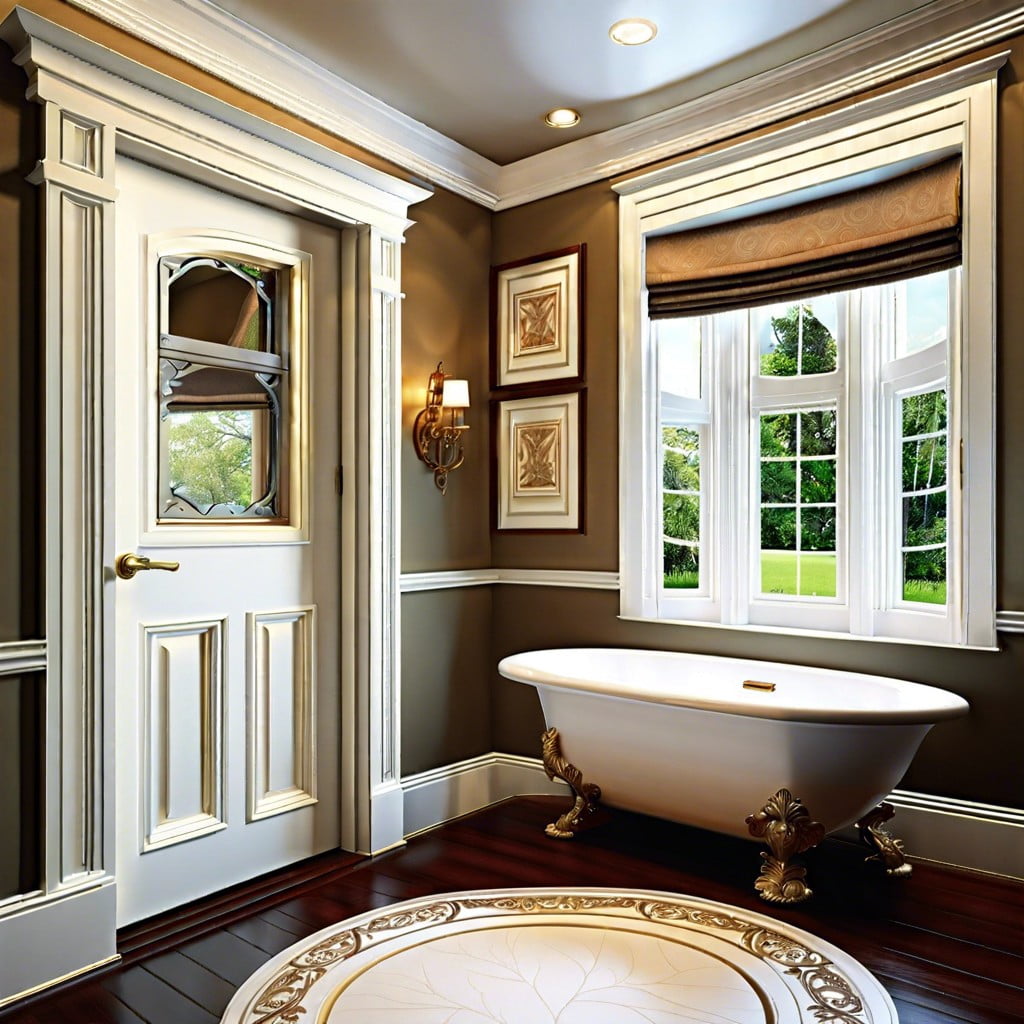
Highlighting doors and windows with the right moulding can elevate the overall aesthetic of your bathroom without overwhelming the space. Consider framing doors with wider trim to create a grand entrance feel.
For window moulding, select designs that complement the existing architecture; a simple, clean-lined casing works well for modern decors, while a more detailed, sculpted trim may suit traditional spaces.
Adding a waterproof seal to window moulding ensures longevity in the humid bathroom environment. For a touch of sophistication, you might choose a trim with a high-gloss finish, or for a soft, matte look, opt for a less reflective material.
When it comes to color, matching the moulding with wall color can make the room feel larger, while contrasting hues create a striking visual frame for your windows and door.
Remember to measure your spaces carefully before installing moulding. Proper scale and proportion to the window or door size are essential for a balanced look.
Quick tip: Use a miter saw for precise angled cuts, ensuring a snug and professional fit of the pieces at the corners.
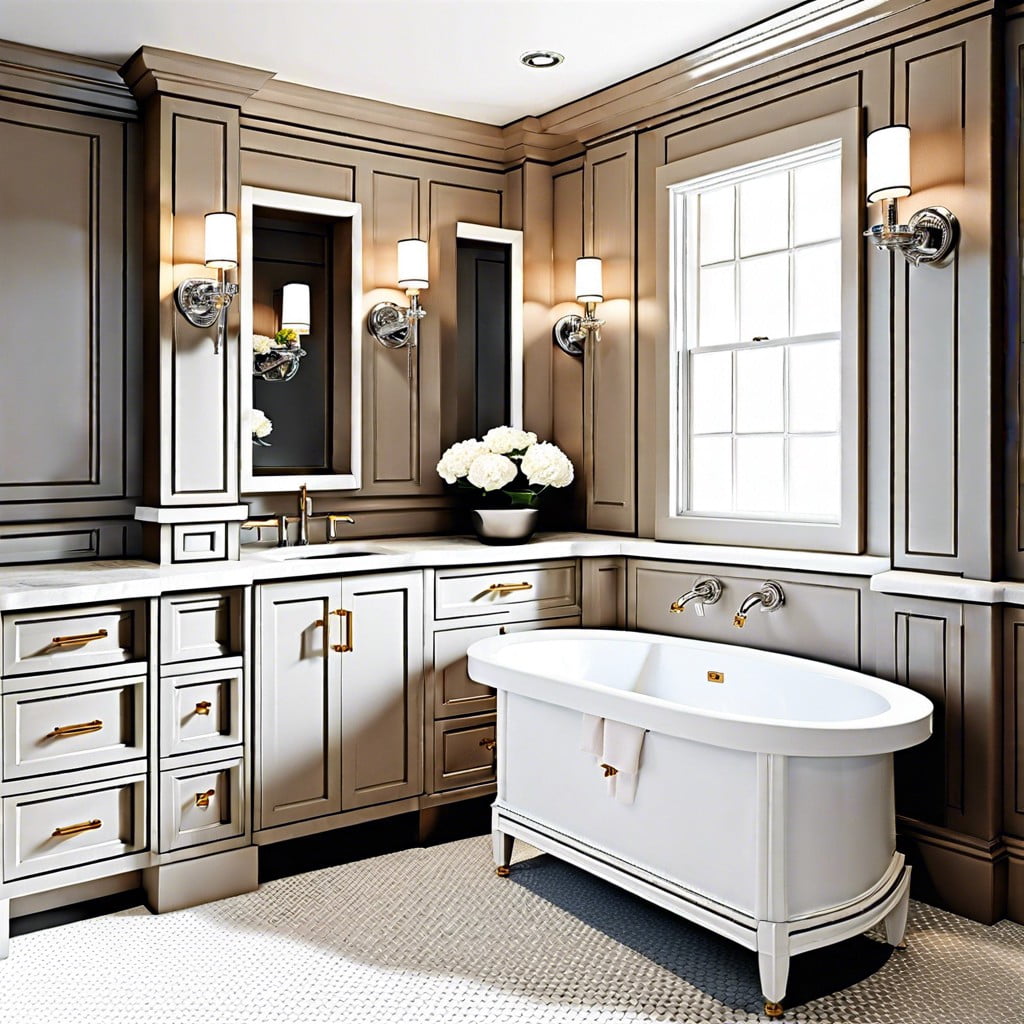
Using Molding to Enhance Vanity Areas
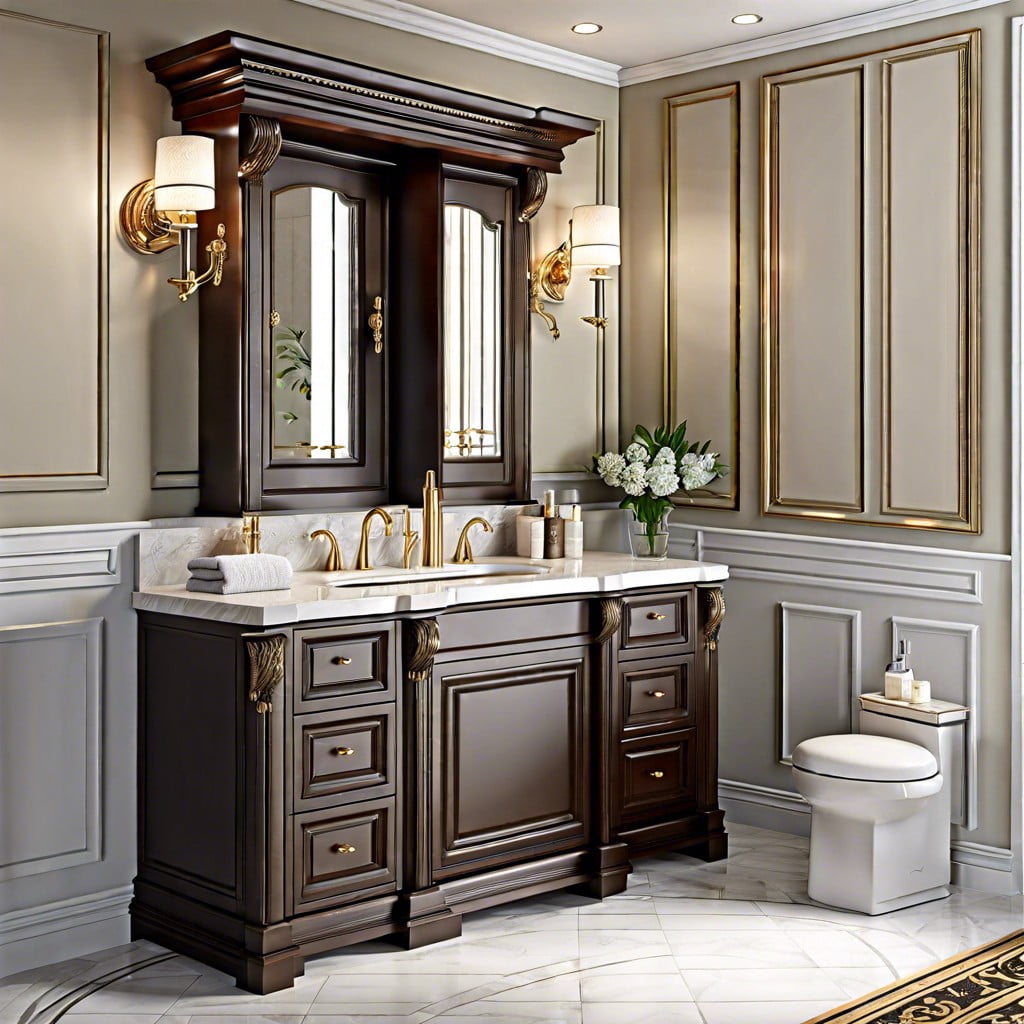
Elevate your bathroom vanity from functional to fabulous with clever molding applications. Crown molding can frame the vanity area, creating a focal point that complements the elegance of high-quality fixtures. Consider adding chair rail molding at a lower height around the vanity to define a separate space distinctly or for a touch of sophistication.
If storage is a must, think about using baseboard molding with built-in shelving above or around the vanity. This not only maximizes space but also adds an architectural element. For something truly unique, use thin strips of trim to create a geometric pattern or herringbone design on vanity doors or side panels.
Furthermore, select moldings with profiles that match drawer pulls or cabinetry handles, allowing for a cohesive look that ties the entire vanity area together. Finishes can range from painted to stained wood, offering an extra dimension and texture to the bathroom’s aesthetic. Keep in mind the bathroom’s humidity when choosing materials, and opt for moisture-resistant options to ensure longevity.
Remember, lighting plays a crucial role in how moldings look—install under-cabinet or overhead lights to enhance the visual impact of your molding choices around the vanity.
Mirror Frame Moulding Ideas for Bathrooms
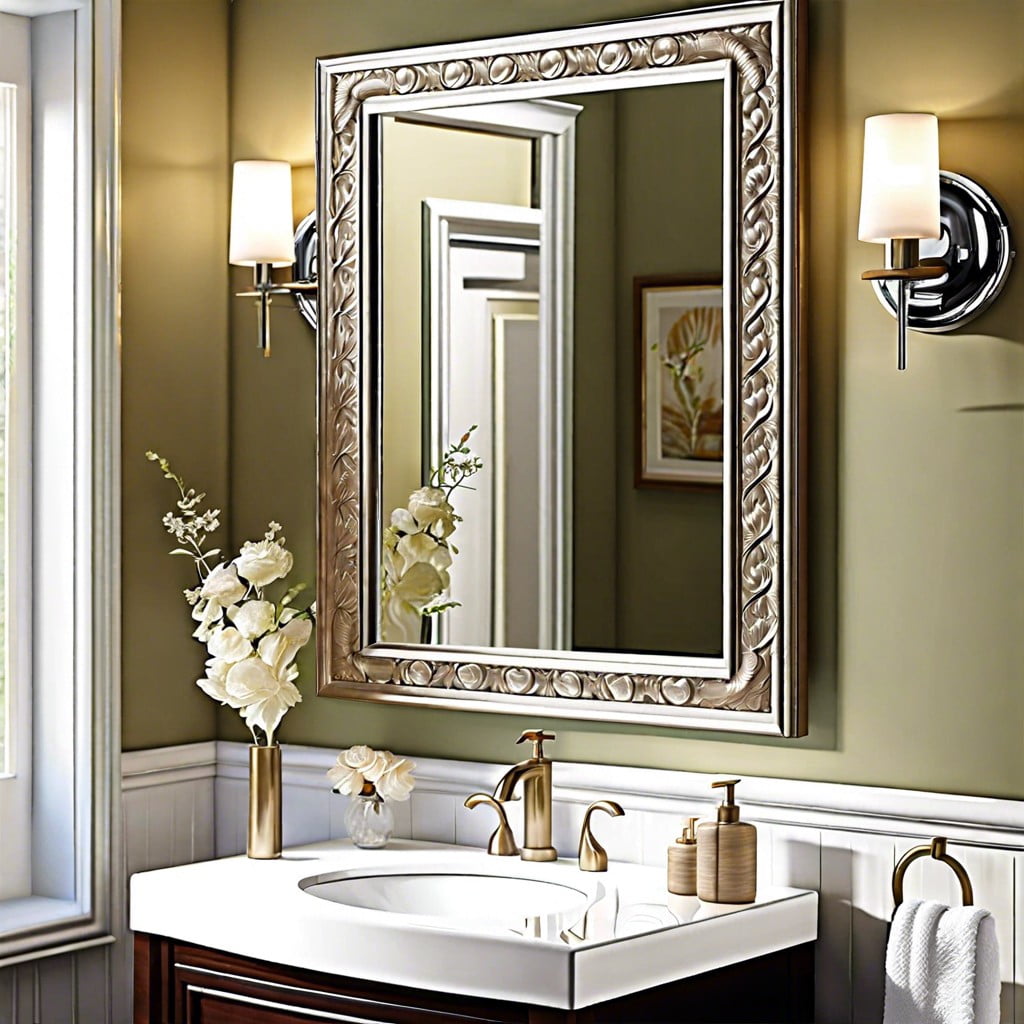
Elevate your bathroom’s aesthetic by framing the mirror with moulding that complements the room’s decor. Consider a classic wooden frame for a warm, traditional feel, or a sleek metallic edge for a more contemporary look. White molding can brighten the space and make it appear larger, while a dark-stained frame adds a touch of sophistication and depth.
For a creative twist, use mosaic tiles as a unique border, infusing color and texture. If DIY projects appeal to you, repurpose crown molding for a luxurious finish. With adhesive and basic tools, you can create a custom-designed frame that showcases your personal style.
When selecting materials, ensure they are moisture-resistant to withstand the humid bathroom environment. Incorporate lighting by installing LED strips behind the frame for a soft, ambient glow that can also enhance the functionality of the mirror.
Pair the framed mirror with matching accessories, such as towel racks and cabinet hardware, to create a cohesive and polished look in your bathroom. The right moulding not only serves as a visual anchor but also personalizes the space, turning an ordinary mirror into a focal point.
Using Moulding to Highlight Bathroom Artwork
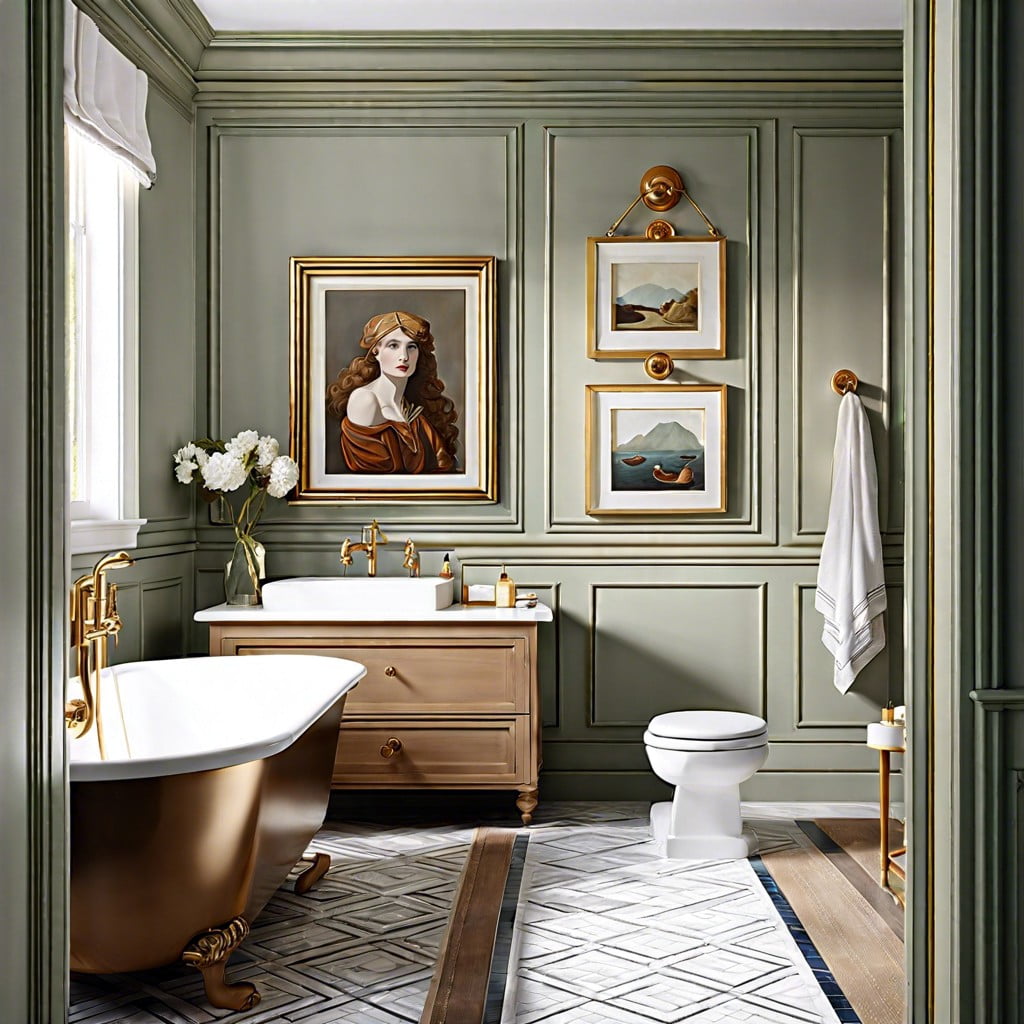
Elevate the ambiance of your bathroom by framing your favorite artwork with strategic moulding. This can create a focal point and add a touch of sophistication. Consider the following points to effectively use moulding around artwork:
- Complementing Colors: Choose a moulding color that complements both the artwork and the wall color to tie the room together.
- Proper Sizing: Ensure the moulding is proportional to the size of the artwork. A wide frame can overpower a small piece, while a thin frame might not give the desired emphasis to a larger work.
- Depth and Dimension: Adding depth to the frame can give the illusion of the artwork being more prominent. This can be achieved with layered moulding.
- Theme Consistency: Moulding styles should align with the bathroom’s overall theme—traditional, modern, or eclectic—to maintain aesthetic harmony.
- Lighting Considerations: Proper lighting can enhance the artwork and moulding. Consider installing direct lighting above the artwork to highlight its beauty.
- Professional Installation: For a seamless look and sturdy installation, it’s often best to employ a professional, especially for heavyweight pieces.
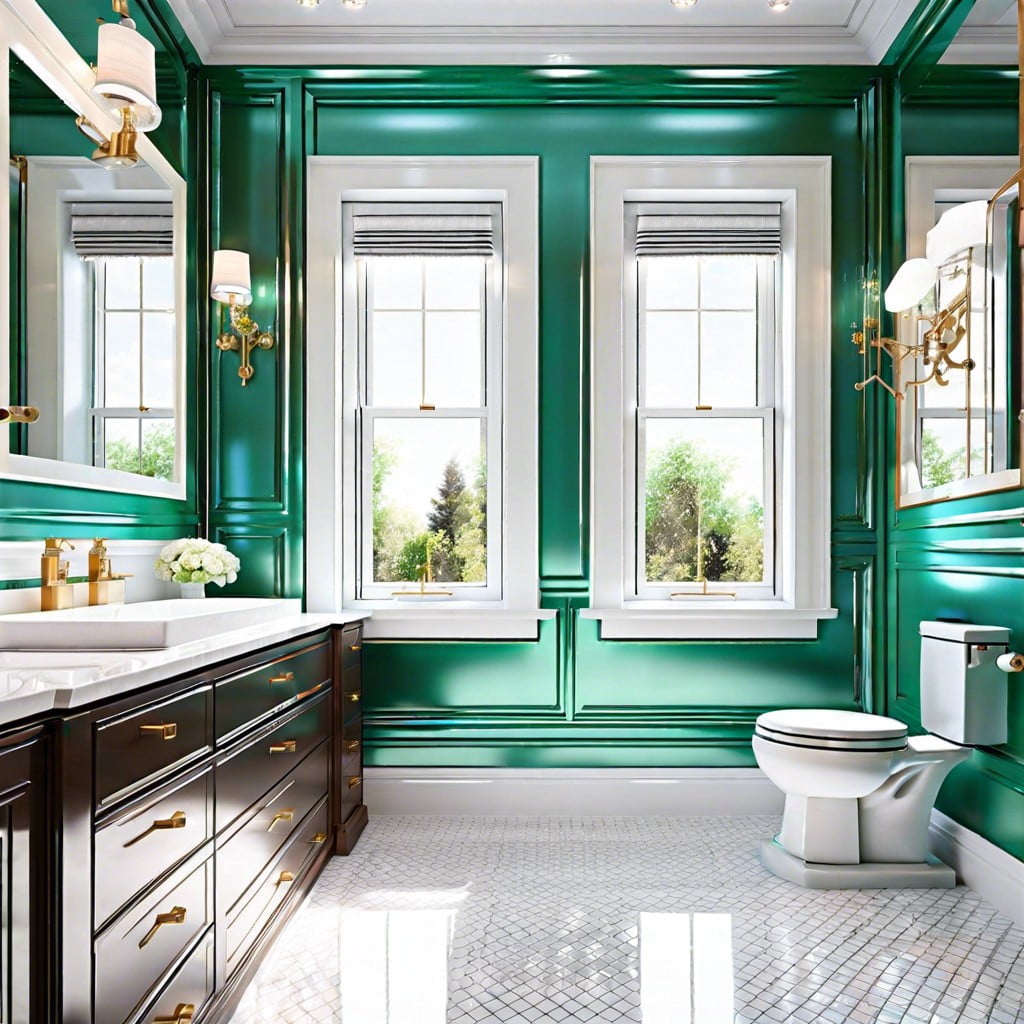
Bold Colored Molding for Dramatic Bathroom Designs

Dive into the trend of vibrant hues to create an eye-catching bathroom environment. Bold-colored molding serves as an instant focal point and injects personality into space.
Use deep blues or striking reds to frame mirrors and doorways, making them stand out against neutral walls. For a harmonious look, choose a shade that complements other elements, like towels or tiles.
When opting for intense colors, balance is key—keep other decorative features subdued to avoid clutter. High-gloss finishes on moldings not only add sophistication but also reflect light, enhancing the dramatic effect.
Remember, the goal is to craft a statement that resonates with your unique aesthetic while maintaining harmony in the bathroom’s design.
Moulding Styles for Accessible and Disabled-Friendly Bathrooms
Creating an accessible bathroom for individuals with disabilities calls for strategic design choices that balance functionality with aesthetics. Moldings play a key role in achieving this harmony:
- Smooth Transition Moldings: These ensure that there are no sharp edges or transitions, enhancing wheelchair maneuverability around the bathroom space.
- Raised Panel Molding: This design provides tactile borders around doors and walls, which is helpful for visually impaired users to navigate.
- Handrail Moldings: These can be integrated around the bathroom to offer support and stability without compromising on style. The moldings can match the decor, blending seamlessly with the overall design.
- Contrasting Color Moldings: Use moldings in contrasting colors to aid those with low vision in discerning different areas of the bathroom, offering both a visual aid and an elegant design element.
- Durable Materials: Opt for water-resistant and non-slip moldings to ensure longevity and safety in the humid bathroom environment.
Each of these elements contributes to a bathroom environment where safety and accessibility are just as important as the visual appeal.
Ideas Elsewhere
- https://vanessafrancis.com/2014/06/adding-interest-to-bathrooms-with-moulding/
- https://www.themouldingcompany.com/blog/a-brief-guide-to-remodeling-your-bathroom/
- https://thedesignery.com/blog/bathroom-wall-trim-ideas-using-wainscoting-and-crown-molding/
- https://www.metrie.com/the-finished-space/crown-moulding-in-bathrooms
- https://www.younghouselove.com/master-bathroom-decorative-wall-molding/
- https://www.soulandlane.com/bathroom-baseboard-ideas-2199/
Browse More
 Gray Bathroom Cabinets: What Color Walls Complement Best
 What Is a Vanity and Why You Need One
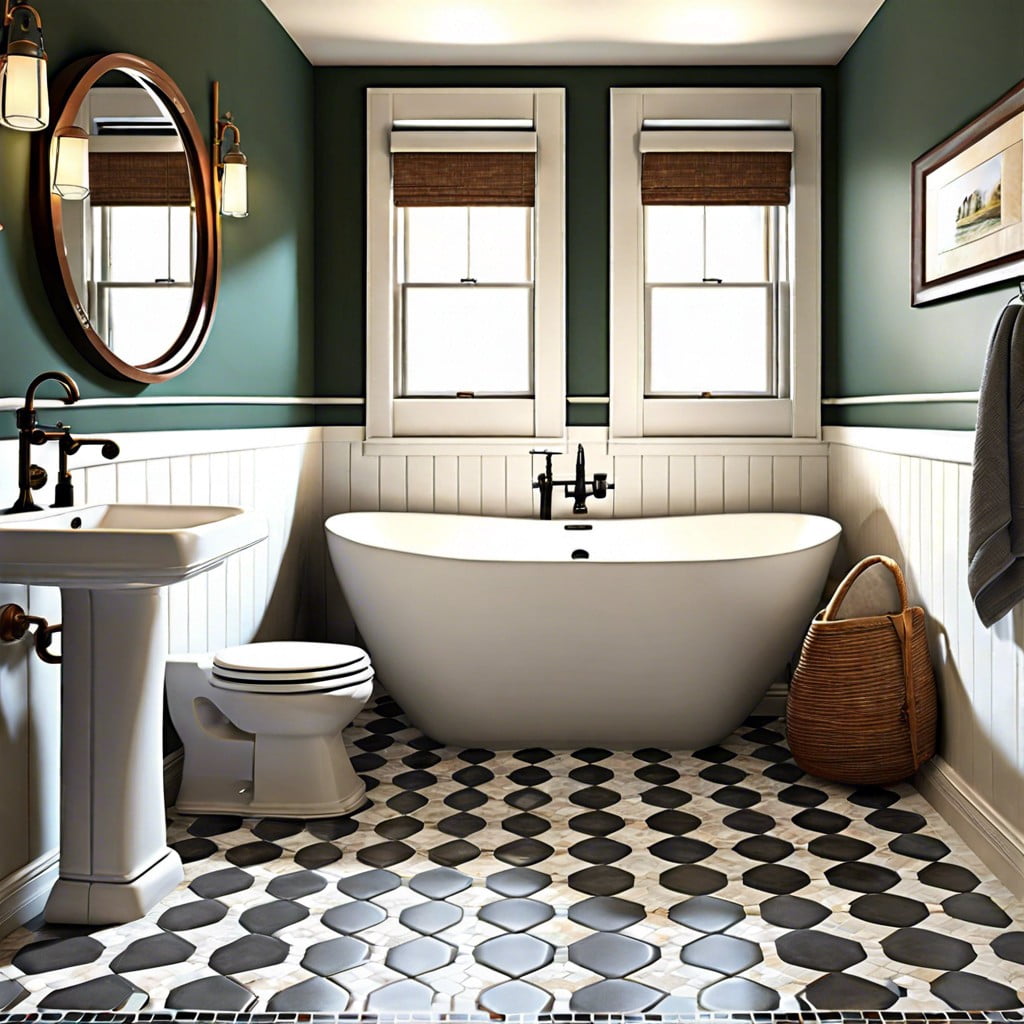 15 Ideas: What is the Best Flooring for a Small Bathroom
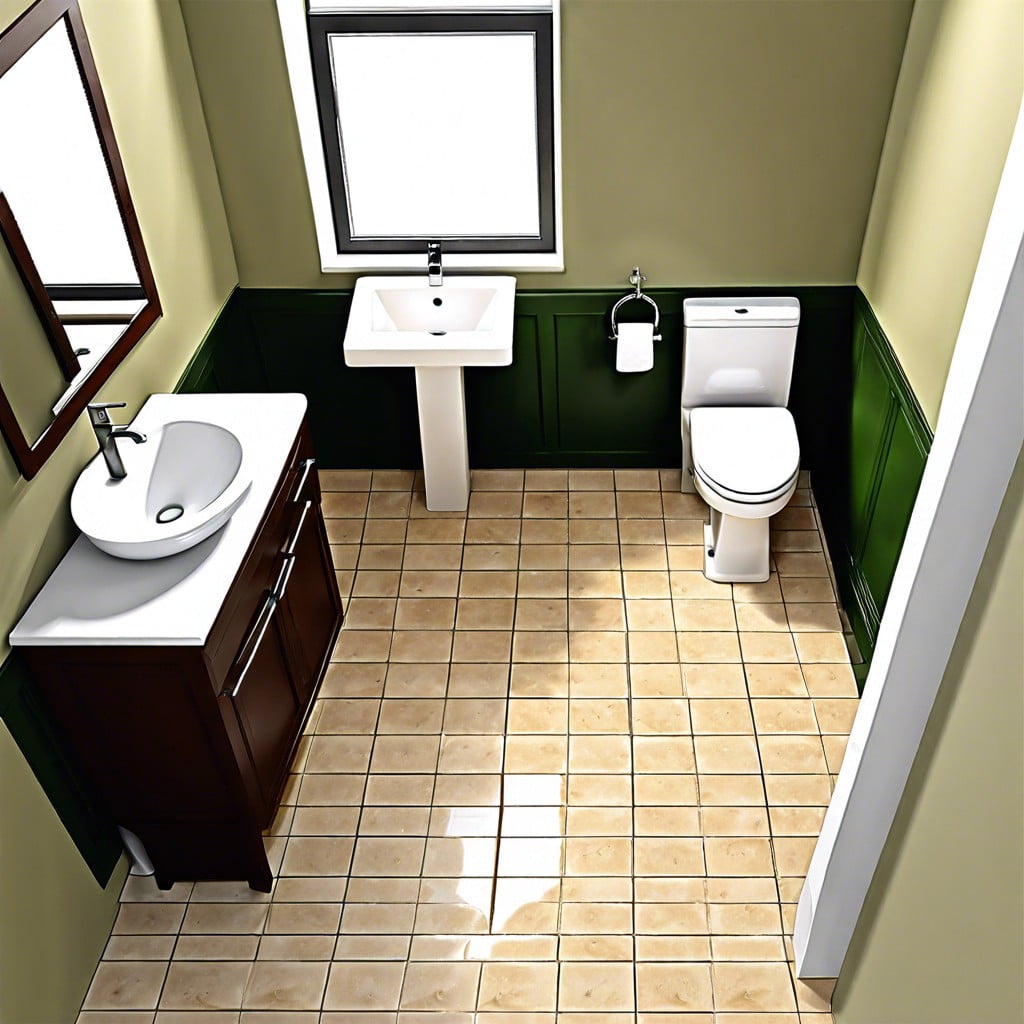 What is a Half Bath: Maximizing Your Home’s Space
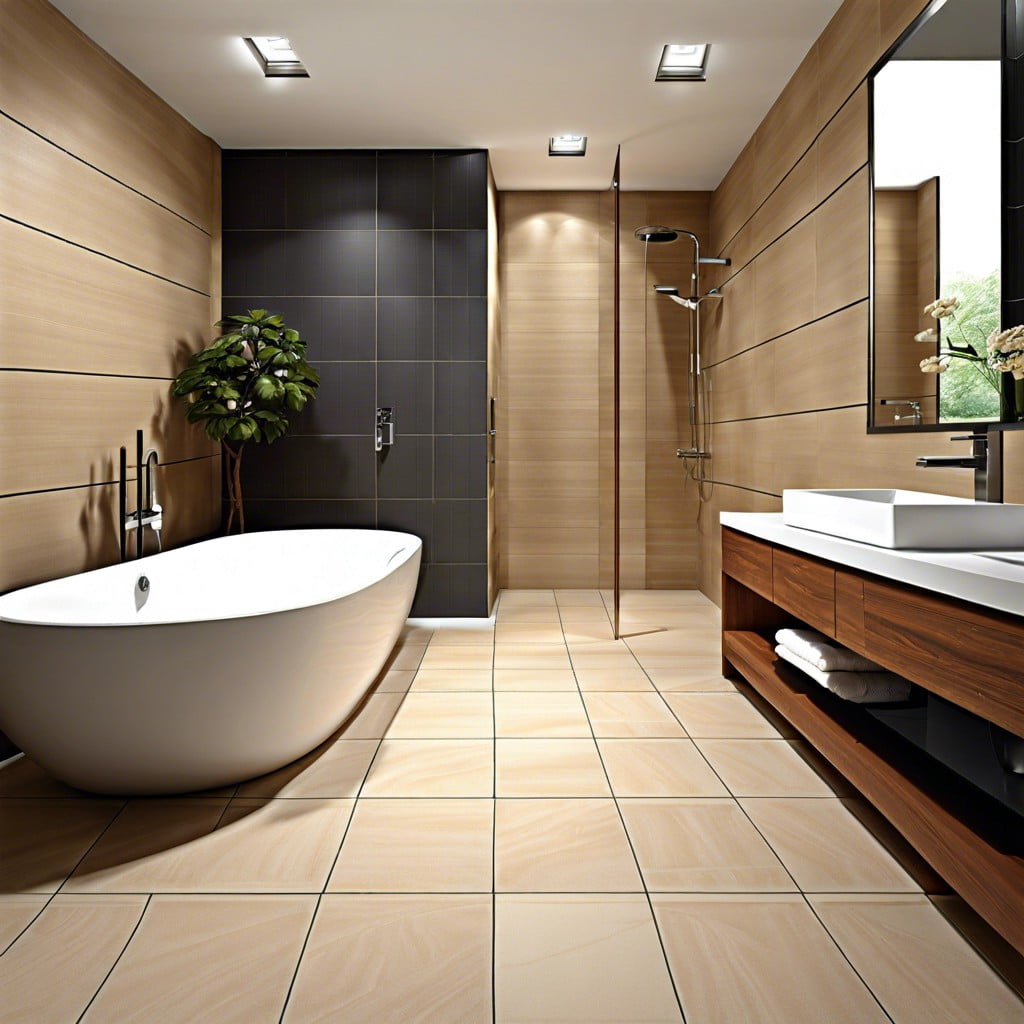 Best Flooring for Bathroom: Your Essential Buying Guide
Recap