Last updated on
Creating a DIY lighthouse with a solar light transforms your garden into a coastal-inspired oasis, because it adds charm and practical, eco-friendly lighting.
Key takeaways:
- Use terracotta pots in graduated sizes
- Choose outdoor acrylic paint for durability
- Securely stack and glue pots to create the structure
- Personalize with paint, stripes, and decorative elements
- Apply a clear waterproof sealant to protect the paint
DIY Lighthouse Supplies
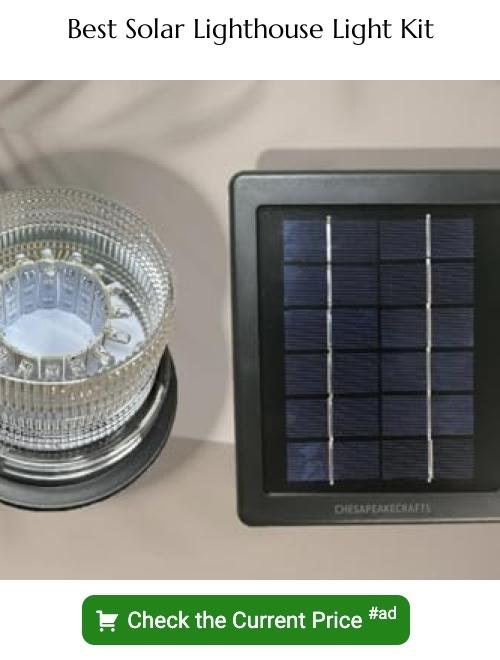
Gathering the right items ensures your DIY lighthouse isn’t just functional but also a visual delight. First, a solar light for the top helps in mimicking a real beacon with environmentally-friendly energy. Terracotta pots in graduated sizes form the structure, offering a sturdy and weather-resistant base. Make sure to select acrylic or outdoor paints in your chosen color scheme; these will withstand the elements. Brushes and sealants are essential for applying the paint and protecting your finished work from the sun and rain. Decorative elements like rope or sea glass can add a nautical flair. Don’t forget strong, waterproof adhesive to securely bond the pots. Lastly, sandpaper can be handy for smoothing any rough edges on the pots, ensuring a polished final product.
How to Make a DIY Lighthouse

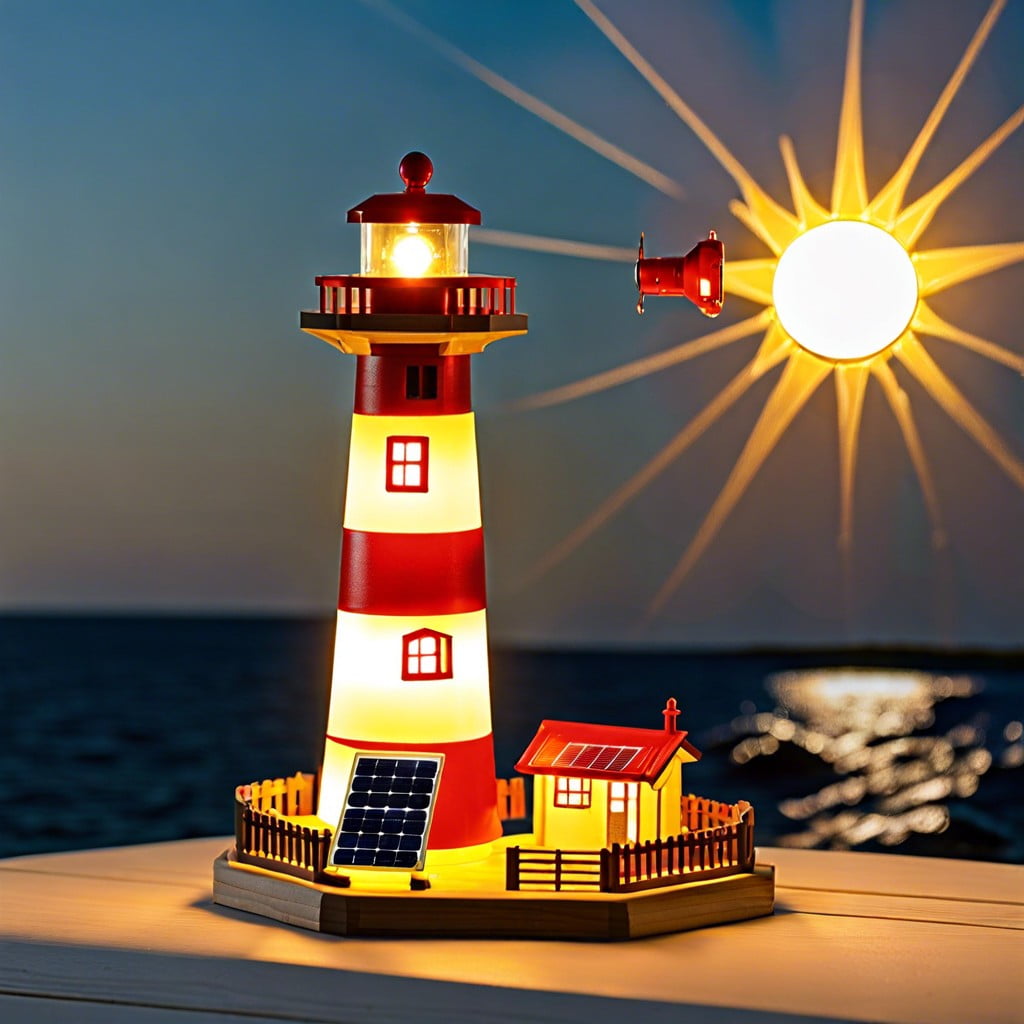
Begin by locating a suitable solar light; this will form the beacon of your lighthouse. Ensure the size fits the top of your terracotta pots, which will act as the main structure. To create the tower, stack the pots from largest to smallest, securing each with weatherproof adhesive. Allow time for the adhesive to dry before proceeding to paint.
Choosing the appropriate paint is crucial; opt for outdoor acrylics to withstand the elements. Apply a primer if necessary to ensure the paint adheres well to the terracotta surface. Select classic lighthouse colors like white and red, or personalize with hues of your choice.
Once the paint has dried, fix the solar light atop the smallest pot. Reinforce with adhesive if needed. The ambient glow of the solar light at dusk will mimic a real lighthouse, creating a charming effect in your outdoor space.
For extra stability, you may anchor the structure onto a solid base such as a large tile or a concrete block. This step is essential to prevent toppling in windy conditions. Lastly, remember to place your lighthouse in a sunny area to charge the solar light effectively.
Remove the Stem From the Solar Light

To begin transforming your solar light into a beacon for your lighthouse, carefully detach the stem or stake that usually plants the light into the ground. This piece isn’t needed for your project and can be set aside or saved for future use. Ensure the light housing itself stays intact as it will sit atop your lighthouse structure to cast a cozy glow.
If the light housing won’t detach easily, gently twist or wiggle it to loosen any clips or fasteners. Proceed with patience to avoid damaging the solar panel or LED. Remember, the cleaner the detachment, the smoother the next steps in your lighthouse creation will be.
Paint the Pots + Saucers
Choose your colors carefully to mimic the classic lighthouse aesthetic. A combination of white and red, or white and blue, is traditional. Acrylic paint works best for outdoor durability.
Apply a base coat of white to all pots and saucers, allowing ample drying time. Once dry, mark even bands for stripes using painter’s tape. Paint alternate stripes with your chosen secondary color, taking care to press the tape down firmly to prevent bleeding. For a smooth finish, apply two coats, letting each dry thoroughly before removing the tape.
If you prefer a weathered look, lightly sand the edges after the paint has set. Remember to cover the drainage hole of the upside-down pot with tape before starting to ensure your light fixture fits snugly later on.
Assemble the Lighthouse
Begin by flipping the largest terracotta pot upside down. This will serve as the base of your lighthouse. Apply a strong, weather-resistant adhesive around the rim before carefully centering and stacking the next largest pot on top. Continue this process with the remaining pots, ensuring they decrease in size as you build upward to create the tapered shape of a traditional lighthouse.
Once the tower structure is complete, attach the saucer to the top pot. This will act as the lighthouse ‘deck’. The solar light will sit on this saucer, so ensure the surface is stable and level. For the solar light, if it comes with a stake, remove it, and then glue the light onto the center of the saucer. Hold it firmly in place until the adhesive sets to ensure the light is secure. Allow ample time for the adhesive to dry according to its instructions before moving the lighthouse.
As you stack and adhere, check the alignment from different angles to maintain a straight and symmetrical structure. Accuracy and symmetry are key to a visually appealing lighthouse.
Decorate
Embrace creativity to give your lighthouse a charming touch. Use weather-resistant acrylic paints to add stripes, spiral patterns, or a faux brick appearance for a realistic look.
Consider maritime motifs such as anchors or seagulls for added sea-side flair. Apply stick-on numbers to imitate a true lighthouse’s identifier.
For a finishing touch, glue on small pebbles or seashells collected from a beach visit, accentuating the coastal theme.
Remember to keep decorations simple to avoid overwhelming the structure and ensure that they complement the overall style and color scheme.
Flower Pot Lighthouse Materials
To get started creating your charming flower pot lighthouse, you’ll need the following:
- Terracotta pots in varying sizes that can be stacked to create the lighthouse shape.
- Acrylic outdoor paint to withstand the elements (choose white for the classic lighthouse look, red and white for nautical stripes, or colors that complement your garden).
- A small paintbrush for detail work and a larger brush for general painting.
- Sandpaper to smooth any rough spots on the pots for even paint application.
- Strong weatherproof adhesive suitable for bonding terracotta.
- A solar light to cap the lighthouse and bring it to luminous life at night.
- Additional decorative elements such as small stones, pebbles, or seashells (optional for extra embellishment).
- Clear waterproof sealant to protect your paint job and ensure longevity.
Gather these materials, and soon you’ll be on your way to creating a beacon of light and a delightful focal point in your outdoor space.
Prep the Flower Pots
Begin by selecting terracotta pots in graduated sizes—these will stack to form the lighthouse shape. Ensure the pots are clean, dry, and free of any stickers or residue. Sand the exterior surfaces lightly to create a rough texture that will help the paint adhere better. Wipe them down with a damp cloth after sanding to remove any dust.
For a long-lasting finish, apply a coat of primer to the pots. This step will prevent moisture absorption and provide an even base for your chosen paint colors. Once the primer is dry, you’re ready to add hues that will bring your lighthouse to life.
Paint
Selecting the proper paint is crucial for the longevity and aesthetics of your lighthouse. Opt for high-quality, weatherproof acrylic paints that will stand up to the elements. For a traditional look, choose classic white paired with a contrasting color such as red or navy blue for stripes.
1. Begin with a base coat to ensure a smooth surface for additional layers. Allow it to dry completely.
2. Tape off sections if you’re creating stripes or specific designs to keep lines crisp and neat.
3. Apply the paint in thin, even coats to prevent drips and to allow for quicker drying times.
4. After the base layers, add any finer details with a smaller brush, which will bring your lighthouse to life.
Remember to paint in a well-ventilated area and to protect the surface you’re working on with a drop cloth or old newspapers.
Connect the Flower Pots
Adhering the pots securely is crucial to the lighthouse’s stability. Apply a generous amount of outdoor-grade adhesive between the rims of each inverted pot, centring them as you stack to create a tapered effect.
Allow sufficient drying time as instructed by the adhesive manufacturer. For added durability, consider inserting a long dowel through the drainage holes, extending from the base pot to the top, ensuring all pieces are pierced and aligned before the adhesive sets.
This internal support reinforces the structure, especially against windy conditions. Remember that precise alignment during this step influences the overall look, so take your time to adjust each pot until you’re satisfied with the arrangement.
Embellish
Adding character to your lighthouse can be both fun and creative. Think about using small pebbles to create a cobblestone effect around the base or crafting tiny windows and doors from colored paper or felt.
You might consider painting on a faux brick pattern for more detail or affixing a miniature ship’s wheel as a whimsical touch near the entrance. For a nautical flair, wrap rope around the edges of the pots and glue seashells or starfish at strategic points.
Remember, these decorations not only enhance the aesthetic but also make your lighthouse uniquely yours. Use a strong adhesive to ensure these elements withstand the elements if your lighthouse will be outdoors.
Seal
Applying an outdoor sealant is key to ensuring the longevity of your lighthouse. Weather conditions can be harsh on unsealed painted surfaces, so here are some important points to remember:
- Choose a clear sealant that’s labeled for outdoor use to safeguard your artwork against rain, wind, and sun damage.
- Spray-on sealants are user-friendly – simply hold the can six inches away from the surface and apply light, even coats to avoid drips.
- For a sturdier finish, apply multiple thin layers rather than a single thick layer – this method prevents cracking and peeling.
- Allow ample drying time between coats; rushing the process can result in a tacky finish that doesn’t protect as well.
- Pay special attention to sealing the underside edges of the pots and saucers, as these areas are susceptible to water seeping in and causing damage.
By sealing your lighthouse properly, you not only enhance its durability but also maintain its vibrant appearance for seasons to come.
Tips
Choose weather-resistant paint to ensure your lighthouse withstands the elements. Acrylic works well for outdoor projects and maintains its vibrancy.
Opt for adhesive materials such as E6000 or marine epoxy to secure the solar light atop your structure. They bond strongly and resist moisture.
When decorating, consider using nautical themes like anchors or ropes to enhance the seaside aesthetic.
For night visibility, select a high-lumen solar light to cast a bright, guiding glow. If your lighthouse is purely decorative, a lower-lumen light can offer a subtle, ambient effect.
To maintain your creation, regular cleaning with soapy water will keep it looking fresh and prolong the life of the paint and materials.
FAQ
How to make a solar lighthouse?
To create a solar lighthouse, simply stack three or four painted terra cotta pots atop each other, securing them with glue, and finish with a solar light on top that will illuminate automatically in the dark.
How do you make a simple lighthouse for kids?
To make a simple lighthouse for kids, you should place a red cup upside down, draw two parallel stripes with white tape, glue a door shape and two windows cut from black paper where desired, then switch on a tea light and position it at the top of the lighthouse, which is the bottom of the red cup.
What materials are needed to create a solar lighthouse?
To create a solar lighthouse, you need a solar garden light, clay pots, acrylic paint, a paint brush, a round wooden ball, and waterproof adhesive.
Are there specific steps to follow when wiring a solar lighthouse?
Yes, when wiring a solar lighthouse, one must install the solar panels, connect the solar panel to the control system, connect the control system to the battery, and finally, connect the battery to the lighthouse’s light.
How can the design of a solar lighthouse be customized for personal flair?
The design of a solar lighthouse can be customized by adding unique paint colors or designs, incorporating specific lighting styles, and embedding personal symbols or embellishments.
Browse More
 Baking Soda and Vinegar Drain Cleaning: Simple Steps for a Clog-Free Life
 How Long Does It Take to Tile a Bathroom: Your Ultimate Time-Saving Guide
 Smelly Drain: Banish Odors with Easy Fixes
 How to Remove Bathroom Fan Without Losing Your Cool
 How to Remove Bathroom Vent Cover Without Losing Your Mind
Recap