Last updated on
Revitalize your home’s ambiance with intriguing background drawing ideas because these creative yet simple designs can seriously boost the aesthetic appeal of your space.
Looking for innovative background drawing ideas? You’ve hit the jackpot! This article is packed with unique and inspiring concepts that will elevate your artwork to new heights.
From simple yet effective techniques for beginners, to more complex and intricate designs for advanced artists, there’s something for everyone.
Dive in to discover how to transform a blank canvas into a mesmerizing backdrop, with step-by-step instructions and helpful tips to guide you along the way.
Let’s unleash that inner artist and make your drawings stand out.
Stay tuned for the complete solution!
Abstract Geometric Patterns

Diving deep into the captivating world of abstract geometric patterns, let’s explore some fundamental concepts.
First, the harmony in contrast – contrasting colors give your patterns a pop they wouldn’t otherwise have. Second, the elegance of repetition – repeating shapes form an aesthetic rhythm that calms the eye.
Experiment with different geometrical shapes like squares, circles, triangles or polygons. Freeform or precise calculations? Both works great, only remember, symmetry and balance are key.
Facing a creative block? Seek inspiration from architecture, culture, or even nature to find your next captivating pattern.
Finally, don’t shy away from the power of optical illusion. 3D cubes, for instance, can give your patterns an exciting twist!
In this exciting concept of unpredictable predictability, keep in mind – simplicity is powerful. Less is often more; with a few shapes and colors, you can make memorable designs that captivate and inspire.
Sunset At a Beach

Start with vibrant shades of red, orange, and purple to depict the classic brilliance of the sun setting over the horizon. The best way to create depth is to layer colors – darker at the top, gradually transitioning to lighter hues at the horizon. The reflection of the sunset on sea water can be represented by rippled streaks of the same color range.
In your preliminary sketch, focus on three main elements: the sun, the water surface, and the sky. Remember, in a natural scene like this, nothing needs to be perfectly symmetrical or straight.
The sun can be a simple semi-circle peeking from the edge of your canvas, don’t forget to leave a bright area around it to represent the light emission. The clouds can be fluffy with yellowish lining. For the water, use wavy lines that gradually tone down as they reach the shore.
Next, the Sky. It’s the main component and requires careful blend of colors. Gradation of colors can be challenging, start with red at the horizon, blending into orange, then purple and finally deep blue at the top. Don’t worry about perfection – the sky is ever-changing.
Finally, add in a few silhouettes for a realistic touch. These could be palm trees, sea birds, a sailboat, or even a small beach shack. The silhouettes would be solid black, creating a stark contrast that would emphasize the color gradients of your sunset.
Forest in the Fall
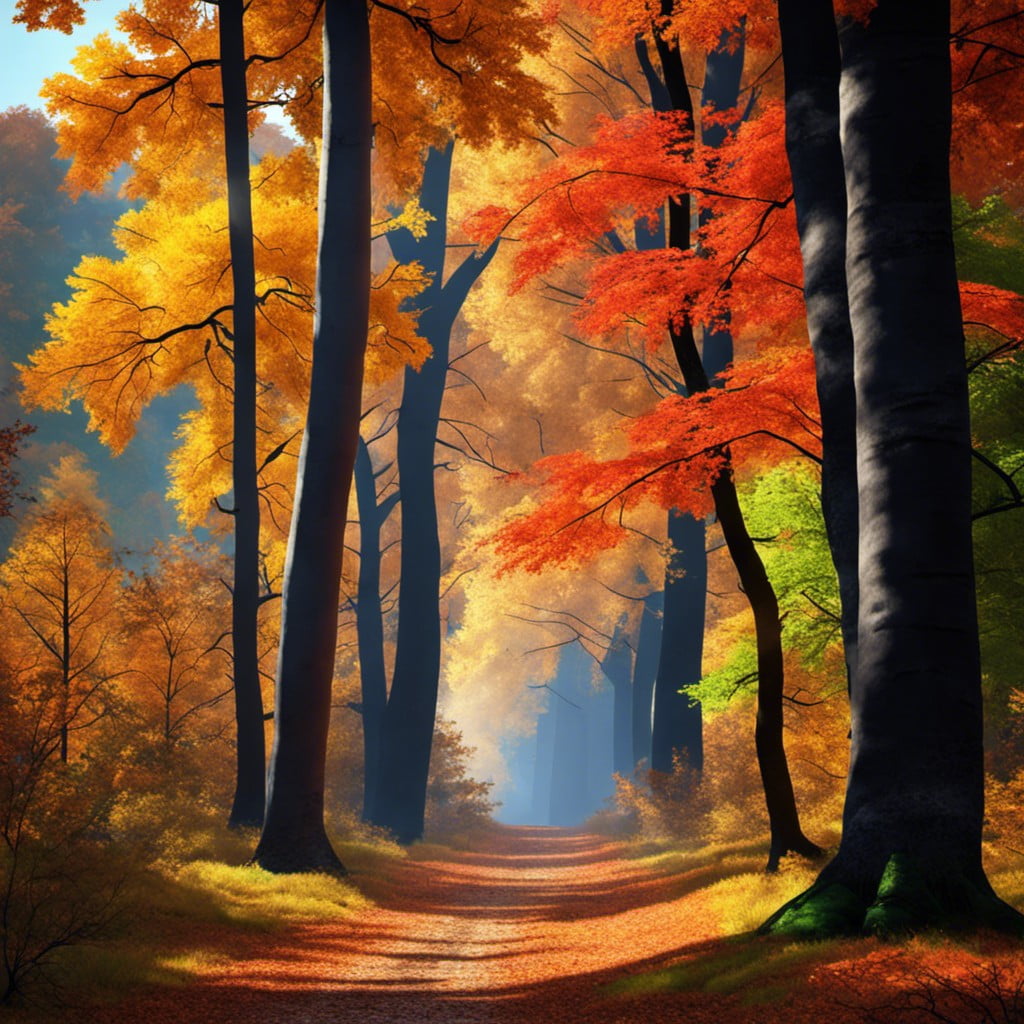
To successfully capture the essence of an autumn forest, consider incorporating an array of vibrant colors, ranging from deep reds and oranges to light yellows and muted greens. Emphasize the pivotal role trees play in the scene; depict them with leaves half-fallen and branches growing more visible.
A carpet of fallen leaves on the forest floor can add an extra layer of depth, texture, and color distinction.
Incorporate wildlife subtly, such as a distant deer or a squirrel busily collecting acorns. Additionally, consider the play of light specific to this season: a softer, golden light filtering through the trees can heighten the sense of tranquillity and warmth that a fall forest encapsulates.
Don’t forget the elements of texture, use short, thick strokes to mimic the roughness of the tree bark and softer, wavy lines for the leaves.
Finally, keep in mind that forests in fall are havens of transitions. Reflect this in your drawing by preserving the balance between elements that are rich in life and those that are letting go, preparing for the winter sleep.
Starry Night Sky
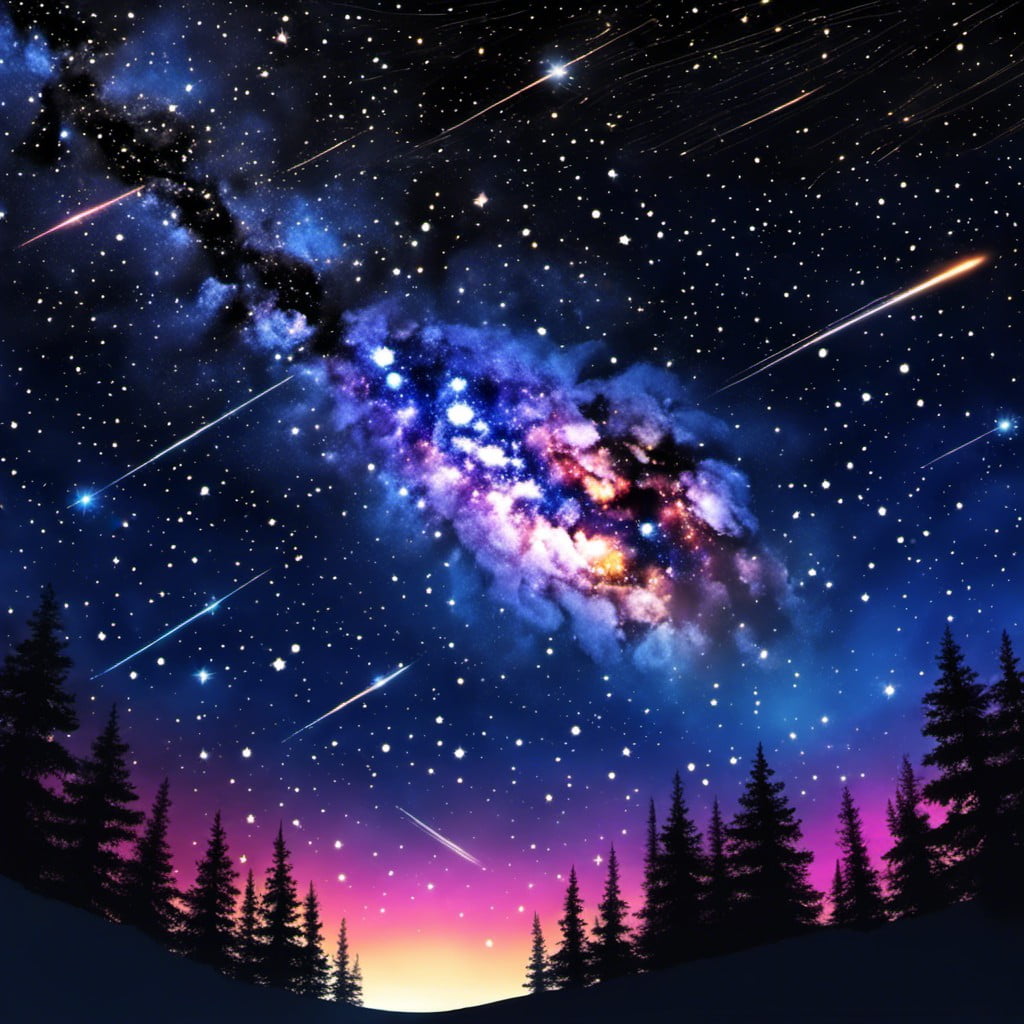
Guided by nature’s wonder and the allure of astrology, creating a stellar-themed space is a dynamic choice. It radiates tranquility and fosters curiosity, bringing the celestial charm of the night sky indoors.
Here are few key considerations for this theme:
- 1. Color Palette: Opt for deep blues and blacks to mimic the nighttime backdrop. Accent with shades of white or silver for stars. Use metallic or reflective paints for an additional spark of magic.
- 2. Star Positioning: Arrange the stars in your preferred constellation patterns. Or, freestyle your star placement for a natural, scattered look.
- 3. Shimmering Additions: Introduce galaxy tapestry, LED strip lights, or glow in the dark decals for a twinkling transformation any time of the day.
- 4. Texture: Wallpapers or textured paints can provide the illusion of depth in your cosmic creation. It adds a layer of complexity, mimicking the unfathomable depth of the night sky.
By combining these elements, you can capture the dreamy aesthetic of a star-studded sky, resulting in a unique and inspiring interior detail.
City Skyline During Twilight
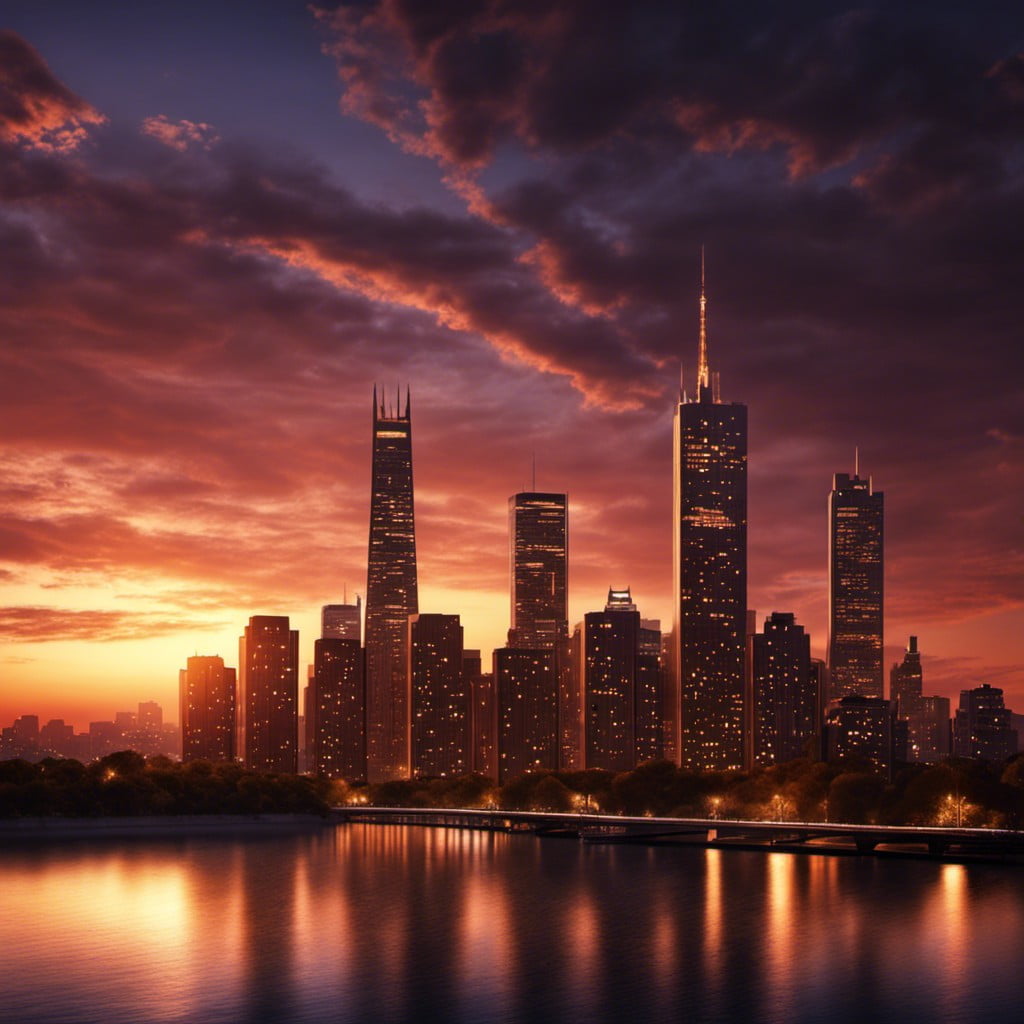
Lend your background a glow of elegance with a city skyline during twilight. This creative concept offers a sharp contrast between the sapphire sky and glistening city lights.
1. Focus on Depth: Incorporate elements at different distances – towering structures in the foreground, sprawling cityscape in the middle, and a mesmerizing twilight in the background. Harnessing this depth will drive a sense of grandeur and expansiveness.
2. Play with Lights: Maximise the twilight setting. Infuse your skyline with an alluring interplay of dark hues and their brighter counterparts. Add hints of fading sunlight reflecting off the buildings, coupled with the burgeoning city lights.
3. Sky: A twilight sky is a feast of colors. Transition from creamy pastels near the horizon, gradually darkening to a rich, blue-black. You could even add a sprinkle of early stars.
4. Stylise Buildings: From simple cuboid skyscrapers to complex architectural marvels, the choice is all yours. Try representing your city’s unique skyline or opt for a more abstract interpretation.
5. Reflections: If water bodies are present, remember the reflections! They could be clear mirror images or rippling distortions, adding another dimension to your background.
Following these points will help you recreate the enthralling spectacle of a city skyline bathed in twilight’s incandescent glow.
Underwater Marine Life

Immerse the page in a captivating spectacle of oceanic allure. Start with the light play on the water surface – a trickling mosaic of blues, whites, and greens. Be sure to feature an array of aquatic creatures – from playful dolphins leaping in the distance to stealthy sharks lurking beneath. Don’t forget about the smaller yet vibrant inhabitants like clownfish, seahorses, and jellyfish.
For flora, consider including coral reefs, diverse in their shapes and colours, which make a perfect backdrop, while seaweeds can sway elegantly, adding movement to your drawing. Sunken treasures, pirate ships, or ancient ruins might also provide intriguing points of interest and a dash of mystery.
Creating depth is crucial in these scenes. Use shading and perspective to convey the vastness of the marine environment. Lighter tones for objects close to the surface and darker ones for the depths enhance the feeling of submersion.
Minimalistic? Focus on a singular object – like a lone whale or an intricate shell. Detailed? Include a thriving ecosystem with multiple species and elements. It all depends on what underwater narrative you want to portray while tailoring it to your own artistic style.
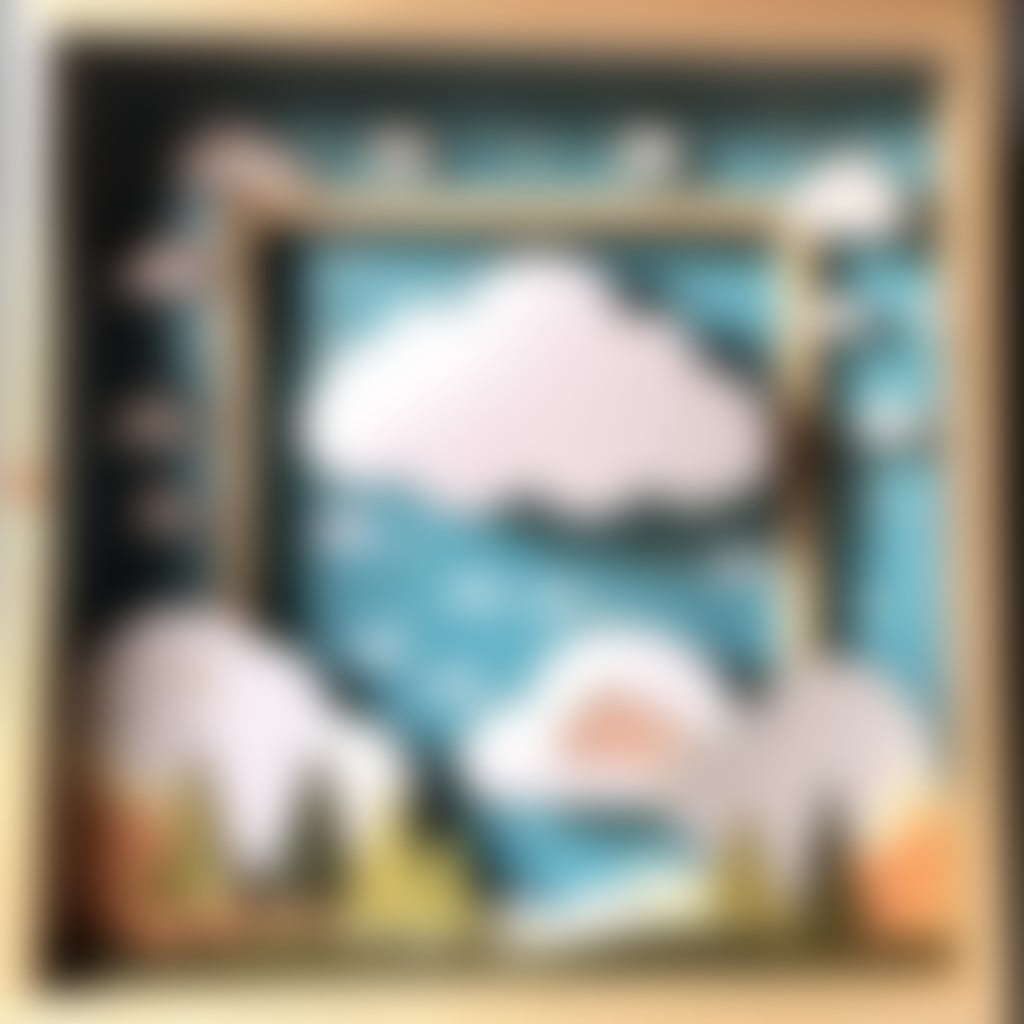
Misty Mountains
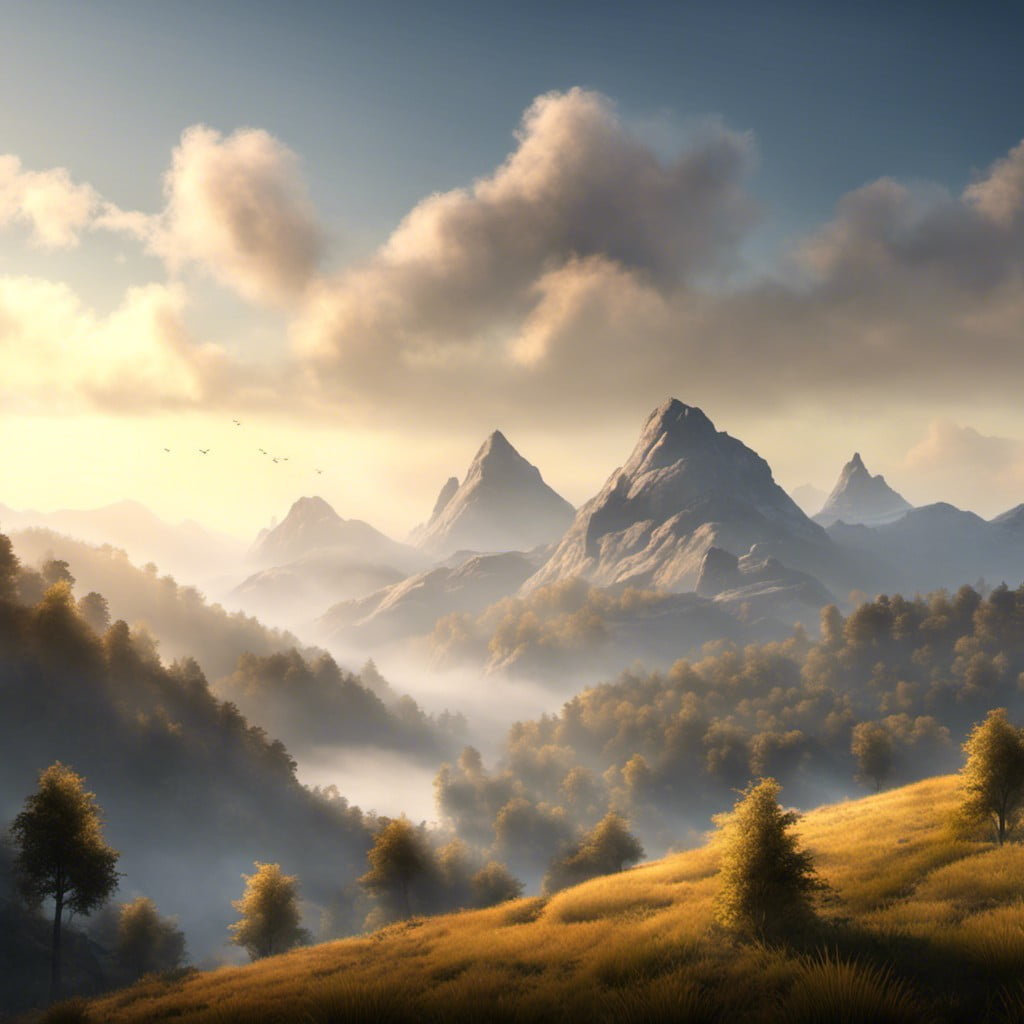
Take advantage of the mystical aura and the artistic challenge that misty mountains offer. Here are some pointers to help you render their grandeur.
1. Start by deciding the time of day, which affords unique lighting scenarios.
2. Choose a vantage point – whether from the base, at an elevation, or simply a bird’s eye view.
3. Sketch out the contour of the mountains, attributing different sizes for depth.
4. Layer various shades of your primary color to create the illusion of distance, lightening hues as they recede.
5. Create mist by blurring areas of your mountains, using less detailed strokes the further away they are.
6. Adding elements like trees or hikers can contribute positively to the scale of your drawing.
These key concepts should start you off on your artistic journey to encapsulate the silent majesty of misty mountains.
Desert With Cactus Silhouettes
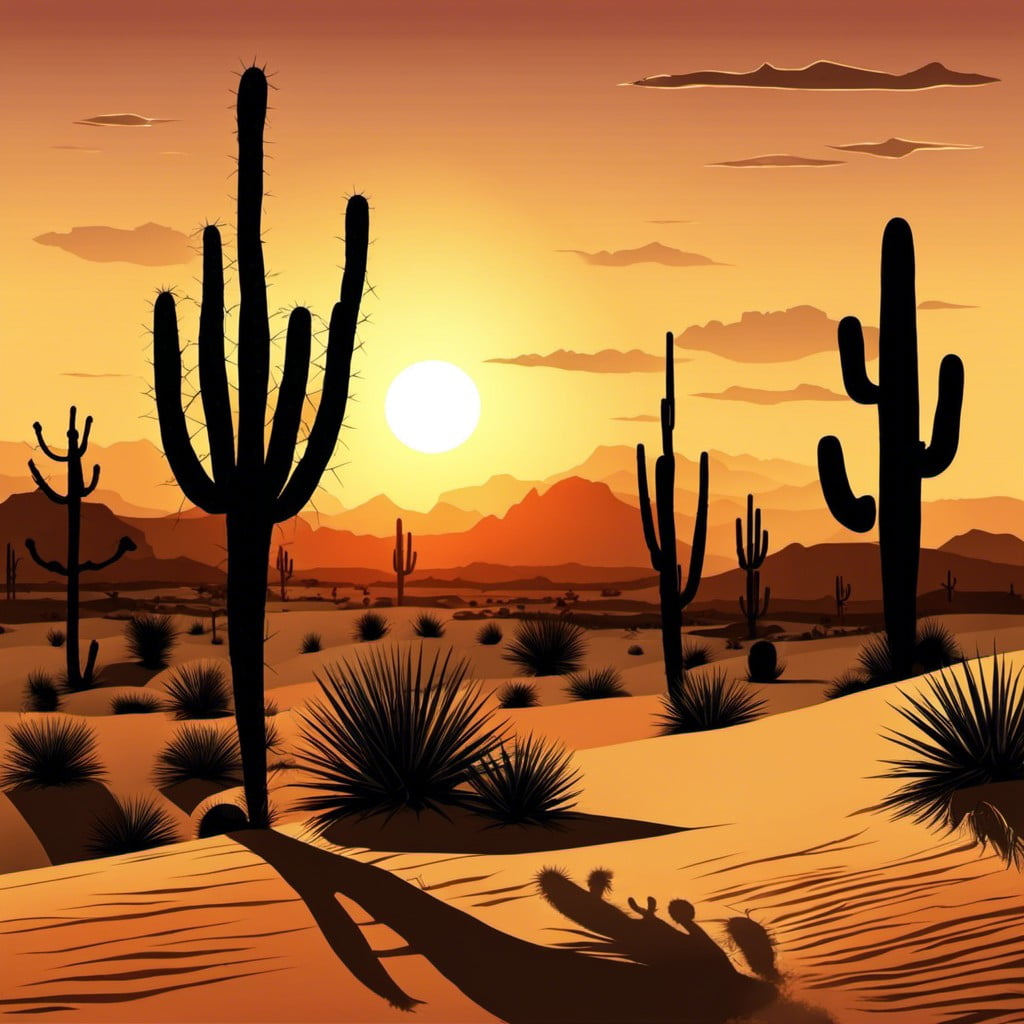
In creating this arid scene, focus primarily on the play between light, shadow, and form. Here’s how to bring this desolate yet beautiful landscape to life:
1. Start with a flat, horizontal sparse baseline to establish the earth – remember, deserts are often sweeping and vast.
2. Coordinate your color palette with sandy hues: think warm tones of yellow, beige, and brown. Dashes of red signifying rock formations can also be dramatic.
3. Tall, stick-like shapes will work as your cacti. Vary their sizes and frequencies for a touch of realism.
4. Use silhouettes to express not only the cacti but also rugged mountain ranges in the background if desired. Remember, less is more in this pared-down scenario.
5. Incorporate darker, elongated shadows leaning away from a light source, usually scorching sun overhead or dipping below the horizon.
6. Add touches of blue in the sky for a stark contrast with the sandy desert below.
7. Finally, depending on the time of the day, incorporate a radiant sun or piercing moon and twinkling stars.
Bamboo Forest

Let’s take an adventure into the serene world of a bamboo forest. Picture tall, sturdy stalks shooting towards the sky, creating an aerial foliage and a patterned play of light and shadow on the ground.
Here are some tips to bring this scene to life on your canvas:
- Begin with drawing vertical lines of varying heights. This will form the raw structure of your forest, giving depth to your perspective.
- Next, draw the leaves. Bamboo leaves are long and slender, almost pointy at the end. Group them together at the top to showcase the high, dense foliage.
- Play with different shades of green to bring out the bamboo stalks’ distinctive colors, ranging from yellow-green to darker forest greens.
- Add shadow and sunlight patches to illustrate the contrast that bamboo forests are celebrated for. Remember, less is more when it comes to illustrating light seeping in from the gaps in the foliage.
- Finally, don’t forget to draw thin, horizontal lines on the bamboo stalks to give them their distinctive look.
Now, your bamboo forest is ready, a piece of nature’s peace and tranquility right in your living space! Next up, a captivating sunrise over a serene lake. Sit tight, as we continue our creative journey.
Flower Field in Spring
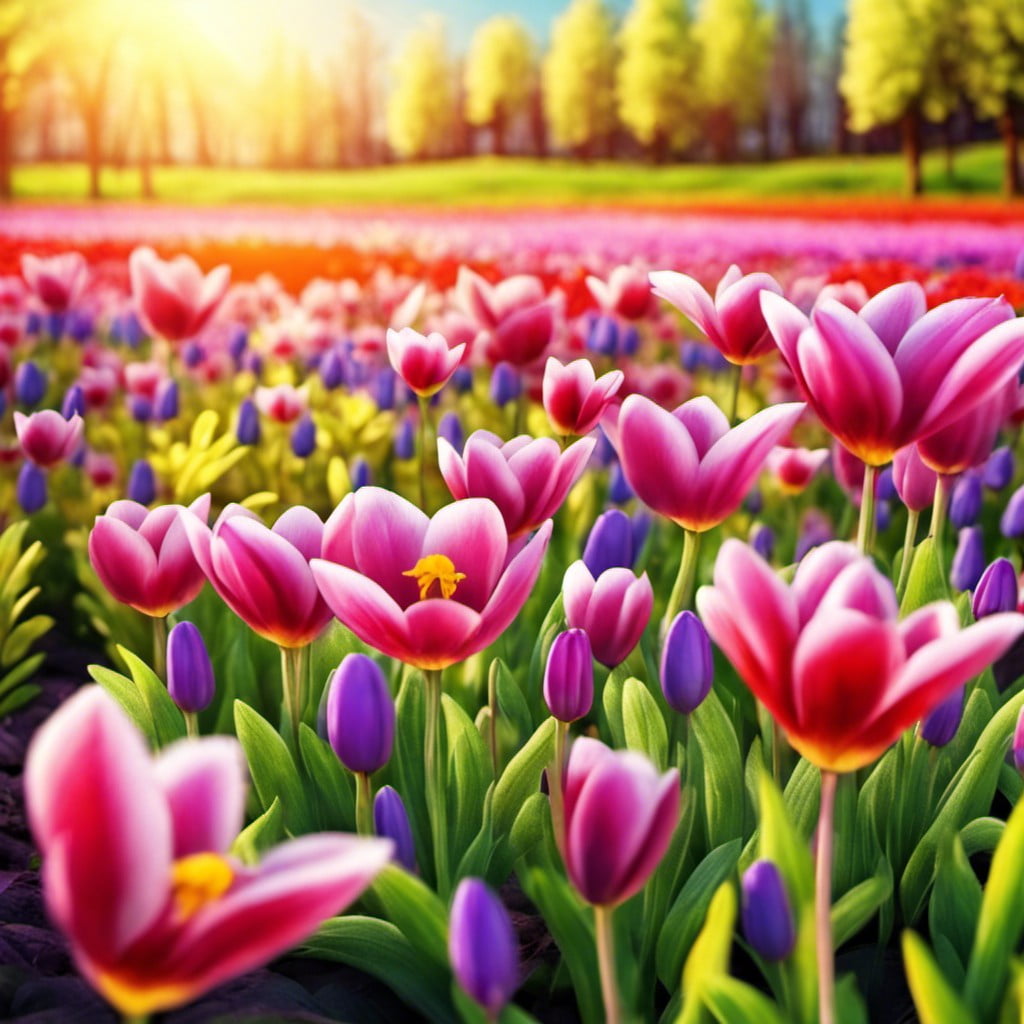
Creating a spring flower field background involves choosing a variety of vibrant blooms. Start by selecting a color palette that includes softer pastels like pinks, purples, and yellows, mirroring the warmth of the season.
In your background, incorporate a variety of flowers, considering their shapes, sizes, and growth patterns. Some may prefer tulips or daffodils, which bloom early in the season. Others may opt for blossoms like cherry or apple, which burst into bloom later in the season.
Remember, the placement of flowers in your background can help create depth. Having larger flowers in the foreground, with smaller ones in the distance, can create an illusion of a vast, sprawling field.
Lighting plays a significant role too. A light source, perhaps a sun softly shining from the corner, can add a warm, inviting atmosphere to your background. Use softer edges and lighter colors to portray the ethereal glow unique to a spring morning.
Experimenting with different weather conditions can add extra flair. A blue sky dotted with fluffy clouds, or even a slight drizzle causing a scattering of dewdrops on the flowers, can further enrich your spring field artwork.
An essential factor to remember, it’s not necessary to depict every single detail. The idea is to capture the essence of a spring flower field, and often, a less detailed, more impressionistic approach can convey this beautifully.
Snow-covered Village

Creating a snow-covered village as your background can transform a plain wall into a stunning winter wonderland. Here’s how to conceptualize and execute this idea effectively:
- It’s essential first to plan your scene. Draw a rough sketch of your village, considering where the houses, trees, roads, and any other elements sit within the snowy landscape.
- Think about the light in your scene. A wintery glow will add depth and warmth to your backdrop. Consider using hues of soft blues, whites, and purples.
- Texture is vital in conveying a realistic snow effect. Mixing painting techniques can achieve this – blending, stippling, or even adding a medium to your paint can provide an authentic snowy texture.
- Details make a big difference in bringing the scenery to life. Add snowflakes, icicles, footprints in the snow, or smoke coming out of the chimneys.
- Remember, less is often more. Leaving areas of white space will add to the impression of a snowy landscape. You don’t have to fill in every section with intricate detail.
Remember, the end-game here isn’t just to paint a picture, but to create an atmosphere that immerses you into the scene. Make each stroke of your brush count.
Jungle With Various Animals

A lion in its sun-drenched savannah might stand as a captivating center. Dense foliage in various shades of green give an unparalleled depth to your scene while exotic birds add splashes of color, let their elegance be caught mid-flight.
The brush strokes used to draw the verdant vegetation should vary in length, thickness and direction to convey the wild, untamed nature of the jungle. Monkeys can be depicted swinging from branch to branch, their movement denoted by curved, swooping lines. Pythons slithering in the undergrowth become an intricate element.
Remember, there’s more to the jungle than meets the eye, it’s brimming with life; each corner holds a different creature with a story to tell. Playing with shadow and light techniques will bring forth a scene in which reality merges with imagination.
Rainy Day in the City
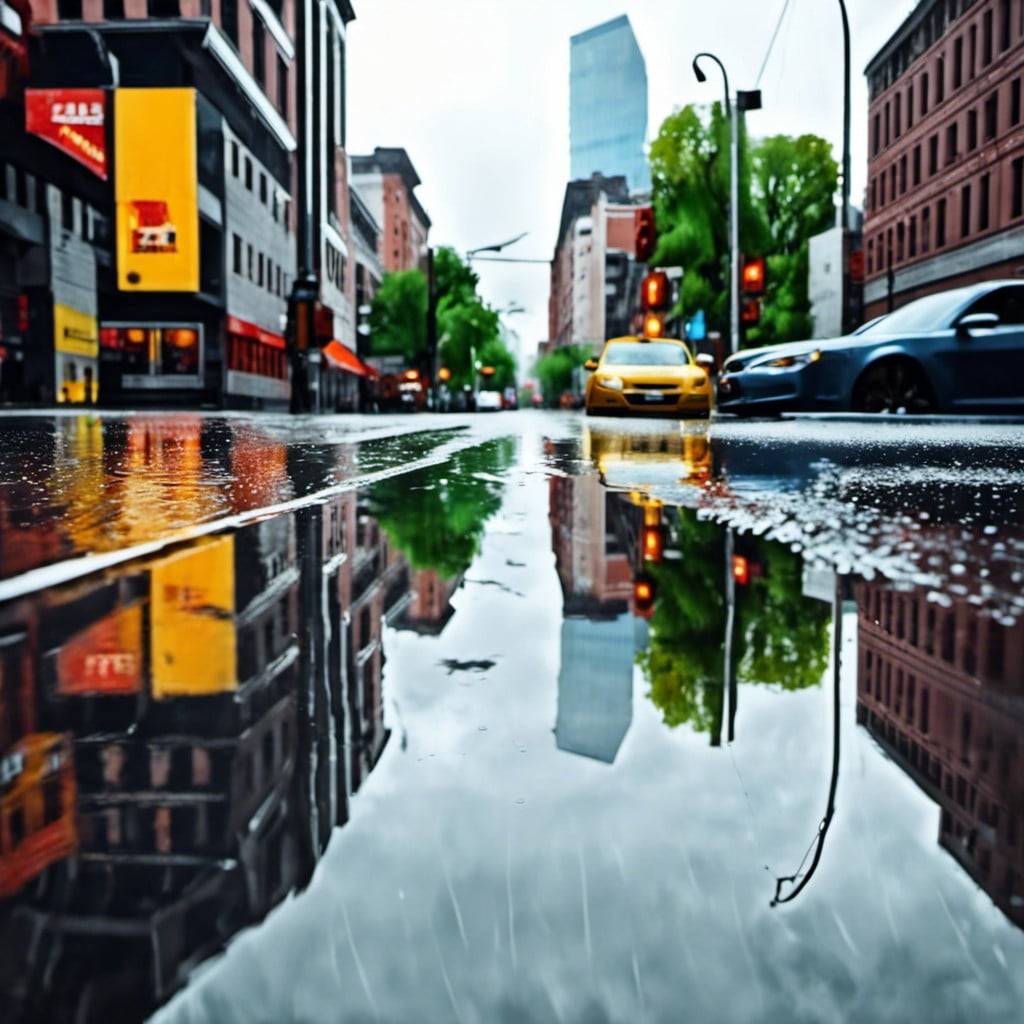
Conjuring up the ambiance of a rainy urban scene can be quite intriguing and atmospheric. To get started with your design:
1. Think in layers: In the foreground, sketch umbrellas dotted along a sidewalk or cobbled street.
2. Midground: Draft high-rise buildings, each window potentially telling a different story.
3. Background: The faint outlines of the city’s skyscape to give depth and perspective.
4. Texture: Light drizzle or heavy rainstorm? That will define how you draw the rain and its interaction with other elements.
5. Color Palette: Grey and blue naturally come to mind, yet a city bathed in neon glows can be a captivating twist.
Remember, whether it’s abstract or realistic, the aim is to capture the energy and rhythm of the city spectral, even on its wettest day. The final thought is your personal touch: maybe an unfolding romance under a shared umbrella or a lone figure reflecting deep thoughts?
Tropical Island

Creating a tropical island setting can transform a room and give it an exotic, vacation-like vibe.
1. Colors: Think of a mix of blues (the ocean and sky), greens (palm trees) and vibrant floral hues, balanced with warm sandy tones.
2. Textures: Incorporate various textures, such as the roughness of tree bark or the smooth feel of seashells.
3. Elements: Use elements such as surfboards, coconuts, tropical flowers, and parrots to create the island atmosphere.
4. Palm Leaves: Paint palm leaves as they create shadows on the beach or captured in the wind.
5. Horizon: It’s where the deep blue sea meets the lighter sky color, a great place to infuse bright colors like the setting sun.
Remember, this is your personal paradise – it should exude relaxation and happiness.
Sunrise Over a Lake
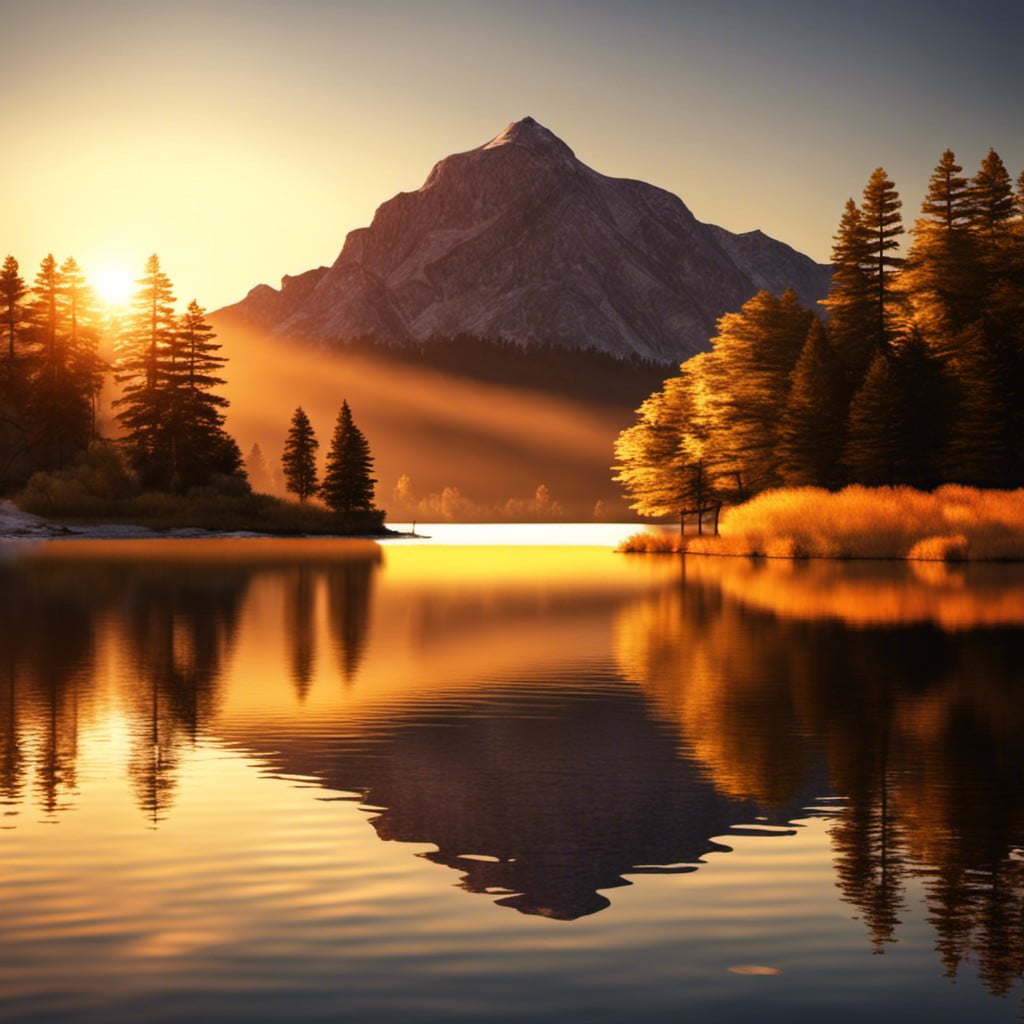
Consider portraying the beauty of early morning tranquility in your drawing. Begin with a calm lake, making sure it’s perfectly mirror-like to emphasize tranquility. Use lighter colors to depict the gentle ripples on the water surface.
The horizon line plays a significant role here – situate it lower on the page to allot more space for the sky, creating a grand impression of nature.
The sky is the focal point of your drawing, capturing the transitioning hues from night’s remnants to the first light of day. You’ll need a smooth blending of colors—inky blue to soft purples, hints of rose, gradually to the warmer shades of orange and yellow. Practise various sketching techniques for different types of clouds— wispy, fluffy, or barely-there — as an integral part of your illustration.
Rendering the sun is an art in itself. A partially visible sun, peeping over the horizon, bring out a promising start for a new day. The reflection of the sun on the water should align directly beneath it. Use lighter and warmer colors for the area surrounding the sun and its reflection, giving the impression of its radiant glow. In fact, reflections add to the scene’s serenity.
Foreground elements like silhouettes of trees, a small dock or a solitary boat can add depth to your image. These should be darker to contrast against the lighter sky and water. The details of these elements are not prominent, but they line the lower edge of the page, creating a natural frame for the scene.
Remember, it’s all about balance – between light and dark, warm and cool colors, detailed and loose strokes. This sunrise over a lake is not just a picturesque scene, but metaphorically also a fresh beginning, which your viewers will surely relate to and admire about your drawing.
Medieval Castle
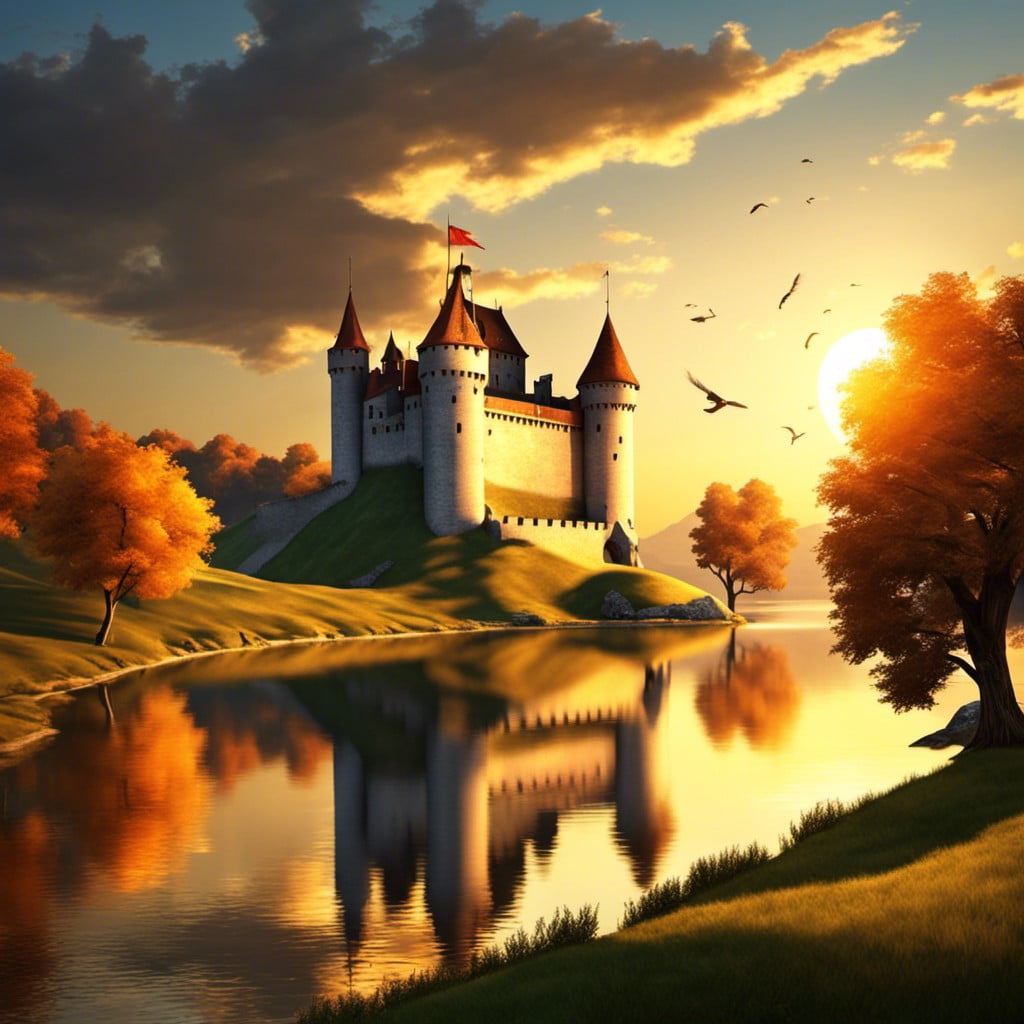
Take the plunge into the rich tapestry of history by incorporating a Medieval castle layout into your background drawing. Its signature elements can instantly grant a touch of grandeur and mystery to your artwork.
Consider following these key points:
- Focus on retaining the classic castle features – robust fortifications like high walls and circular towers, intricate drawbridges, the central keep – all bearing that iconic touch of the Medieval era.
Play with perspectives. Master the bird’s eye view or the lofty perspective showcasing the towering castle to represent dominance.
Include minute elements like flags, flickering torches, or barrels around for authenticity.
Experiment with the weather – a castle beneath a stormy sky could evoke a sense of dramatic allure while one under the warm sunlight could portray peace.
Practice shading; castles provide great opportunities for you to improve given their elaborate structure and variety of surfaces.
Remember, a Medieval castle background is not just about accuracy; it’s about invoking a timeless aura. Let your creativity guide your fortress’ tale. Be patient and enjoy the process.
Space Scene With Planets and Stars

Creating a space scene with planets and stars brings the mysterious expanse of outer space right into your home. It begins with painting your wall a deep shade of black or navy blue, to give the effect of the dark cosmos.
1. Draw spheres of different sizes for planets using chalk. Placement is key, scatter them across the wall.
2. Use different hues of blues, purples, reds, and greens to depict planets.
3. Add rings to some planets using white or light colored paint.
4. Get creative with your stars. Dabble small amounts of white or yellow paint for distant stars.
5. Use a template or stencil for bigger, closer stars.
6. Create galaxies using a mix of bright colors swirled together.
7. Lastly, remember to add contrast to your scene by playing with light and shadow.
Japanese Garden in Sakura Season
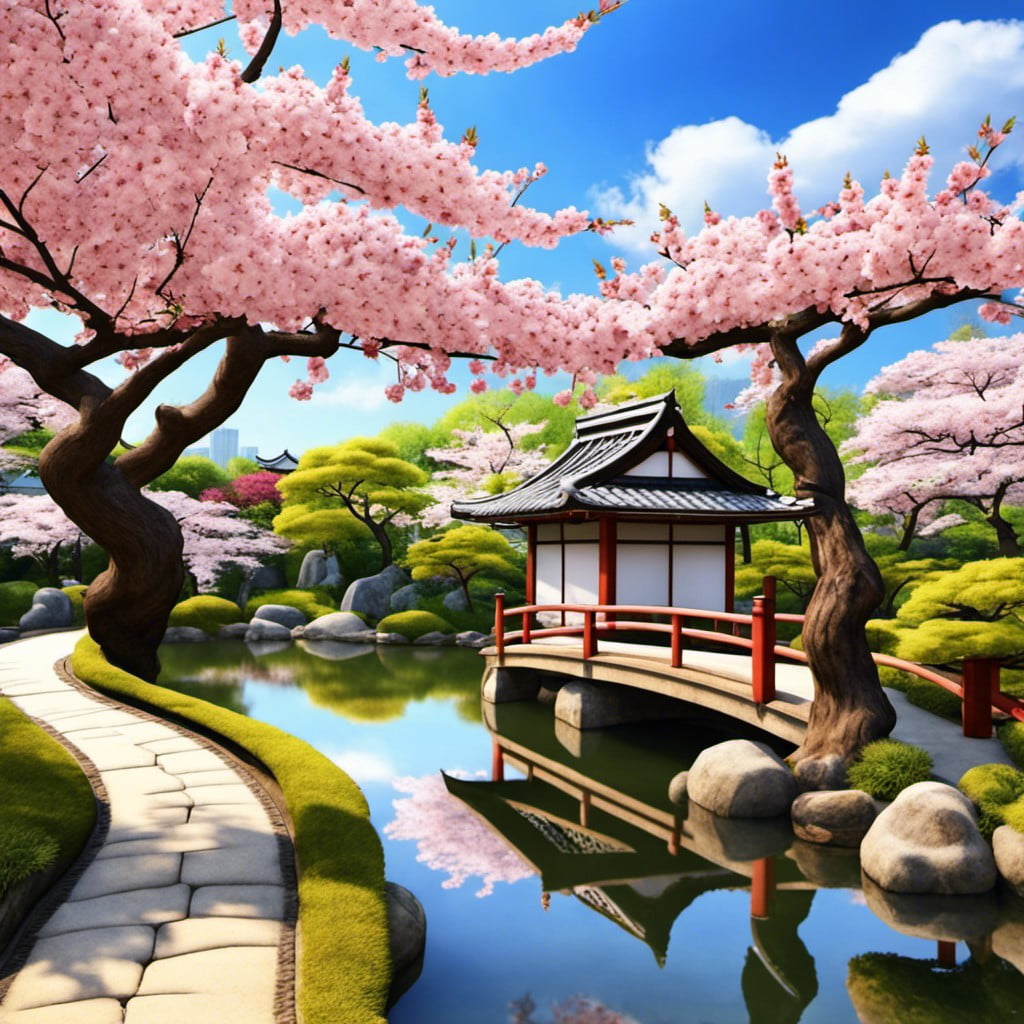
Diving right into how to encapsulate the serene beauty of sakura season in your Japanese garden backdrop, let’s go over some key elements.
1. Cherry Blossom Trees: Nothing signifies sakura season more than a flurry of soft pink cherry blossom trees. These trees should be the focal point of your drawing, dotting the landscape with their ethereal beauty.
2. Koi Pond: For a touch of tranquility and cultural significance, consider depicting a Koi pond, riffle with reflections of the cherry blossoms.
3. Stone Lanterns: Punctuate your garden depiction with traditional stone lanterns, symbolizing illumination and life’s path in Japanese culture.
4. Footbridge: A gracefully arching footbridge over the pond can bring a sense of direction and movement into the scene.
5. Zen Rock Garden: A small section can be dedicated to a Zen rock garden, representing the various islands of Japan.
6. Bamboo Fence: Last but not least, a bamboo fence, the quintessential element of a Japanese garden, helps frame the scene beautifully.
Remember to maintain the harmony and simplistic elegance that Japanese gardens are known for during the enrapturing sakura season. Each element must contribute to this peaceful ambiance.
Sunflowers Field Under the Blue Sky

What’s more enticing than a bright, flourishing field of sunflowers under an expansive blue sky? Let’s guide you through making this vibrant countryside scene come alive.
Choose Your Colors: Warm yellows for the sunflowers, calming blue tones for the sky. Be creative with your choice of colors to add extra flare.
Build Your Base: Start by creating your sky. This is your canvas, so fill it with the shades of blue that inspire you. Keep it lighter towards the horizon for realism.
Sunflower Spectacle: Now for the crux of your masterpiece – sunflowers. Start with rough circles, then add petals, leaving a small space in the middle of each for the seed head. Use varying shades of yellow to create dynamics and depth.
Dimension and Depth: To give the picture depth, add larger sunflowers in the foreground and smaller ones receding into the distance.
Final Touches: Hint at the leafy greens in the background with abstract green strokes. Use thin, dark upward strokes to represent the flower stems.
Creating a sunflower field under the blue sky is delightful, full of life, and a testament to the beauty of nature. So, don’t wait. Step up to your easel and let your imagination fly high over your sunflower field!
Countryside Landscape With a Windmill
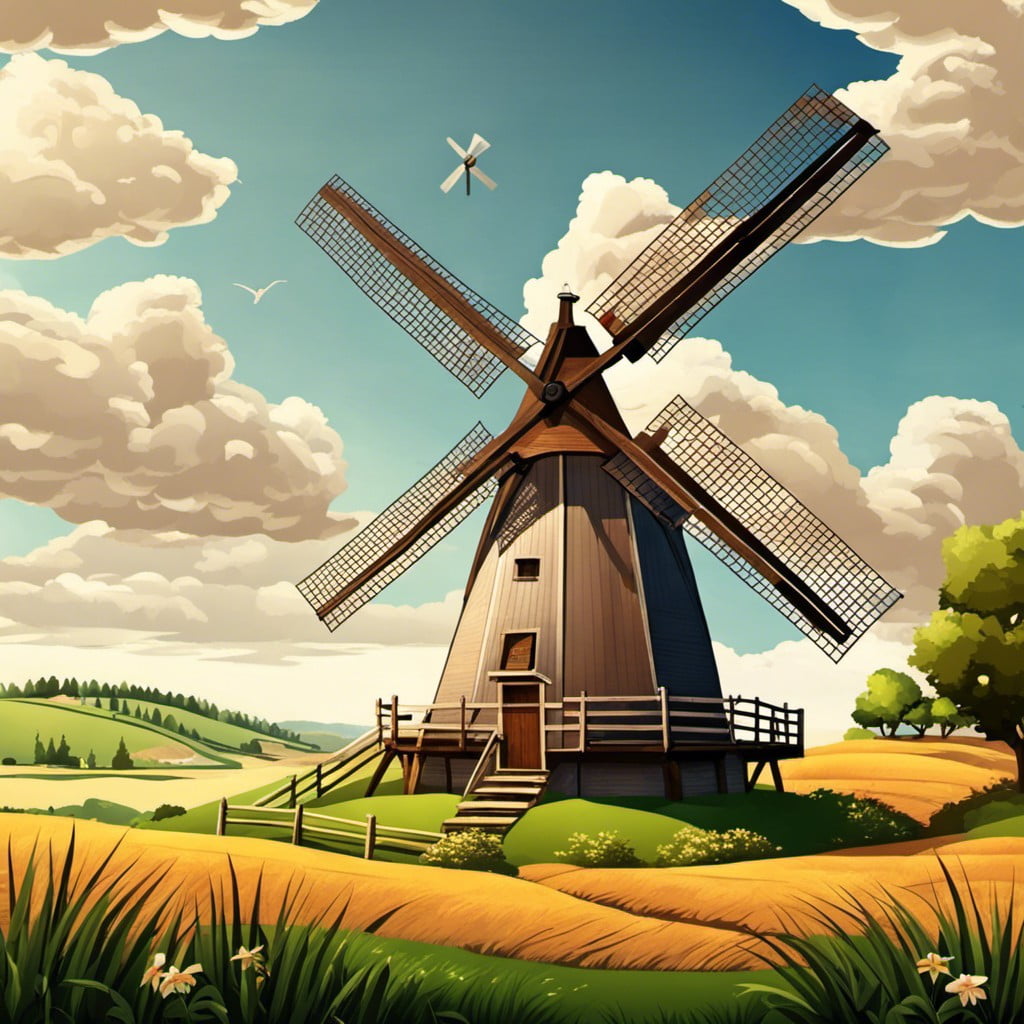
The gentle strokes of greens and blues build the foundation for this artwork – a serene meadow under a clear sky. A windmill, the centerpiece and iconic symbol of the countryside, can be painted with detailed precision or sweeping strokes, depending on your preference.
Various elements can add depth – a sprawling farm field, rusty farm equipment, a delicate stream, or an aged stone wall. These elements provide focal points and direct the viewer’s gaze around your artwork. The sky and cloud formations offer another layer of creativity, from an early morning sunrise to a cloudless afternoon, or a spectacular twilight.
Remember, contrasts between light and shadow will bring vitality while achieving the tranquility inherent in a countryside landscape.
Continue reading:


Recap