Last updated on
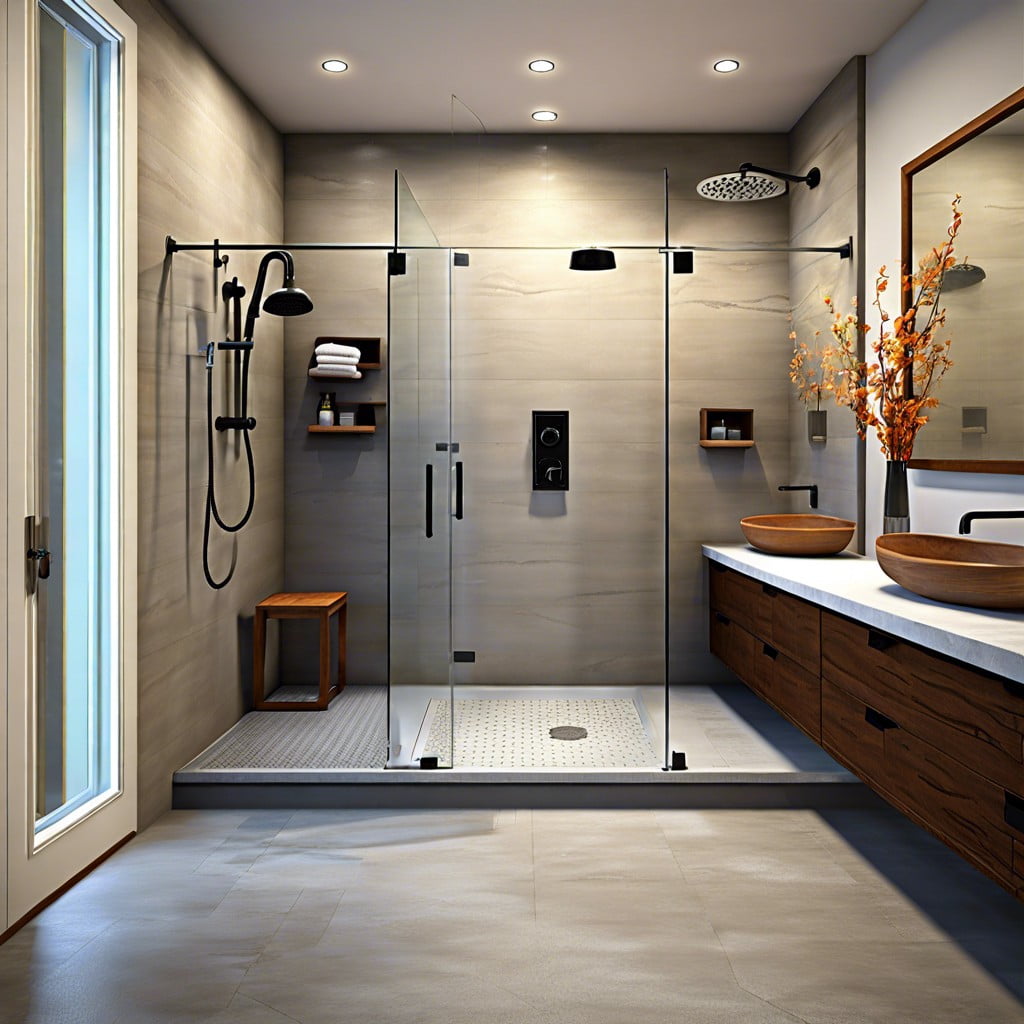
Embrace the elegance and accessibility of a curbless shower on a concrete slab because it can transform a standard bathroom into a sleek, modern wet room.
Key takeaways:
- Benefits of curbless shower: seamless entry, aesthetic boost, easier cleaning, improved accessibility, enhanced resale value.
- Design considerations: slope, drainage, space, materials, style.
- Ensuring mobility access: correct floor slope, non-slip flooring, ample space, supportive features, handheld showerheads, strategic shower controls placement.
- Challenges of building on concrete slab: navigating slope, addressing thickness, dealing with existing plumbing, achieving barrier-free transitions.
- Preparing concrete slab: assess condition, create slope, determine drain location, adjust slab, mark shower’s footprint.
Benefits of a Curbless Shower
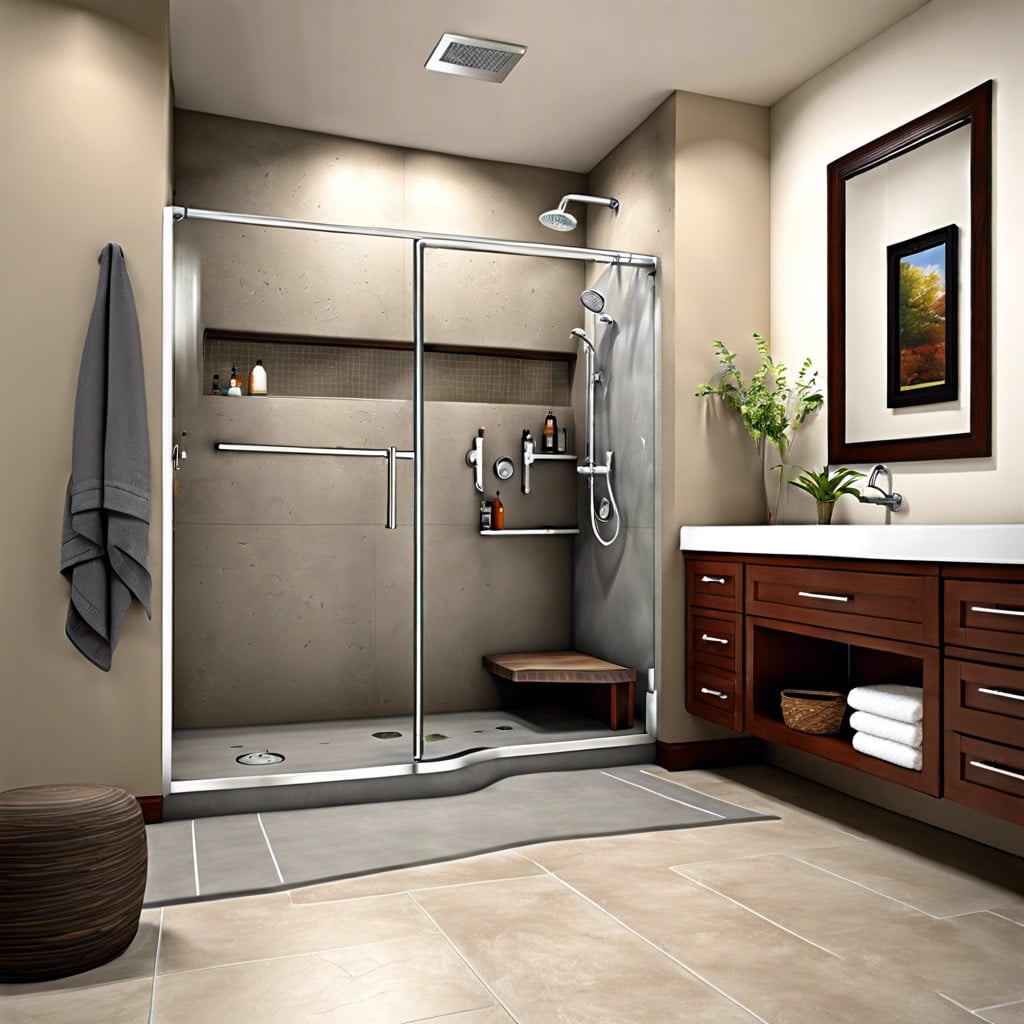
Experience seamless entry; the absence of a threshold makes entering and exiting a breeze, reducing trip hazards for all ages and abilities.
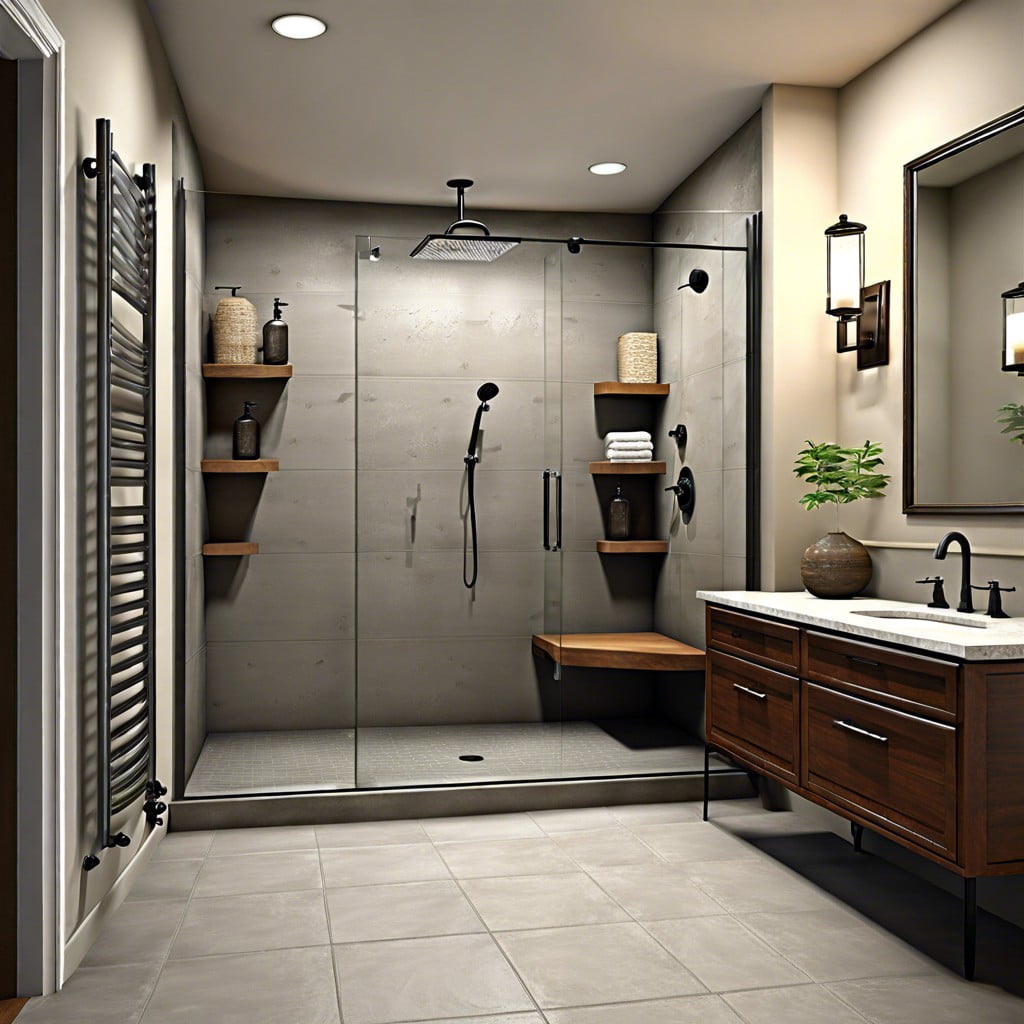
Enjoy an aesthetic boost; the sleek, uninterrupted lines of a curbless shower provide a modern, minimalist look that can make your bathroom appear more spacious and luxurious.
Facilitate cleaning; without a curb to contend with, washing down your shower floor is notably simpler, cutting down on time and effort.
Improve accessibility; curbless designs are ideal for those with limited mobility or who plan to age in place, offering an ADA-compliant solution that does not compromise on style.
Enhance resale value; by incorporating universal design principles into your bathroom, you appeal to a broader audience, potentially increasing your home’s marketability.
Design Considerations for a Curbless Shower On Concrete Slab
When planning your curbless shower, several design elements should be carefully evaluated to ensure a seamless and functional space:
1. Slope: Aim for a gentle but efficient slope towards the drain to prevent water from accumulating or seeping into other areas of the bathroom.
2. Drainage: Select a suitable drain, like a trench or linear option, which complements the shower’s layout and efficiently manages water flow.
3. Space: Consider the overall bathroom space. A curbless shower can make smaller bathrooms appear larger, but adequate room is necessary for a splash zone.
4. Materials: Use non-porous tiles for the shower area to minimize water absorption and consider slip-resistant textures for safety.
5. Style: Maintain a cohesive look with the rest of the bathroom. Frameless glass panels open up the space visually and add a modern touch.
6. Entry Width: Ensure the entrance is wide enough to accommodate all users comfortably, with no obstructions in the entry path.
Ensuring Mobility Access With a Curbless Shower
Creating a seamless transition from the bathroom floor into the shower area significantly enhances accessibility for individuals with limited mobility. Curbless showers offer safety and convenience, allowing wheelchairs and walkers to roll in effortlessly. Additionally, they are beneficial for aging residents who appreciate easy access and a reduced risk of tripping.
Here are practical points to ensure your curbless shower supports all mobility needs:
- 1. Slope the Floor Correctly: Gentle sloping towards the drain prevents water from pooling and makes for an easier wheel-in experience. A slope of no more than 1/2 inch per foot is the standard to maintain both accessibility and safety.
- 2. Non-Slip Flooring: Choose a floor material with a high slip-resistance rating to ensure stability and prevent falls. Textured tiles or slip-resistant coatings offer extra peace of mind.
- 3. Ample Space: Aim for a shower space that’s large enough to accommodate a person using a wheelchair, as well as additional room for assistance if necessary. A minimum of 36×36 inches is recommended, but larger dimensions are ideal.
- 4. Supportive Features: Install grab bars strategically around the shower for added safety. Consider their position and height carefully to be within easy reach for balance and support.
- 5. Handheld Showerheads: A handheld showerhead with an adjustable height can be easily used by someone seated, providing independence and ease of use.
- 6. Shower Controls Placement: Place the controls near the entrance of the shower so they can be accessed without needing to reach across the wet area, minimizing the movement required.
Challenges of Building a Curbless Shower On a Concrete Slab
Navigating the slope for drainage can be a bit tricky when working directly on a concrete slab, as it requires precision cutting into the slab for the proper gradient. This ensures that water flows toward the drain without pooling.
Addressing the thickness of the concrete also presents its challenges. The slab may need to be thickened or structurally reinforced in some areas to accommodate the weight and usage of the shower.
Dealing with the existing plumbing is another consideration. Integrating the new drain location without significant plumbing reroutes is essential to maintain the integrity of the concrete and overall structure.
Lastly, there’s the crucial aspect of barrier-free transitions. Achieving a seamless look while maintaining functionality and meeting building codes can require thoughtful planning and a bit of creativity.
Preparing the Concrete Slab for a Curbless Shower
Before you begin the transition to a curbless shower, a properly prepared concrete slab is crucial. Here are the key steps to ready your concrete base:
1. Assess the current condition of the slab to ensure it’s flat and structurally sound. Any cracks or irregularities may need repair before proceeding.
2. A gentle slope towards the drain is imperative. Use a self-leveling compound to achieve the necessary gradient for optimal water drainage.
3. Determine the location of the drain. Center drains and linear drains each have unique preparation methods, so choose your position wisely.
4. After mapping out the drain and shower area, adjust the slab accordingly. This often involves cutting into the concrete to reposition plumbing.
5. Mark your shower’s footprint. Clearly defined boundaries will guide the subsequent waterproofing process.
6. Finally, clean the surface thoroughly to remove debris. A clean base will ensure that waterproofing materials adhere properly.
Following these foundational steps ensures a solid and reliable groundwork upon which the rest of your curbless shower construction can confidently build.
Waterproofing Techniques for a Curbless Shower Pan
Proper waterproofing is crucial to ensure the longevity of your curbless shower, preventing water damage and mold growth. Here are some key points to consider when sealing the deal on waterproofing:
- Membrane Installation: Use a flexible waterproofing membrane across the shower pan area. It acts as a barrier, keeping water in the shower and away from the surrounding structures.
- Liquid Waterproofing: Apply multiple layers of liquid waterproofing products over the concrete. They create a seamless surface that water cannot penetrate.
- Sealant around Drains: Pay special attention to the shower drain, utilizing a sealant that provides a tight, leakproof connection between the drain and the waterproof membrane.
- Overlapping Seams: If you’re using sheet membranes, ensure the seams overlap by at least 2 inches and are fully sealed to prevent water seepage.
- Test for Leaks: Before tiling, conduct a flood test. Block the drain and fill the shower base with water to ensure no leaks are present.
By focussing on these techniques, you can confidently achieve a watertight curbless shower pan, ready for the finishing touches.
Choosing the Right Waterproofing Materials
Selecting appropriate waterproofing materials is crucial to maintain the integrity of your curbless shower. Typically, you’ll encounter three main options: liquid membranes, fabric sheet membranes, and foam waterproofing systems.
1. Liquid Membranes:
- Easy to apply; they can be rolled or brushed onto the surface.
- Form a rubbery coating, which is great for odd shapes and corners.
- Require careful application to achieve uniform thickness.
2. Fabric Sheet Membranes:
- Come in rolls, similar to wallpaper, and are applied to the floor and walls.
- Provide a reliable seal but need to be cut and tailored for a snug fit.
- They have to be installed with recommended adhesives to ensure full coverage.
3. Foam Waterproofing Systems:
- Include foam backer panels that attach to the walls and floor.
- Integrated options offer a pre-sloped base for easier installation.
- Highly durable and create a strong barrier against moisture.
When choosing, consider the substrate compatibility, ease of installation, and the product’s rating for moisture exposure, ensuring it meets industry standards for tiles. Always refer to manufacturer guidelines to align with your specific shower construction for a successful curbless shower installation.
Importance of an Experienced Contractor for Building a Curbless Shower
Selecting an experienced contractor is crucial for realizing your curbless shower dream effectively. Such professionals bring invaluable insight into drainage gradients, ensuring your floor slopes correctly to prevent water accumulation. Their expertise is also paramount in handling the complex task of integrating waterproofing systems within the concrete slab.
They’ll navigate the nuances of local building codes, assuring your project’s compliance and safety. Remember, a seasoned contractor will save you from costly mistakes and unnecessary renovations down the line by getting it right the first time. When choosing, look for a portfolio of past work, positive client testimonials, and relevant licenses or certifications. Their mastery could be the difference between a stylish, functional bathroom and a problematic project.
Receiving Additional Information and Resources On Curbless Showers
For those seeking to expand their knowledge about curbless shower installations:
- Consult the National Kitchen & Bath Association (NKBA) guidelines for shower construction standards.
- Review the Americans with Disabilities Act (ADA) requirements for accessible design if applicable.
- Visit home improvement websites and forums for community advice and visual inspiration.
- Check out manufacturer websites for installation videos and technical support.
- Look into DIY workshops at local hardware stores which may offer hands-on learning opportunities.
- Read building code regulations specific to your area to ensure compliance.
FAQ
Can I use my concrete slab as my shower floor?
Yes, you can use your concrete slab as a shower floor, but it’s crucial to use a shower mat for safety due to the slippery nature of wet and polished concrete.
Can you have a walk in shower with concrete floor?
Yes, it is indeed possible to have a walk-in shower with a concrete floor, albeit the installation process can be somewhat more labor-intensive.
How much depth do you need for a curbless shower?
For a curbless shower, the recommended minimum depth is 36 inches, although 30 inches is the standard absolute minimum depth requirement.
How do you waterproof a concrete slab for a shower?
To waterproof a concrete slab for a shower, apply a specifically designed concrete primer for waterproofing evenly on the shower floor with a brush or roller to create a strong bond with the waterproofing membrane.
What is the best method to create a non-slip surface on a concrete shower floor?
The best method to create a non-slip surface on a concrete shower floor is by applying a layer of non-slip concrete sealant.
How do I install a drain in a curbless shower with a concrete slab?
To install a drain in a curbless shower with a concrete slab, first cut a hole in the concrete, then place and align the drain, attach it to plumbing lines, seal around it using a waterproof membrane, and finally smooth the area with concrete or floor leveling compound.
What considerations should be made for maintaining a concrete floor in a curbless shower?
Maintaining a concrete floor in a curbless shower requires considerations like sealing it regularly to prevent water damage, clearing standing water to avoid stains, and using non-abrasive cleaners to prevent surface damage.
Browse More
 Baking Soda and Vinegar Drain Cleaning: Simple Steps for a Clog-Free Life
 How Long Does It Take to Tile a Bathroom: Your Ultimate Time-Saving Guide
 Smelly Drain: Banish Odors with Easy Fixes
 How to Remove Bathroom Fan Without Losing Your Cool
 How to Remove Bathroom Vent Cover Without Losing Your Mind
Recap