Last updated on
Because their versatility encourages endless creativity, deep box frames with glass endow your home with a unique elegance and sophisticated designer touch.
Dive into the world of deep box frames with glass, an artistic and stylish way to showcase your cherished items. These versatile frames are not just for displaying photos; they can be transformed into 3D art pieces, shadow boxes, or even miniatures of your favorite scenes.
This article will guide you through innovative ideas to utilize these frames to their full potential, adding a unique flair to your home decor. From arranging your favorite collectibles to creating a stunning display of pressed flowers, you’ll find all the details here to inspire your creativity.
Beach-themed Deep Box Frame With Sea Glass
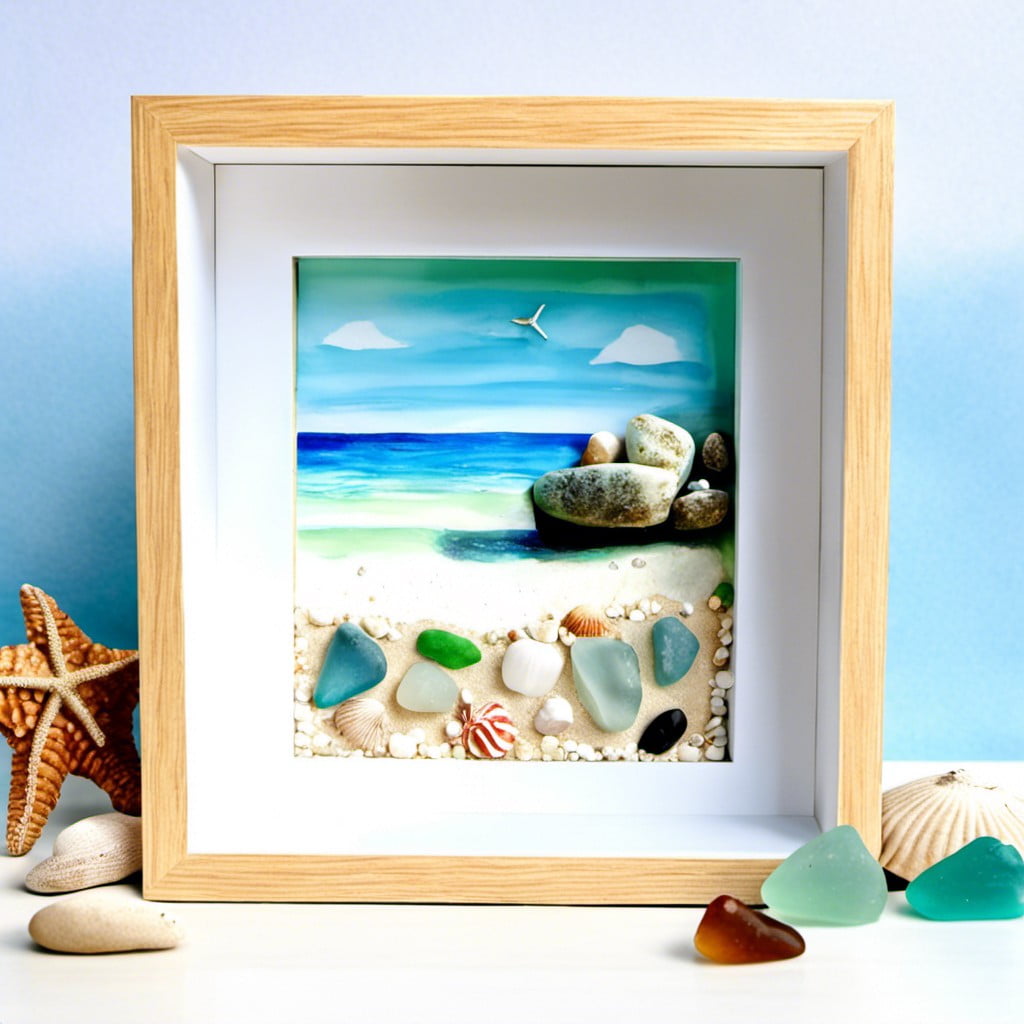
For that coastal vibe year-round, a beach-themed deep box frame is a fantastic choice.
Start with a selection of sea glass, with varied hues all carrying a touch of the ocean’s mystery. Carefully arrange these evocative pieces across a sand or aqua background in a fashion that conjures the randomness of an ocean-tossed beach.
Incorporating other beach elements augments the seaside appeal. Consider small seashells, tiny starfish, or sand dollars. Even a small message-in-a-bottle could add a unique twist. Ensure each item preserves its individuality while contributing to the sea-inspired aesthetic.
Remember, the beauty of such a frame lies in its abstract nature. There’s no need for perfect arrangements or symmetrical designs. Let the elements mimic the organic randomness of the sea and beach. Causes the viewer to drift into a gentle reverie of a walk on the shore.
While positioning your elements, balance is key. Colors should flow together, while the smaller and bigger elements shouldn’t cluster together. Create waves of interest across your design, leading the viewer’s eye on a leisurely, tranquil journey.
Finally, don’t forget about the frame. A distressed white or faded blue would tie the whole piece together, reminding viewers of sun-bleached driftwood or soft ocean waves.
This tranquil artwork is deceptively simple, but with a little thought, it can bring the calming rhythm of the beach right into your home, no matter where you may live.
Family Picture Collage in Deep Box Frame
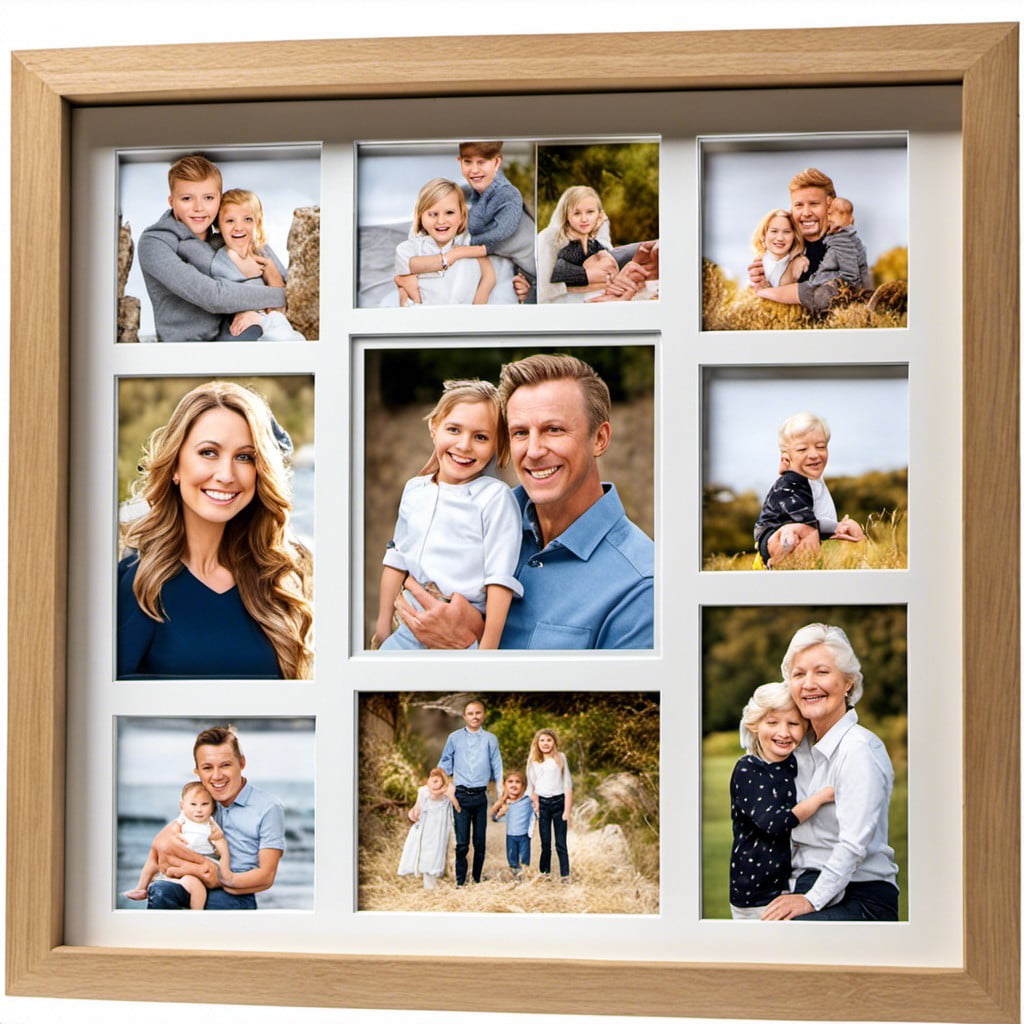
Creating a collage of your favorite family photographs adds a personal touch to your living space. To construct this personalized artwork, firstly, pick a variety of photos representing different moments of your family’s journey. Try a blend of candid, posed, black and white, or colored pictures to add depth to your collage.
For a cohesive look, use photos with similar themes or color schemes. For instance, choosing holiday snaps or pictures all featuring the same backdrop can tie the display together.
To arrange the photographs inside the box frame, there are several approaches to consider. You can either neatly align them in rows or opt for a more abstract configuration. Alternatively, layer your pictures to give your collage a 3D effect by placing the photos at varying depths within the frame.
Don’t forget to include small keepsakes like tickets or trinkets to complement the photos. Positioning these in between the pictures adds an extra element of surprise to your collage.
Finally, be sure to pause and step back once in a while during the arrangement process. This gives a better perspective on how the composition is coming along and helps you make necessary adjustments.
Shadow Box With Vintage Jewelry
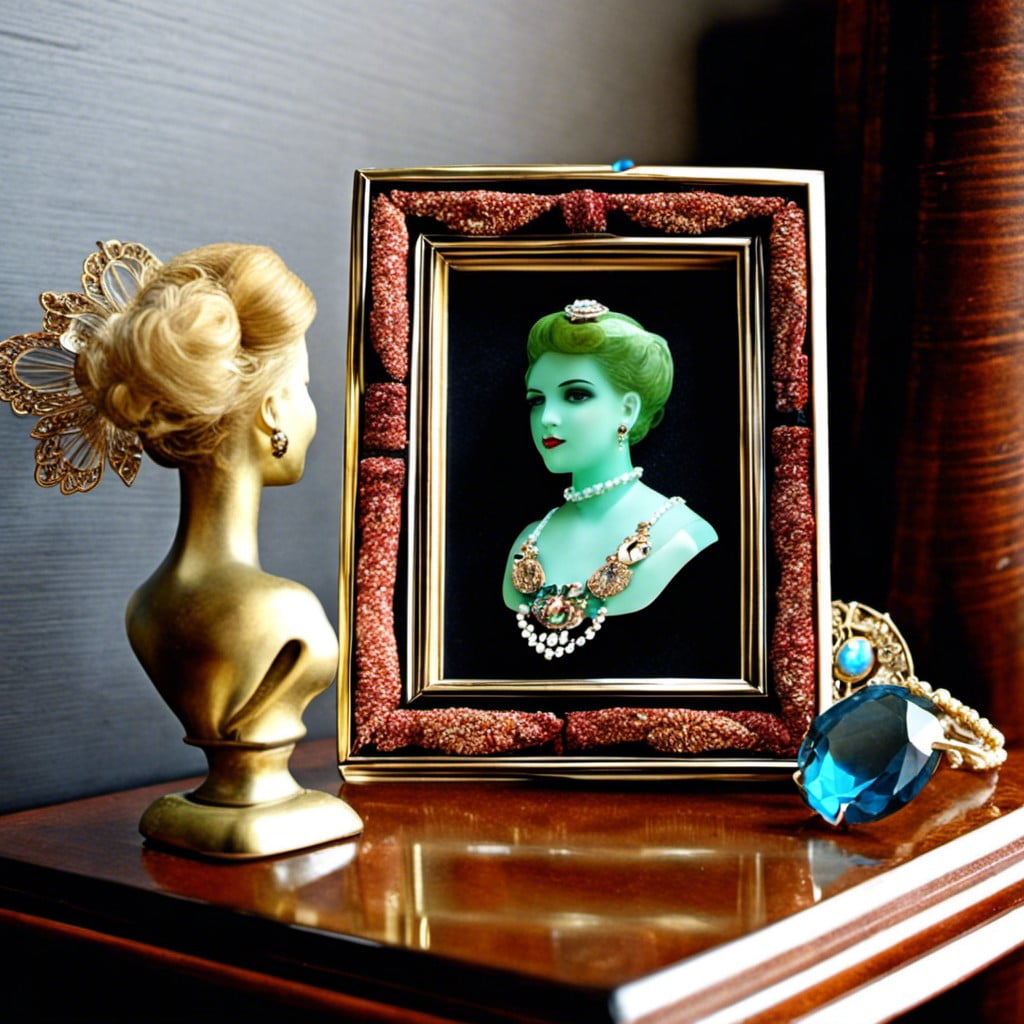
Creating a shadow box with vintage jewelry helps preserve these nostalgic pieces while also making for a visually striking display. Here are a few points to make the project an absolute success:
- Gather your vintage jewelry: The first step in setting up your shadow box is collecting all the vintage jewelry pieces you want to display.
- Sort by Appearance: Organize the items by size, color, or style to create a visually pleasing arrangement.
- Secure your Pieces: Affix every piece securely to the backboard using strong adhesive or decorative pins to ensure they do not move about in the box.
- Arrange with Care: Display larger pieces at the back and smaller in front for an impactful layered look.
- Frame and Display: Once satisfied with your arrangement, carefully close up the box frame, ensuring the glass is clean on both sides, and it’s ready to display.
Remember, your shadow box frame’s purpose is not just to store, but to tell a story through your vintage jewelry.
Memory Box With Baby Keepsakes
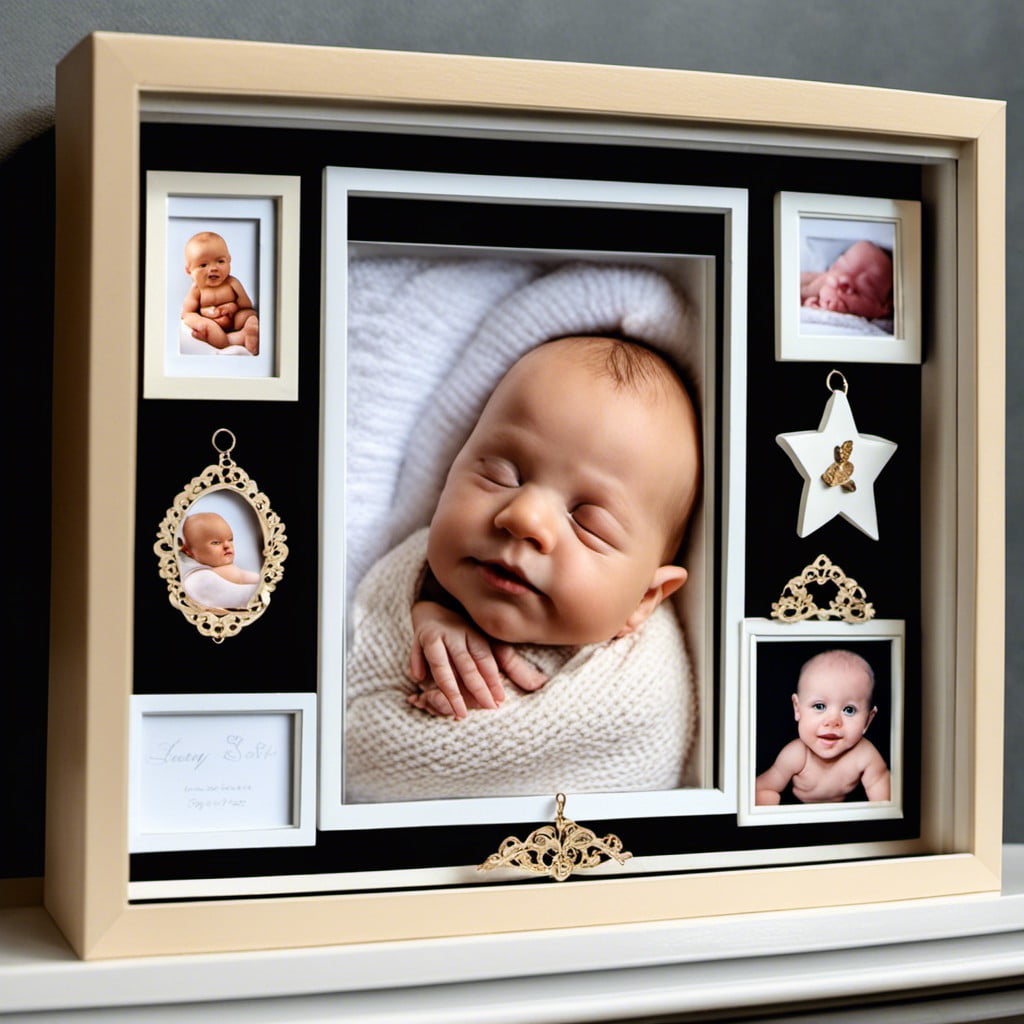
One charming way to eternalize the first stepping stones of your child’s life is by gathering them in a clear glass deep box frame.
- First, gather treasured trinkets like the hospital bracelet, ultrasound image, first booties, locks of hair, or birth announcements.
- Lay out the items on the back panel of your box frame to decide on the positioning before securing them.
- Consider adding tiny labels or short notes next to the items. It not only reminds you at a glance the milestones but also becomes a unique storytelling device to the viewers.
- Use a glass fronted deep box frame. It safeguards the precious keepsakes and also adds depth, propelling every item to stand out.
Remember, this box is not merely inanimate things behind a glass pane. It’s filled with memories that resonate with the joy of your child’s first milestones. Gaze on it, and let nostalgia of those tender moments wash over you.
No need for artistry here; the charm is in those cherished mementos begging to tell a story. Enjoy the process, capture precious moments and let the keepsake box spark conversations for years to come.
Wine Cork Display in Deep Box Frame
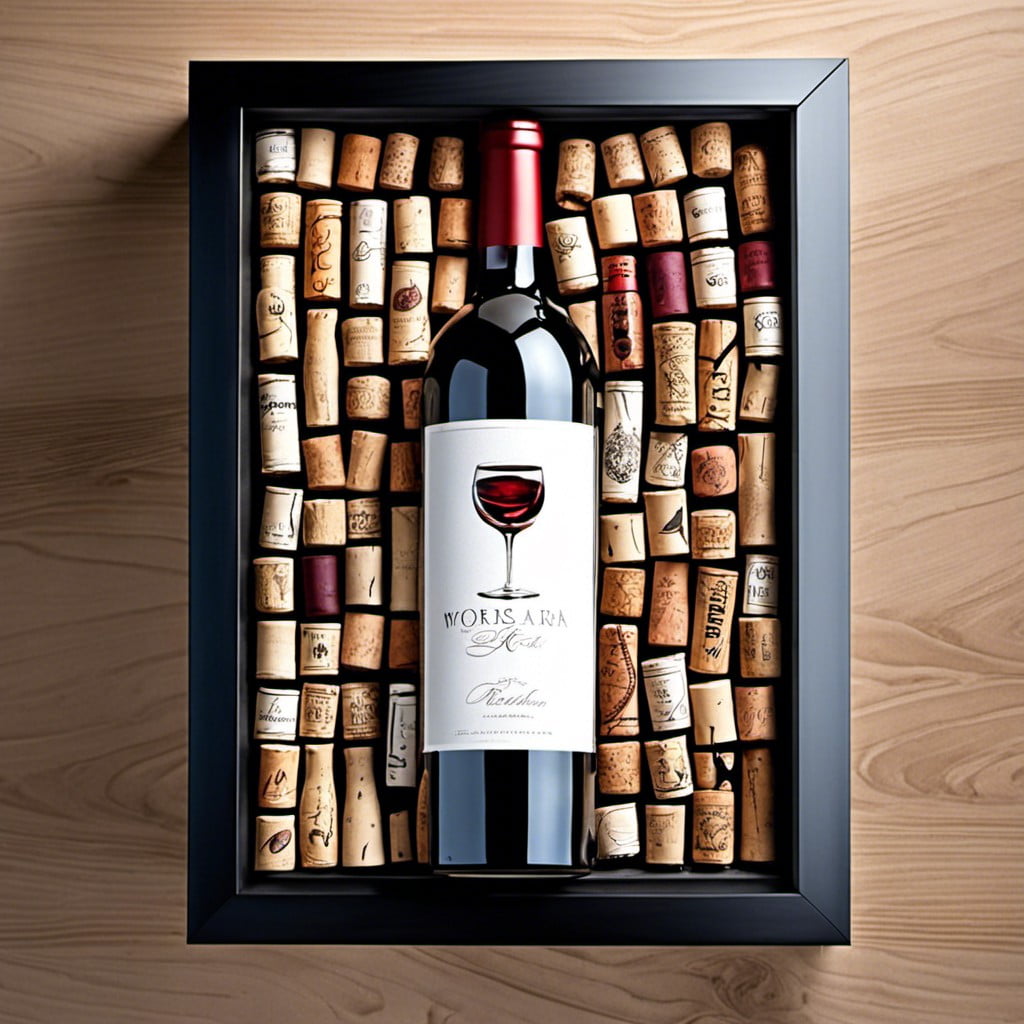
Gather a collection of wine corks from occasions you wish to memorialize, or simply from your favorite wines. Arrange these corks inside a deep box frame. The beauty of this concept lies in the versatile design possibilities.
Consider these ideas for your arrangement:
- Place the corks randomly for an eclectic look, or align them neatly for a more refined result.
- Mix different cork colors and designs to add visual variety and interest.
- The corks can be laid flat or you can show the ends to highlight brands or designs.
- For a fun personal touch, write the date or event on each cork.
- If space allows, you can add miniature bottles or wine-related trinkets.
To install, simply use glue or double-sided tape to attach the corks to the back panel of the frame.
This display effortlessly brings personality and warmth to any space. Plus, it’s a delightful way to walk down the memory lane. Just glance at the frame and remember the great times shared over each bottle.
Dried Flower Arrangement in a Glass Box Frame
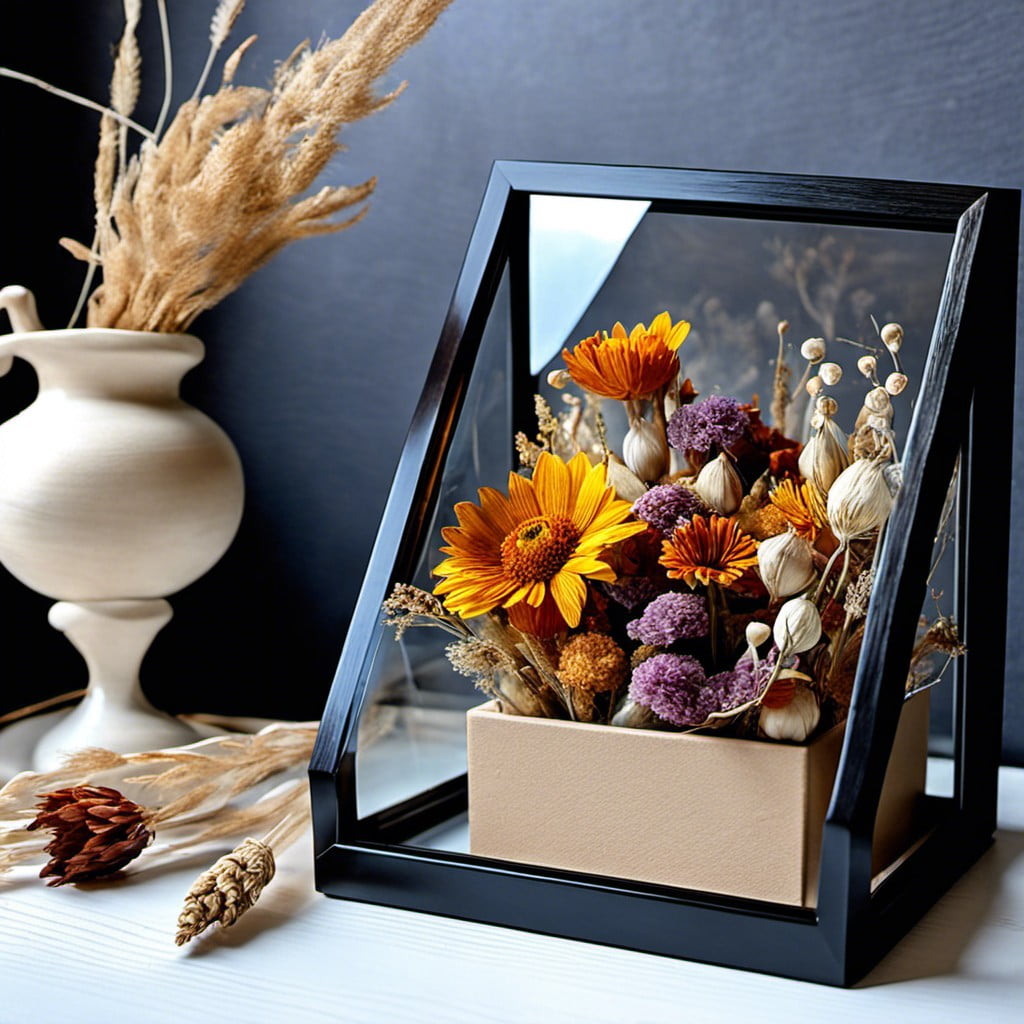
With a plethora of petal hues to pick from, there’s an entirely personal palette you can play with. Start by selecting flowers that hold sentimental or aesthetic value. Roses, lavender, and daisies are among the favorites with distinct shapes that retain their charm even when dried.
Ensure to dry out the flowers properly before arranging them. It’s important to retain the color and structure. For this, press them down with heavy books for about a week. Once they’ve completely dried, arrange them on the box frame’s backboard. Experiment with different designs until you’re satisfied with the layout. A mix of colors, sizes, and shapes adds an intriguing dimensional aspect.
Remember, less is often more. Don’t overload the frame, as it might make it difficult to appreciate individual elements. Add any other sentimental items, such as letters or pictures, to enhance the story. Finally, attach the glass carefully, and you’ve created a visual memory with lasting elegance.
Miniature Artwork Display in the Box Frame
Creating a miniature artwork display in a deep box frame introduces a unique dimension to your wall art. Here’s a simplified way to execute this project effectively:
1. Select Artwork – Focus on tiny paintings, illustrations or even photo prints. They should sufficiently fit within the frame and create an eye-catching display.
2. Plan Arrangement – Not all pieces need to be the same size or shape. Play around with different layouts, such as asymmetrical groupings or grid-like arrangements.
3. Frame Choice – Pick a deep box frame that complements your artwork. The depth will give a 3D effect, letting the art pop.
4. Mounted or Floating – You can either mount your pieces on the backing or use a small amount of adhesive to make them appear as if they’re floating. Both can provide a visually interesting display.
5. Keep It Simple – Avoid crowding the frame. Let each piece breathe and have its moment.
6. Lighting – The beauty of a glass box frame is its reflective property. Ensure the frame is placed somewhere it can catch natural or artificial light for maximum impact.
Remember, this project is entirely customizable. Feel free to add personal touches to make it reflective of your style and character.
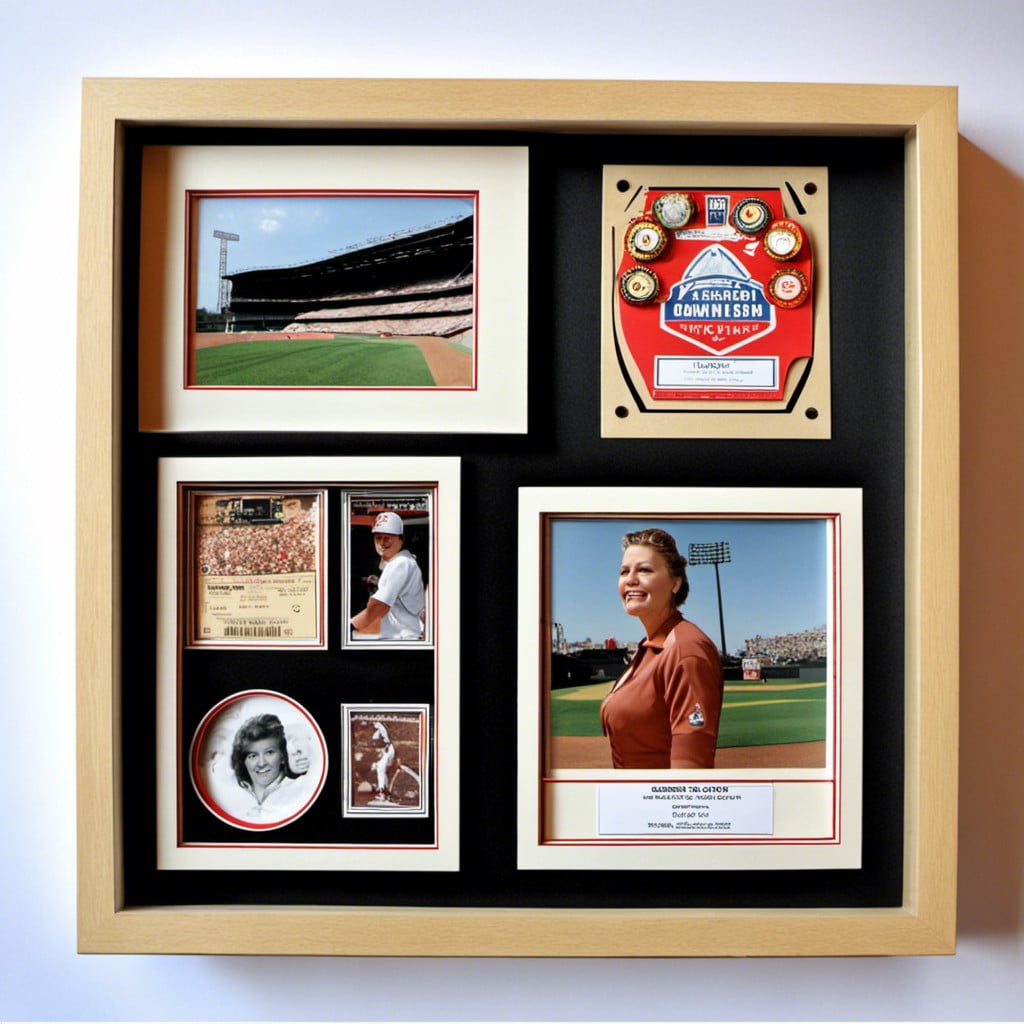
Sports Memorabilia Showcase
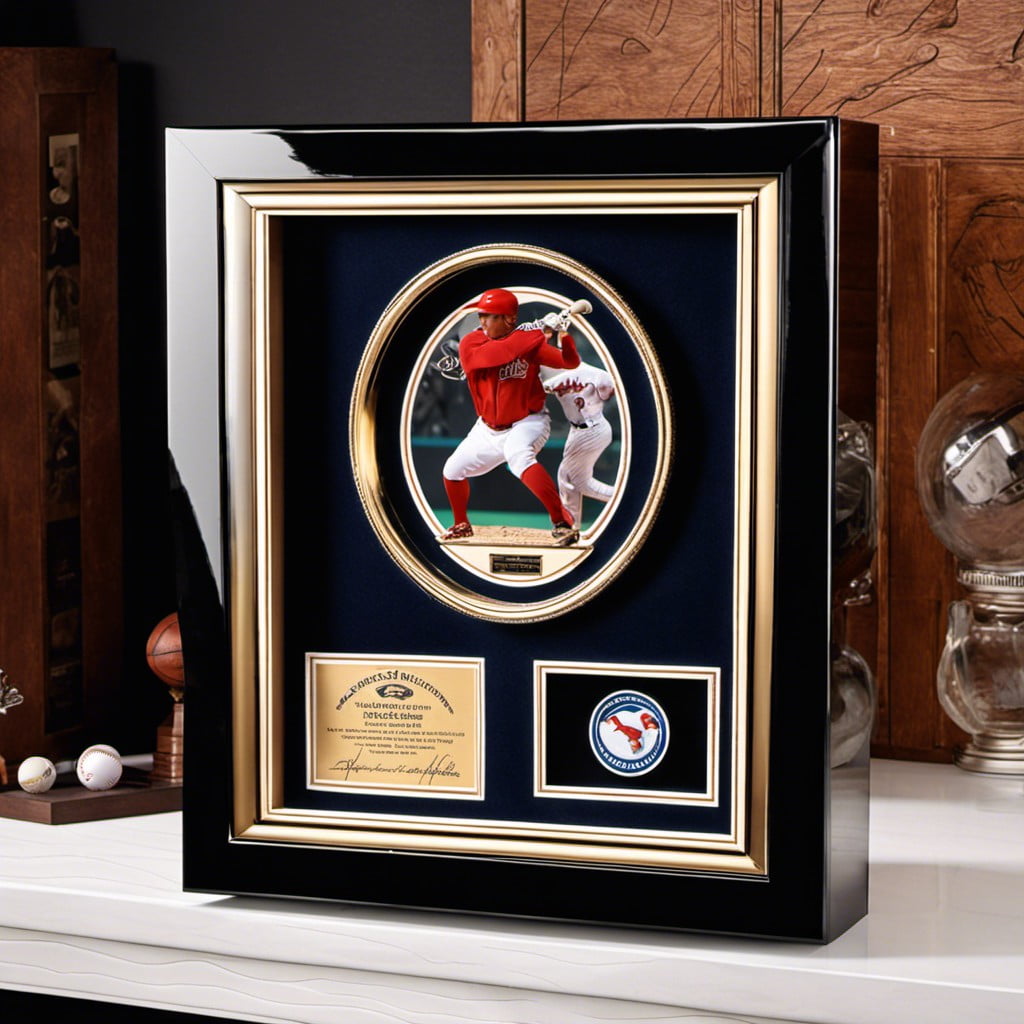
Showcasing your sports memorabilia in a deep box frame can turn your favorite team’s jersey, match tickets, autographs, or trading cards into a masterpiece. By arranging these items smartly, your collection can double as a stylish décor piece and a tribute to your favorite sports moments.
Firstly, ensure that your memorabilia are clean and in the best possible condition. For jerseys or other fabric items, consider getting them professionally cleaned before display. For autographs or paper items, place them away from direct sunlight to avoid fading.
Next, plan your layout. You may decide to display a single item, like a jersey, as the centerpiece or cluster several smaller items together such as tickets and autographs for a collage effect. While arranging, try different layouts and take photographs to compare before you finalize the arrangement.
Thirdly, use the right kind of adhesive. It is advisable to use archival quality, non-permanent adhesives to keep your memorabilia secure yet undamaged.
Lastly, don’t forget labeling. Labeling your items with small plaques can add a professional touch, providing information about the item or the event.
Essentially, a sports memorabilia showcase in a deep box frame allows your cherished items to be presented elegantly while protecting them, telling a story of your sports journey to all who view it.
Miniature Bookshelf in Deep Box Frame
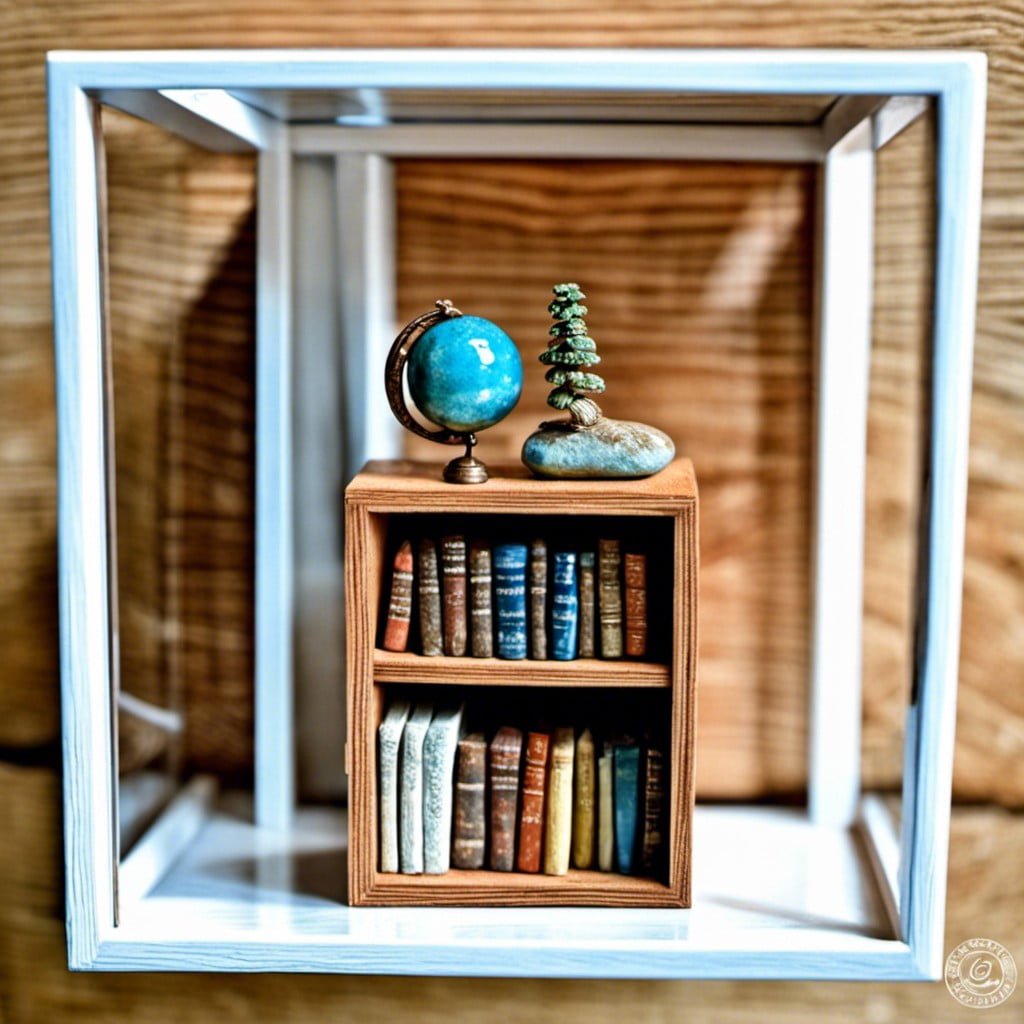
Creating your personal micro-library takes a creative turn with this project. Begin by collecting miniature books making sure to choose a variety of widths for a realistic bookshelf look.
Then, find a suitably sized deep box frame. Remember, the frame needs to be large enough to accommodate the width of the books and still have ample shelving space.
Next, gather small wooden pieces, such as craft sticks or balsa wood, for the shelves, cut them to the size of the frame’s inner dimensions. Paint these pieces to match the theme. Once the paint dries, affix them inside the box frame with a strong glue.
Finally, arrange your miniature books. This phase is the most satisfying, seeing your tiny library come to life. Position them in different orientations – some upright, some lying flat, and perhaps have an open one for a quirky touch.
These miniature bookshelf frames are a charming tribute to the joy of reading and make a unique and detail-packed focal point.
Photo and Ticket Stub Combo Frame
In crafting the perfect combo frame, a delicate balance between photos and ticket stubs is vital. Opt for high-quality, memorable pictures that tie in with the tickets. If the ticket is from a concert, choose a picture from that night; if it’s a vintage train ticket, perhaps an old photo of a train station or railway.
Next, the arrangement is crucial. Lay out your photos and tickets on the frame before gluing to ensure a visually appealing composition. Combine different size photos and tickets for dynamic contrast. Overlapping objects slightly can create depth and show the passage of time.
Personalization is key. Annotating the back of your tickets with a date or special memory adds a private, personal touch. You can even color-coordinate or theme your frame based on the events – think matching concert tickets with band photos, or pairing theater tickets with playbills.
Lastly, remember that white or neutral backgrounds often work best to make your photos and tickets stand out. Consider using a deep box frame with a glass front – it will keep your mementos safe, showcase them beautifully, and turn your precious memories into a cherished focal piece of decor.
3D Butterfly Arrangement in Box Frame
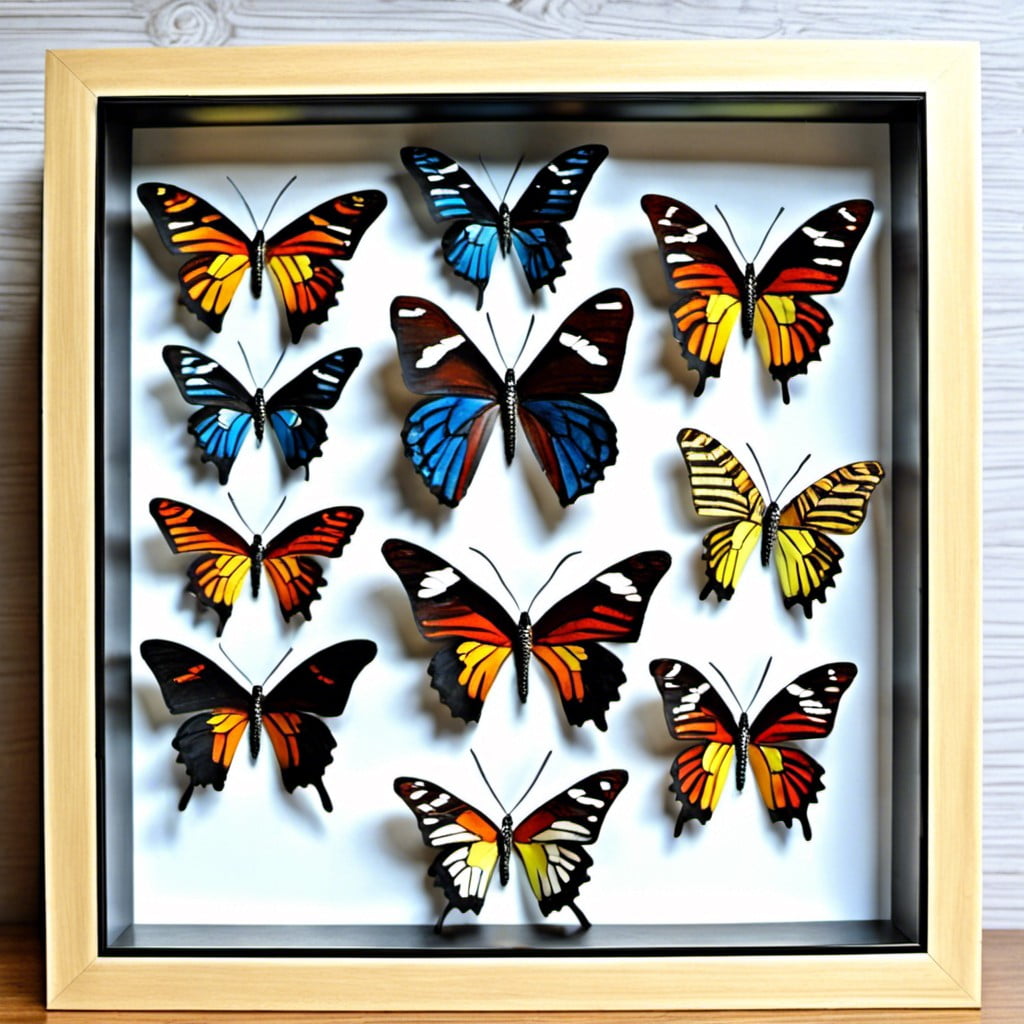
Creating this spectacular display involves a combination of art, craft, and a touch of realism. Here are some crucial pointers to remember:
1. Gather Materials: For a realistic look, invest in high-quality faux butterflies. These can be found in various sizes and colors online or at craft stores. Additionally, source a deep box frame with ample space for butterfly wingspan.
2. Layout Planning: Arrange the butterflies in a pattern, a swirl, or even the shape of a heart before fixing them to the frame.
3. Fixing Butterflies: Adhere butterflies using clear nylon thread or a hot glue gun. Make sure they’re secure but also seem to be floating.
4. Layering: Place the biggest butterflies first, then add medium and smaller ones on top to add depth and 3D effect.
5. Use Background Contrast: Choose a background color that highlights the butterflies. A contrast creates a more startling visual.
Overall, the choice of butterflies, their placement, and the background create a lovely 3D effect that brings the illusion of nature indoors.
Coin or Stamp Collection Display
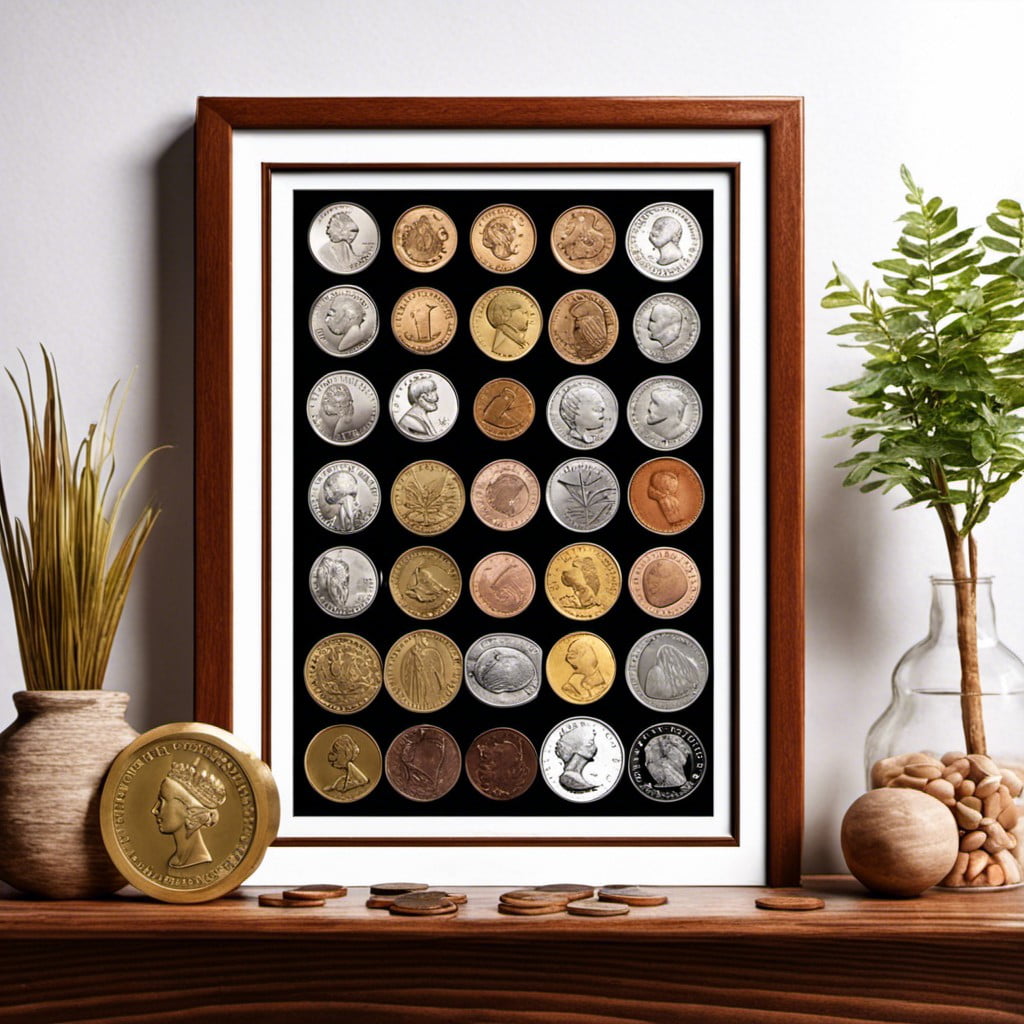
In creating this type of display, the purpose is showcasing the intricate details and unique designs of each coin or stamp. For a compelling arrangement, consider the following points:
1. Grouping by Theme: Group coins or stamps based on a common theme. It could range from country or era to specific symbolic designs.
2. Layering: Don’t restrict your collection to a single layer. Use foam inserts to bring smaller or more important pieces to the forefront.
3. Placement: Placement is crucial. Arrange items in terms of shape, color, or rarity. Try a symmetrical or asymmetrical arrangement to see what best enhances your collection.
4. Space: To avoid clutter, leave sufficient space between items. This helps to keep the viewer’s attention, letting them appreciate each piece individually.
5. Background: Select a contrasting background color that makes your collection stand out. The right backdrop can maximize your collection’s impact and highlight its finest aspects.
Remember, in this creative endeavor, it’s all about letting your collection tell a story. Each piece holds a history and carries a beauty of its own, so allow it to shine in your display.
Framed Vintage Postcard Collection
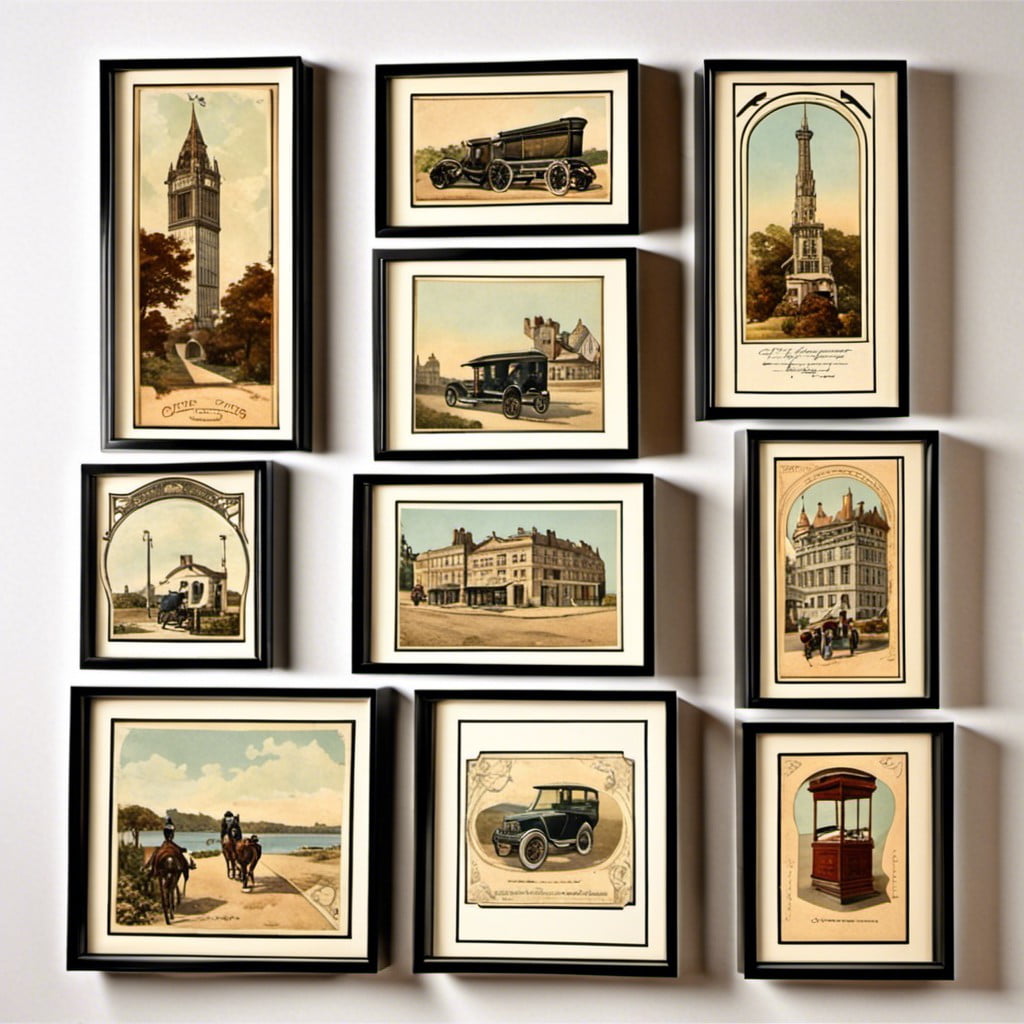
Transforming a box frame into an aesthetic postcard showcase is a simple yet visually pleasing project. It’s ideal for those who love vintage ephemera or travel keepsakes.
1. Evaluate your collection: Select postcards that work well together either by color, theme, or destination. Variety can add visual interest, but consistency will unify the display.
2. Glass Front and Back: The use of a glass back allows the postmarks and messages, if any, to remain visible. This dual-sided view creates a unique and interactive display.
3. Arranging Technique: Spread out the postcards before attaching them to the frame. Experiment with overlapping edges, fanning out the corners, or creating dynamic shapes.
4. Secure Postcards: Use non-permanent adhesive, such as photo corners or mounting putty, to ensure the condition of your collectibles remains preserved.
5. Create Depth: If your collection is large, consider multiple layers. Start with a base level, then add risers or small blocks to the back of other postcards, giving the arrangement a 3D effect.
6. Frame choice: Opt for a dark, rich color if your postcards are light or brightly colored, and vice versa. This will ensure they stand out rather than blending into the frame.
Remember to place your frame in an area where it won’t be exposed to too much direct sunlight to avoid fading. This novel display will not only bring a touch of nostalgia to your space, but it will also tell a unique story of your travels.
Handwritten Letters in Deep Box Frame
Preserving handwritten letters of your loved ones in a deep box frame is a touching way to show the importance of their words. Here’s how it works:
1. Choose a collection of your most cherished letters. These could be from anyone you hold dear – a childhood friend, a grandparent, or a significant other.
2. Arrange them creatively inside your frame. Give thought to their layout. Try a cascading effect or overlap them for a sense of depth.
3. Secure the letters using a minimal amount of adhesive, so as not to cause damage. If you prefer to avoid adhesive, photo corners can be used.
4. Install a backing to your frame. Something simple and neutral is advised, like cream or white colored paper that will help the letters stand out without dominating the frame.
This kind of sentimental yet sophisticated display will certainly become a conversation starter in your home. It’s a unique way to give your space a personal touch while preserving precious memories.
Graduation or Achievement Showcases
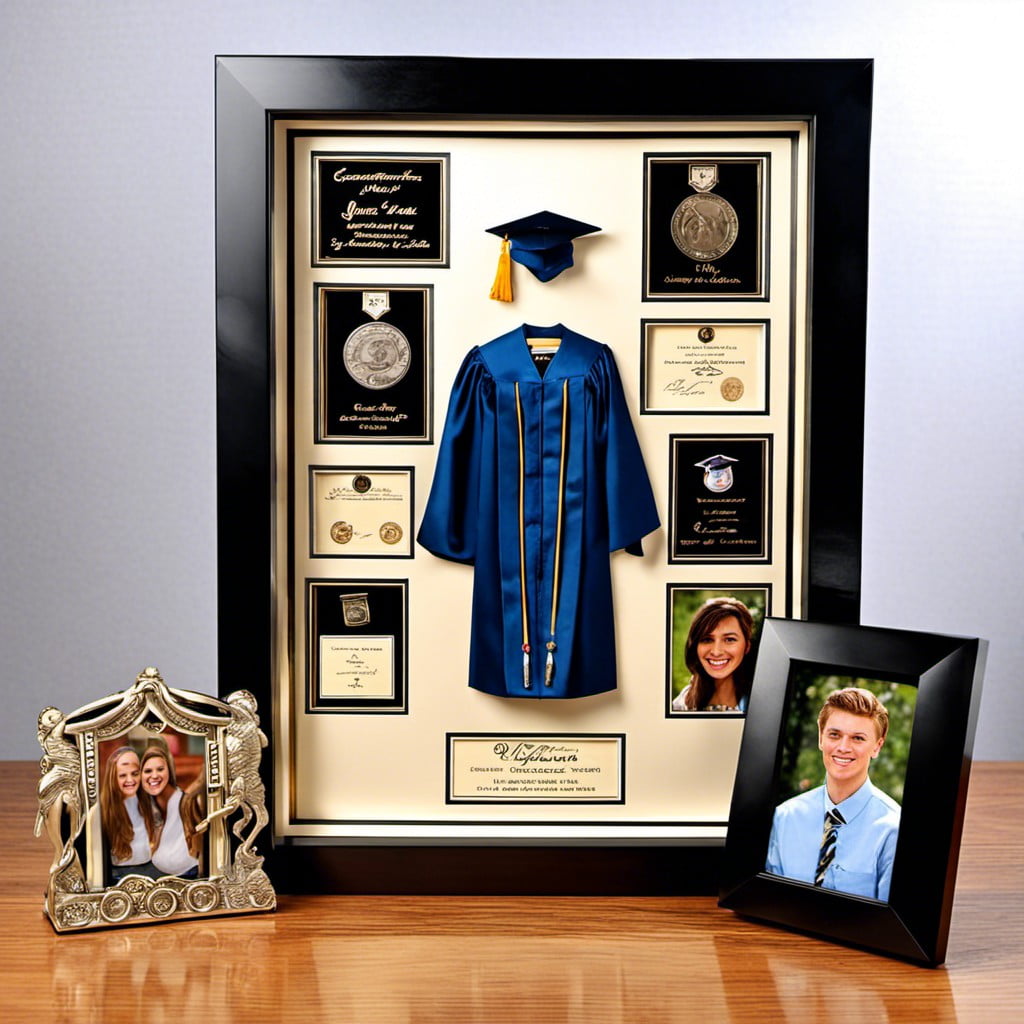
To craft your commencement showcase, first gather all the items you wish to display. This could be your cap and tassel, diploma, honor cords, and photos. If space allows, you may also include a commencement program or an engraved nameplate for personalization.
Cut a piece of felt or fabric to the size of the back of the frame. This will serve as your backdrop. Placement is key. Try a few different arrangements until you find the best presentation.
Secure the objects to the backdrop using hot glue or double-sided tape. Make sure to attach items firmly so they won’t move over time.
Finally, assemble the box frame. Slide the backdrop with attached memorabilia in, face-up. Replace the back of the frame, hang, and enjoy your beautiful memory showcase! Remember, every item in your box tells part of your academic journey, making it a conversation piece for years to come. Consider updating it as you achieve post-graduation milestones, creating a living timeline of your accomplishments.
Military Medal/frame Display
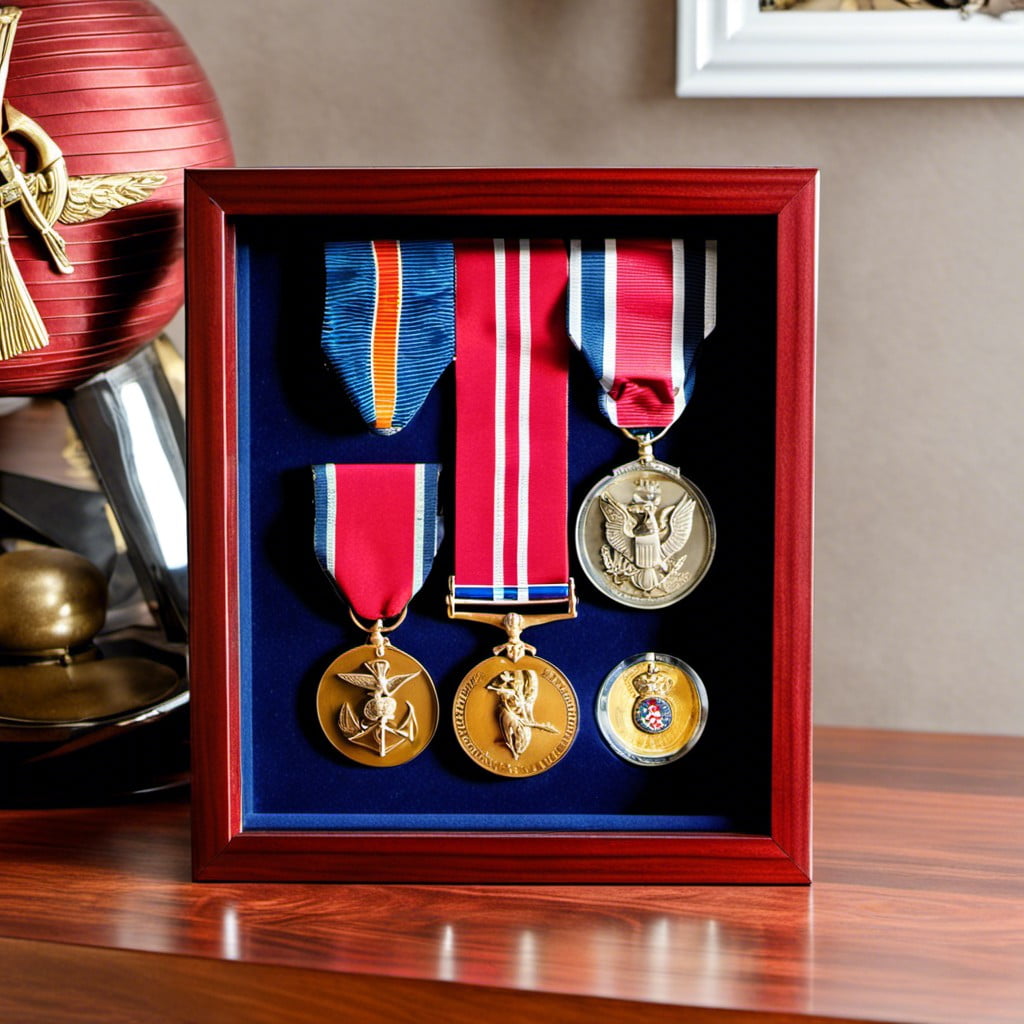
Offer honor and respect to your loved ones’ military service by creating a dedicated display in a deep box frame. The depth of the frame allows space for medals, badges, patches, and even small insignia to be displayed with pride.
Keep these tips in mind:
- Respectful placement: Simply piling medals haphazardly in the frame is a no-go. For a prestigious display, strive for symmetry and cohesive design. Utilize a backboard – it may be uniform fabric or a poignant image such as a flag or official military seal.
- Safe materials: Considering these items may be priceless and irreplaceable, ensure to use acid-free and non-reactive adhesives or materials that may damage them over time.
- Visual categorization: Arrange medals and badges according to significance, type, or chronological order. By doing so, the frame tells a story besides showcasing a collection.
- Documentation: Add a small inscription plate or title to each item. It will allow viewers to understand the importance, significance, or story behind each medal or badge.
- Display with pride: Choose a prominent spot in your home where the display can command the attention it deserves.
Remember, preserving and showcasing these symbols of heroism not only pays homage to the service rendered but also adds a rich layer of personal history to the decor of your home.
Scrabble Pieces Arranged to Spell Family Names
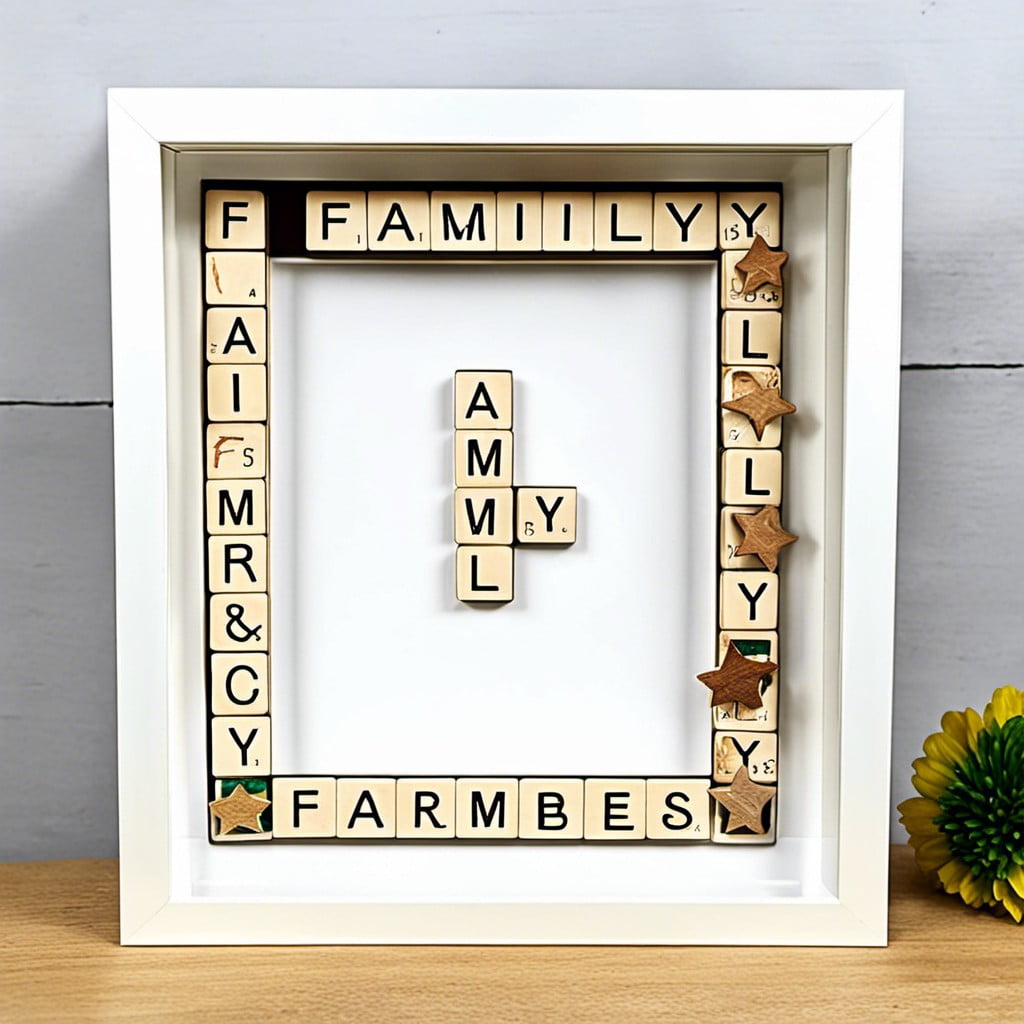
Immerse yourself in the captivating word play by transforming Scrabble tiles into the centerpiece for your deep box frame. Start by choosing a pristine piece of background paper, perhaps a nostalgic shade to lend your creation a disguised charm.
Next, meticulously lay out your family’s names using the Scrabble tiles. Find connections between names, maybe where an ‘A‘ in your daughter’s name neatly lines up with an ‘A‘ in Uncle Tom’s, spawning an engaging grid.
The layout isn’t set in stone. Feel free to shuffle the letters around until it feels right to you. The placement key is to ensure that the frame seems organically filled while guaranteeing each name’s visibility.
Adding a dash of individuality is the next step. Small trinkets or photos corresponding to each person could add meaningful context and a personal touch to your display.
Once satisfied with your arrangement, adhere the elements securely in place. Lastly, secure the back onto your frame and voilà, your personalized Scrabble deep box frame is ready. Not only does it serve as a testament to your tight-knit family bonds, but it will also be a conversation starter for anyone visiting your stylish home!
Miniature Model Car Showcase
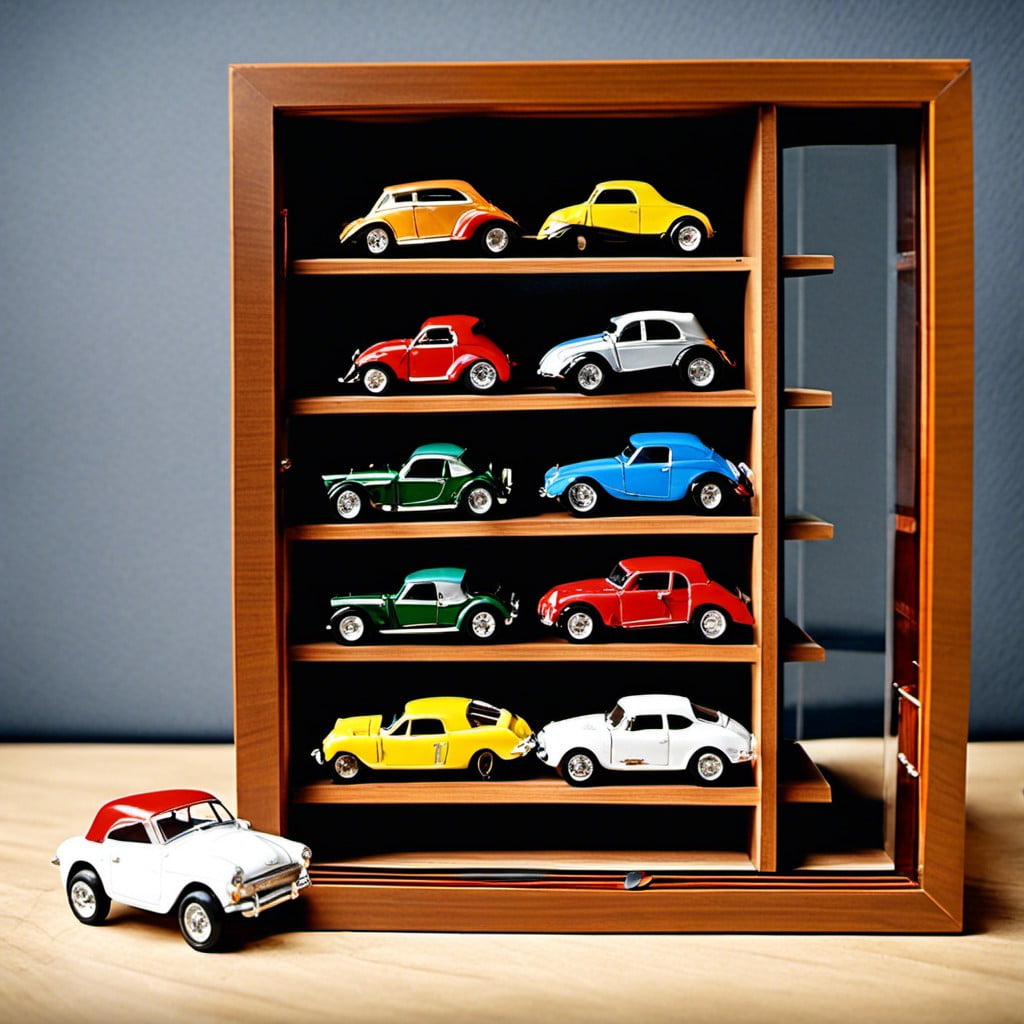
Placing miniature model cars in a deep box frame presents a striking display and protects these delicate collectibles from dust and damage.
First, arrange the cars aesthetically – popular choices include by age, manufacturer, or color.
Remember to leave enough space between each piece for visibility.
Attach small clear blocks or shelves to elevate each car, creating depth and adding to the 3-dimensional effect.
Next, secure each piece to the blocks using adhesive putty – this prevents movement and provides flexibility for rearrangements.
Choose a frame with clear, UV-protective glass to guard against color fading.
Lastly, frame the showcase in a prominent location to engage guests with your unique mini automobile gallery.
Smaller frames might work better for an intimate personal collection, while a larger frame can make a bold statement.
Regardless of size, this showcase will surely highlight your love for miniature model cars.
Lego Art in Deep Box Frame
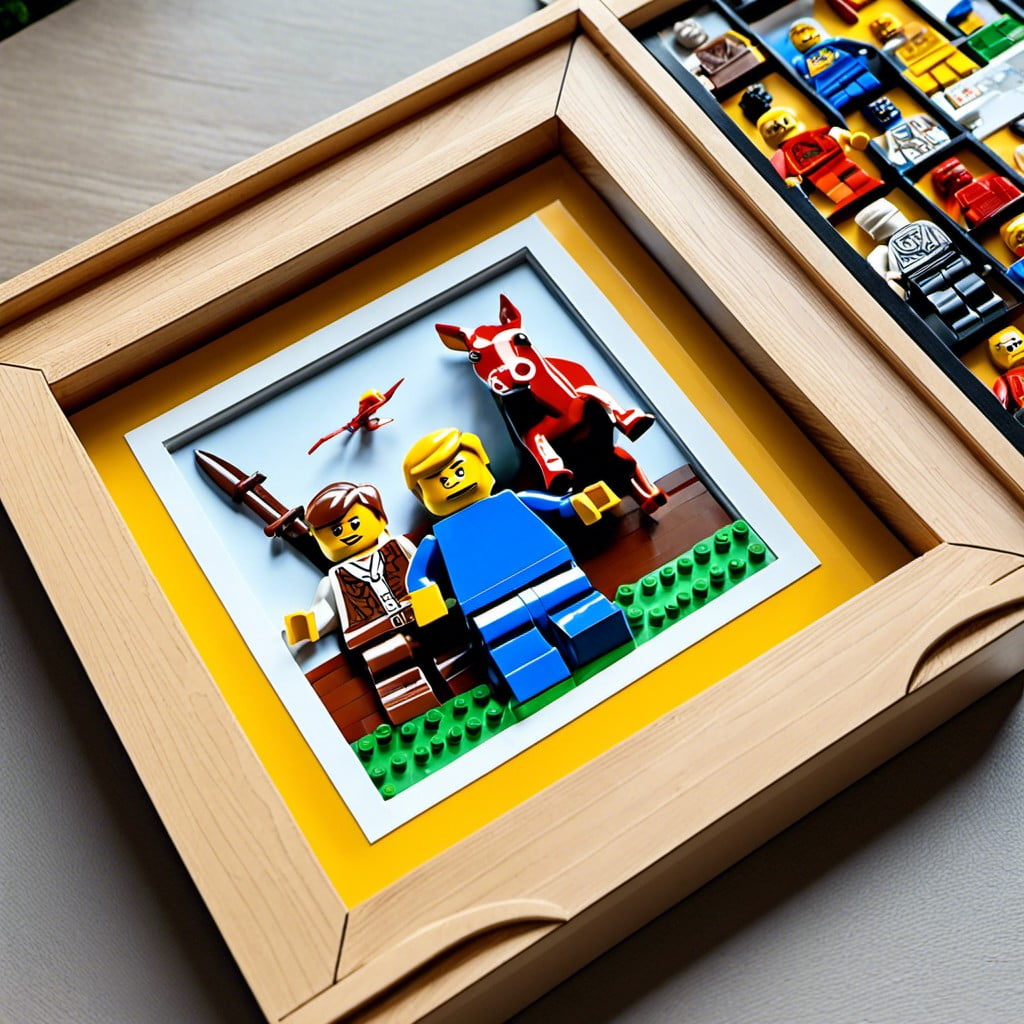
Starting on your Lego masterpiece, consider size and complexity based on the depth of your frame and your skill level. Miniature figurines or simple structures create a great gateway for beginners. Unleash your creativity by opting for a theme, such as compositions with animals, favorite characters, or abstract designs. Lighting is an essential aspect that can greatly enhance the visual appeal. Incorporate LED string lights or spotlights for an impressive glow.
Reducing the visual chaos is key. Create a tidy background using a single color baseplate, which will make your artwork stand out. The design’s arrangement could be symmetrical for an organized look or can be chaotic to portray energy and randomness.
While placing your Lego creations into the deep box frame, use strong glue to ensure your design stands the test of time. Remember, the process should reflect fun, resourcefulness, and a chance to display your Lego-building skills in a unique, artistic way.
Origami Art Display in Box Frame
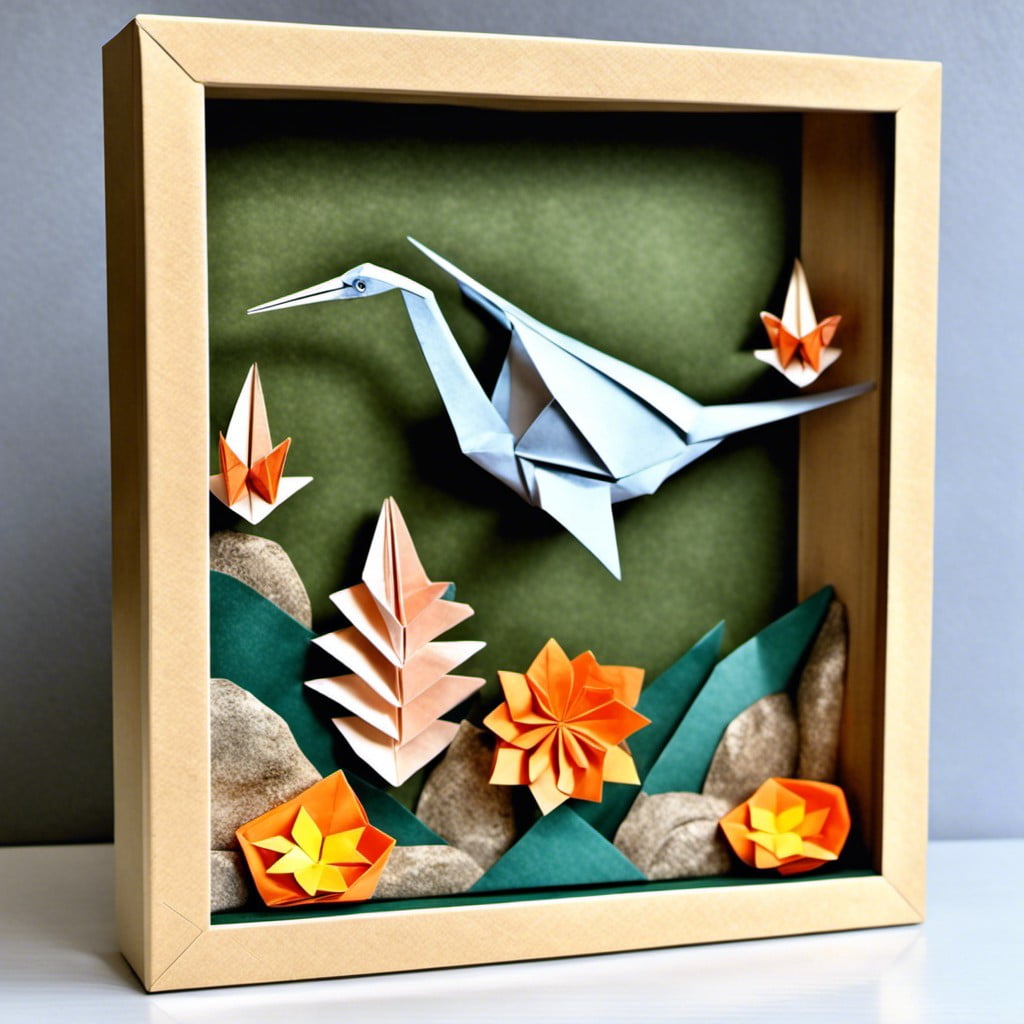
Predominantly used in Japanese culture, Origami involves the art of paper folding to create intricate designs. With patience and precision, one can fabricate various miniature creations – from animals and flowers to abstract figures.
For showcasing these delicate paper minis, a deep box frame could serve as an ideal canvas.
Here are the tips to create your own origami display:
- Select your origami piece: Choose based on personal taste or room theme. Simplistic designs effectively contrast the complexity of the frame.
- Arrange before framing: Position your origami art on the frame’s backing. Experiment with layouts – as a cluster of designs, a single central piece, or a gradient effect with color tones.
- Secure origami in place: Use a dab of glue or a piece of double-sided tape on the underside. Never rush this – careful placement ensures longevity.
- Adding dimension: To add depth, use small bits of styrofoam or something similar under the origami.
- Finalize frame: After affixing the pieces, place the glass and secure the back. If preferred, leave out the glass for a touchable art piece.
Remember, there’s no wrong way to display your work, it’s all up to personal creativity and preference!
Browse More
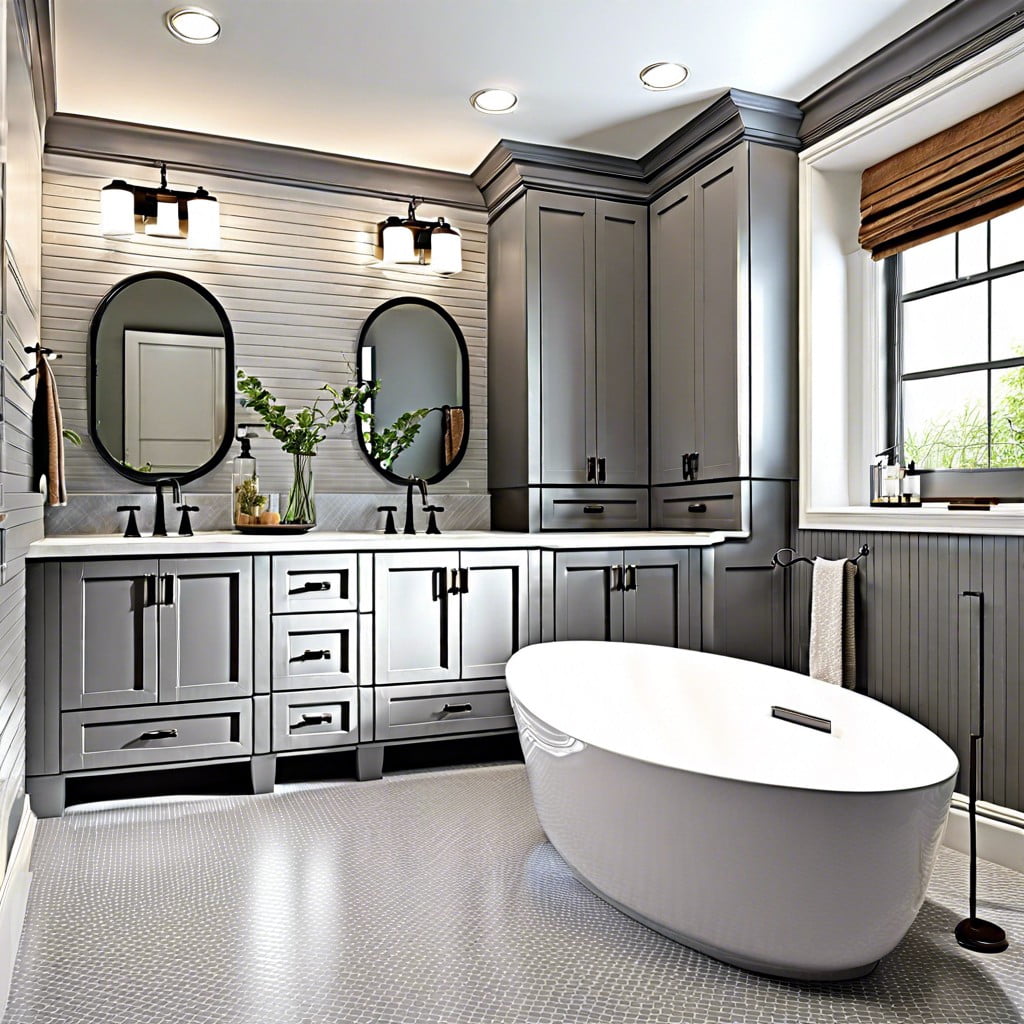 Gray Bathroom Cabinets: What Color Walls Complement Best
 What Is a Vanity and Why You Need One
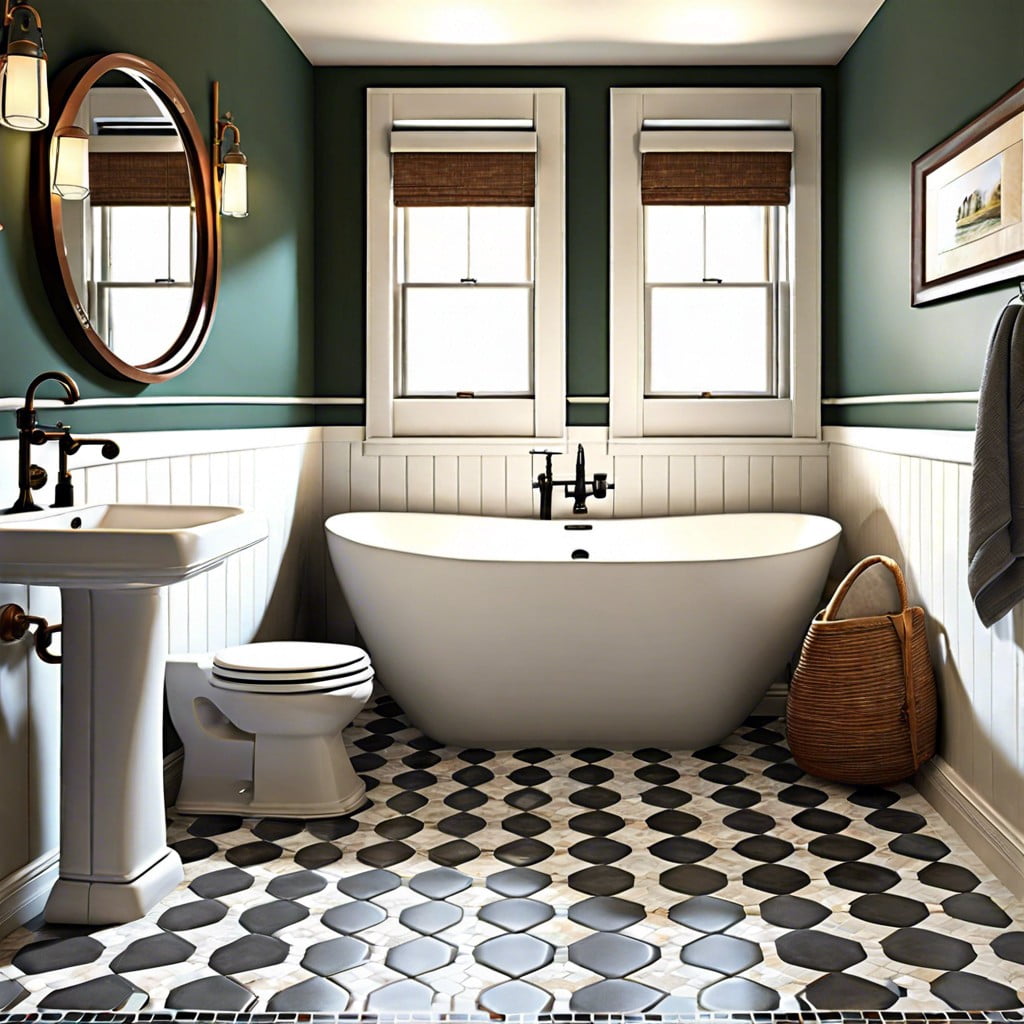 15 Ideas: What is the Best Flooring for a Small Bathroom
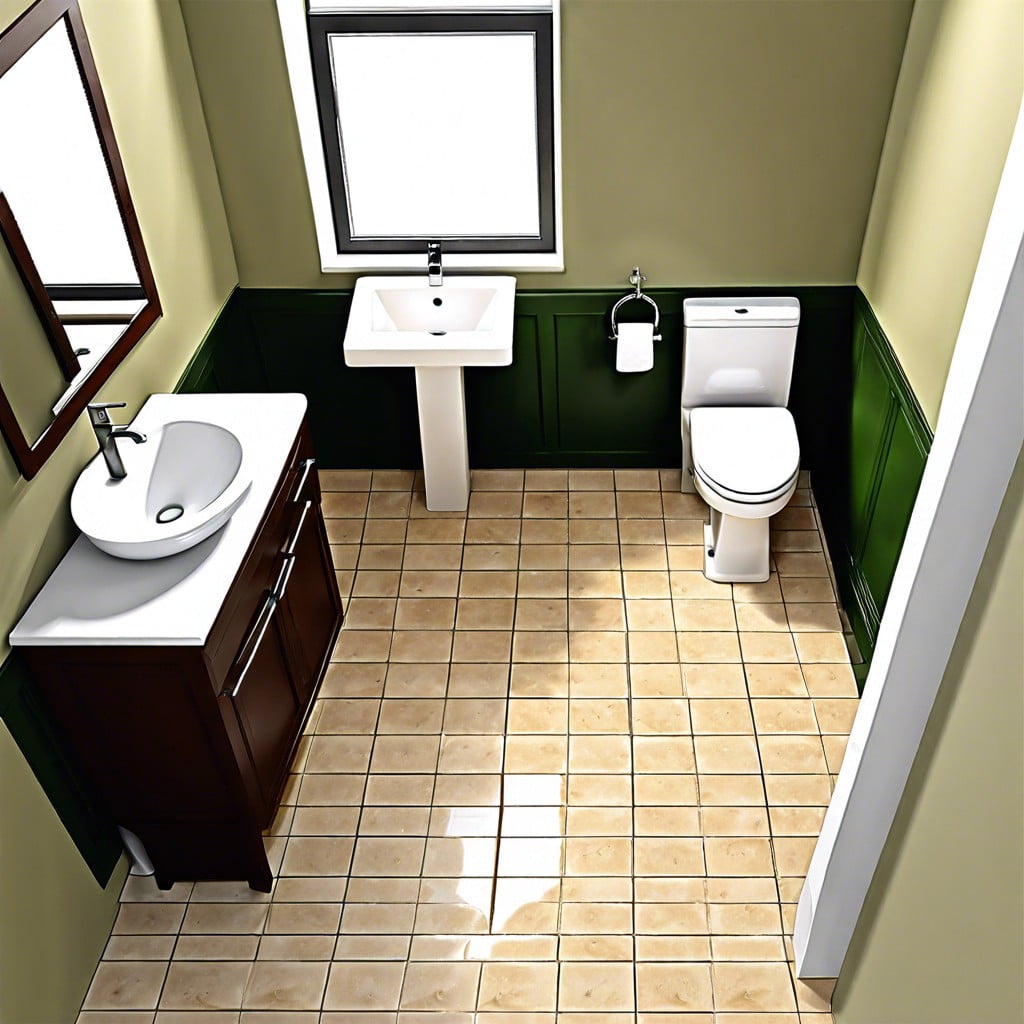 What is a Half Bath: Maximizing Your Home’s Space
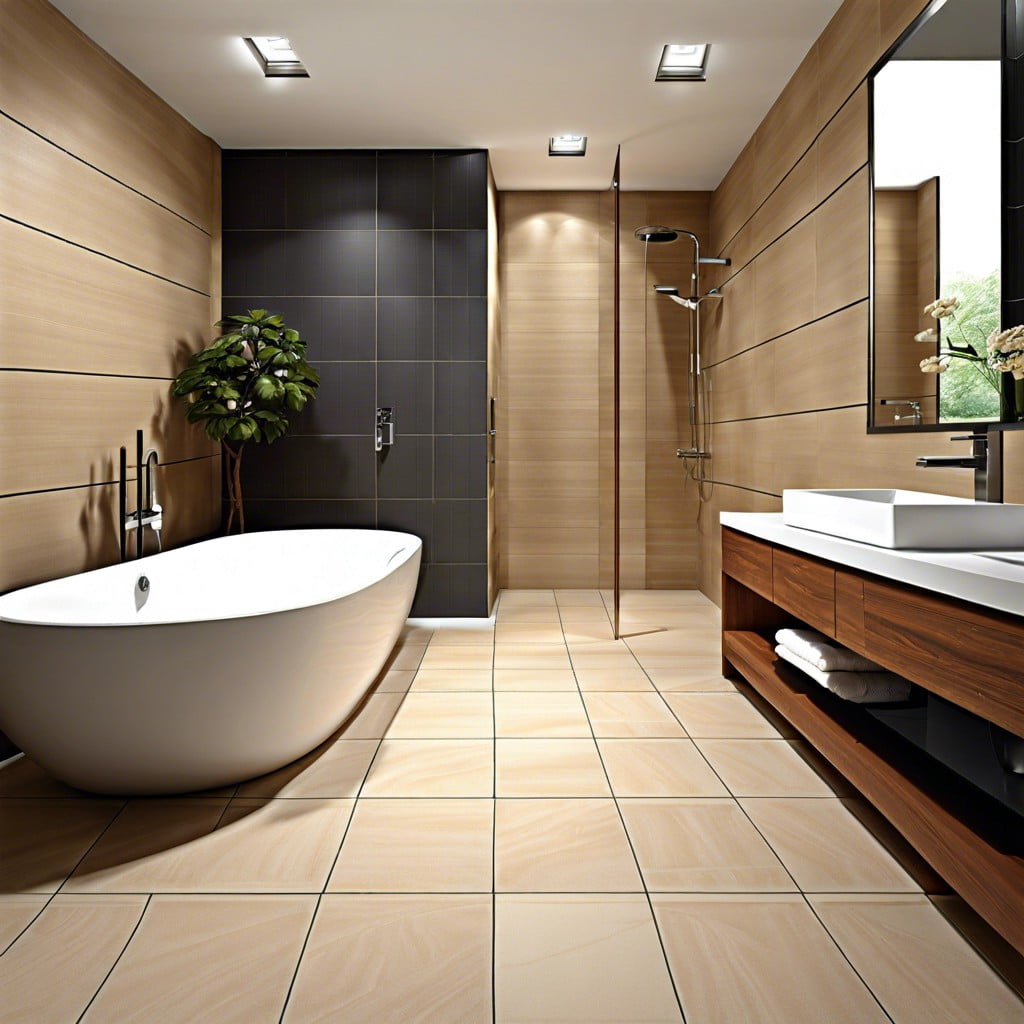 Best Flooring for Bathroom: Your Essential Buying Guide
Recap