Last updated on
In recent years, the trend of do-it-yourself (DIY) home improvements has gained immense popularity. Homeowners are increasingly looking for creative ways to transform their living spaces without breaking the bank.
One emerging trend in interior design is the use of glass installations to add a touch of elegance and modernity to any home makeover project. In this blog post, we will provide you with a comprehensive guide on how to incorporate DIY glass installations into your home renovation plans, along with some useful tips to ensure a successful outcome.
Benefits of DIY Glass Installations
Using glass in home decor offers numerous benefits that make it an attractive choice for many homeowners. Firstly, glass can create an illusion of spaciousness, making even the smallest rooms or living spaces appear larger and more open. This is especially beneficial for those living in apartments or houses with limited square footage.
Additionally, glass allows natural light to flow freely, brightening up the space and creating a welcoming and inviting atmosphere. Furthermore, glass installations lend a modern and elegant touch to any interior, elevating the overall aesthetic appeal of your home.
Another significant advantage of opting for DIY glass installations is the cost-effectiveness it offers. Hiring professionals for glass installation projects can be expensive, but by taking the DIY route, you can save a substantial amount of money. With the right tools and techniques, you can achieve professional-looking results without having to break the bank.
Safety Precautions and Tools

When working with glass materials, safety should always be a top priority. It is essential to wear appropriate protective gear such as safety gloves, goggles, and even clothing that covers exposed skin. Glass fragments can cause severe injuries if mishandled, so taking necessary precautions is vital.
To carry out DIY glass installations successfully, you will need a few essential tools. These include a glass cutter for accurately cutting the glass to size, a suction cup to handle the glass panels safely, and adhesive and sealant to secure the glass in place. Having these tools handy will ensure that you are well-prepared for the project.
Choosing the Right Type of Glass
Before diving into your DIY glass installation project, it is crucial to understand the different types of glass available. Three popular options for home projects are tempered glass, laminated glass, and frosted glass.
Tempered glass is highly durable and resistant to shattering, making it an excellent choice for areas where safety is a concern, such as windows and doors. On the other hand, laminated glass consists of two or more layers with a plastic interlayer between them, providing added strength and security.
This type of glass is often used in areas where soundproofing or enhanced privacy is desired, such as office partitions or bathrooms. Frosted glass offers a translucent appearance, adding a touch of elegance while maintaining privacy. It is commonly used in shower enclosures or room dividers.
When selecting the appropriate type of glass for your DIY project, consider factors such as your home’s climate and location, the intended purpose of the installation area, the level of privacy required, and the overall aesthetic you wish to achieve.
One crucial aspect to keep in mind is the climate and location of your home. Depending on where you live, you may need glass that offers enhanced insulation for colder climates or glass that provides UV protection for sunnier regions. Consulting with professionals familiar with your area’s specific requirements can ensure that you choose the right glass to withstand local weather conditions and optimize energy efficiency.
Another consideration is the purpose of the glass installation. Different areas of your home may require different types of glass. For example, windows facing busy streets or noisy neighborhoods may benefit from soundproof or laminated glass to reduce noise transmission. On the other hand, areas where privacy is a concern, such as bathrooms or offices, may benefit from frosted or tinted glass.
Additionally, energy efficiency is a key consideration when choosing glass for your home. Many Wilmington home window replacement professionals advocate this practice to help homeowners be energy-efficient.
Selecting high-performance glass with low emissivity (low-E) coatings can help reduce heat transfer, improve insulation, and lower energy costs. Professionals specializing in window replacement in your area can provide expert advice on selecting energy-efficient glass options that meet your specific needs and budget.
Measuring and Cutting Glass
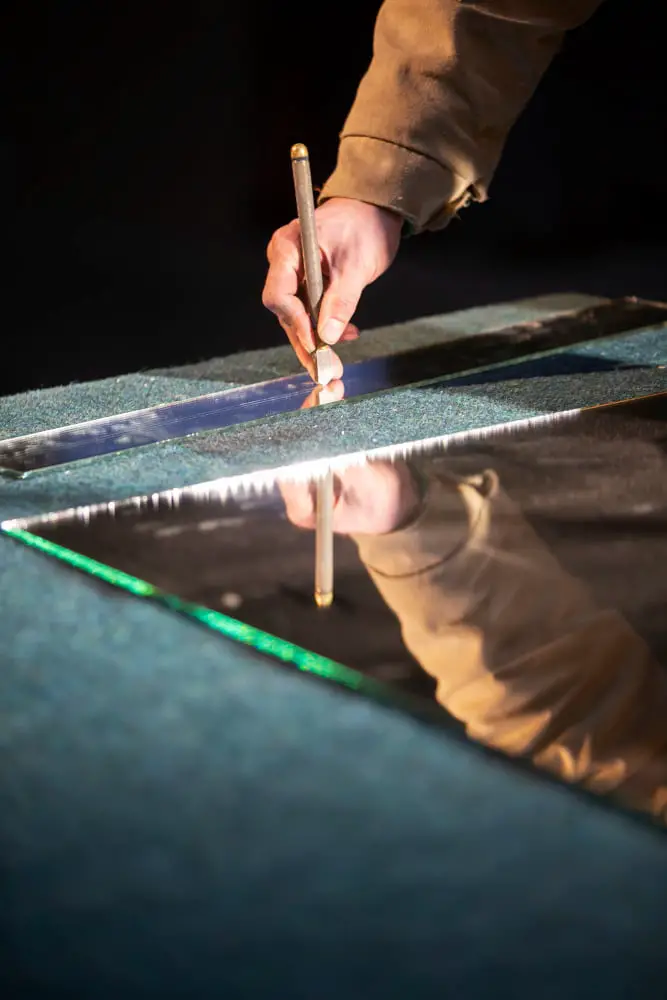
Accurate measurements are crucial when working with glass. Before you begin cutting the glass, carefully measure the dimensions of the installation area to ensure a perfect fit. Mark the measurements on the glass panel, using a ruler or straight edge as a guide.
To cut the glass, use a glass cutter. Start by lightly scoring the surface of the glass along the marked line, applying gentle pressure. Once the initial score is made, apply firmer pressure to create a deeper groove.
Repeat the process until you have a clean, straight cut. To ensure precision, take your time and be patient. Remember to wear safety gloves to protect your hands from any potential cuts.
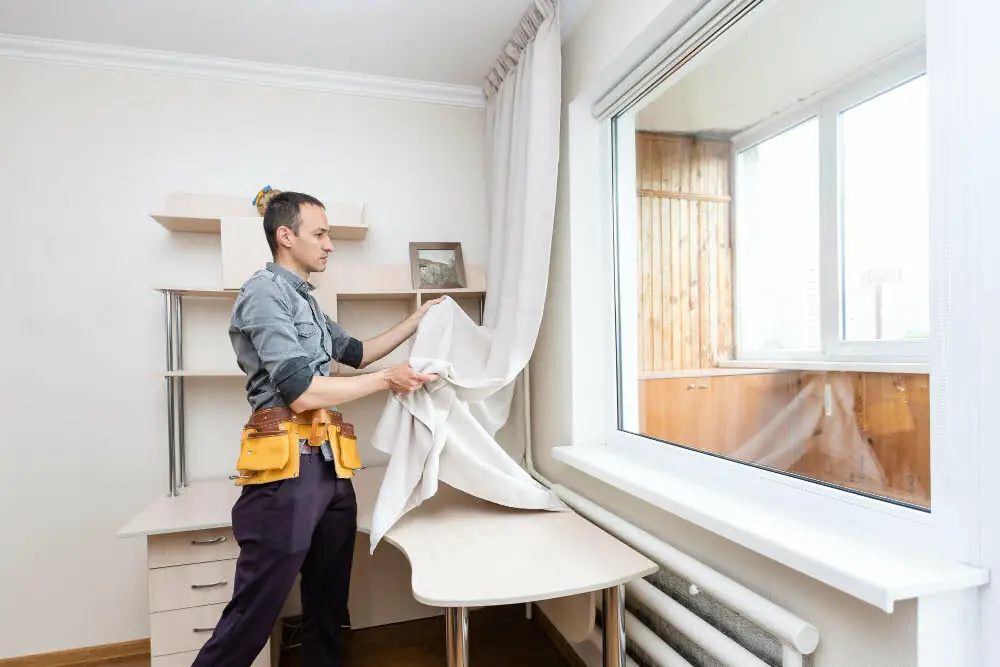
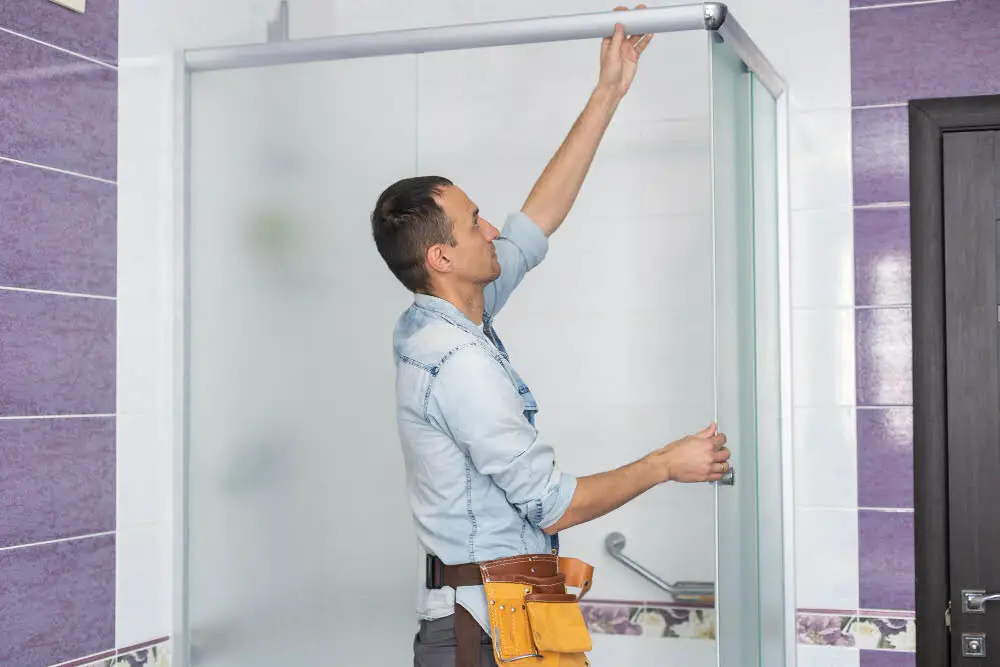
Installing Glass Panels
Once your glass panels are cut to the desired size, it’s time to install them. Start by preparing the surface where the glass will be placed. Ensure that it is clean and free from any debris or dirt. Apply adhesive or sealant to the area where the glass will be attached, following the manufacturer’s instructions.
Carefully position the glass panel onto the adhesive or sealant, ensuring proper alignment. Press firmly to secure it in place. Use a suction cup to adjust the glass if needed, making sure it is level and straight.
Allow the adhesive or sealant to dry as per the product’s recommended drying time. Avoid touching or applying pressure to the glass during this period to prevent any misalignment.
During the installation process, it’s crucial to pay attention to detail and ensure a seamless finish. Take your time and double-check the alignment and positioning of the glass panels to avoid common mistakes, such as air bubbles or uneven placement.
Maintenance and Care
To maintain the beauty and longevity of your DIY glass installations, regular maintenance is essential. Develop a cleaning routine to keep your glass surfaces sparkling and free from smudges and fingerprints.
Regular cleaning is essential to keep your glass installations looking their best. Use a non-abrasive glass cleaner and a soft cloth to clean the glass surfaces. Avoid using harsh chemicals or abrasive materials that could scratch or damage the glass.
Additionally, be mindful of any potential hazards that could cause damage to your glass installations. For example, avoid placing heavy objects near glass panels, as they could potentially fall and shatter the glass. Be cautious when moving furniture or other items around the glass installations to prevent accidental damage.
Lastly, periodically inspect your glass installations for any signs of wear or damage. If you notice any cracks, chips, or loose fittings, it’s important to address them promptly to prevent further deterioration and ensure the safety of your home.
By following these tips and maintaining your DIY glass installations, you can enjoy the beauty and elegance they bring to your home for years to come. Remember to always prioritize safety and take your time to achieve the best results. Happy DIY-ing!
Continue reading:

Recap
