Last updated on
Exploring creative wood art ideas can revolutionize your home’s aesthetic appeal because each piece has a unique character that adds charm to any space.
Exploring the world of creative wood art can be a thrilling adventure, filled with ample opportunities to transform your home into a stylish dwelling. This article will guide you through a variety of innovative wood art ideas, from simple DIY projects to intricate designs that can add a unique touch to your home decor.
Whether you’re keen on creating a rustic centerpiece or a modern wall art, the comprehensive details in the following sections will cater to all your needs.
So, let’s delve into the fascinating realm of wood art and discover the endless possibilities it offers!
Abstract Wood Sculpture

Creating an abstract wood sculpture involves giving imaginative life to a piece of wood. It all depends on your personal touch. Here’s a basic process to get you started:
- Selection: Types of wood like oak, pine, or cedar are usually preferred. A variety with beautiful grain patterns can add extra appeal to your artwork.
- Idea Sketch: Having a rough sketch of your idea helps guide your carving process.
- Carving: Initial shaping of the sculpture can be achieved with a saw. A chisel gives it detail, while sandpaper makes it smooth.
- Finishing: Apply a finishing coat such as varnish, to protect the sculpture and bring out the beauty of the wood.
Remember there’s room for creativity, so allow your imagination to take lead. You might be surprised by what you can create out of a block of wood.
Driftwood Wall Art
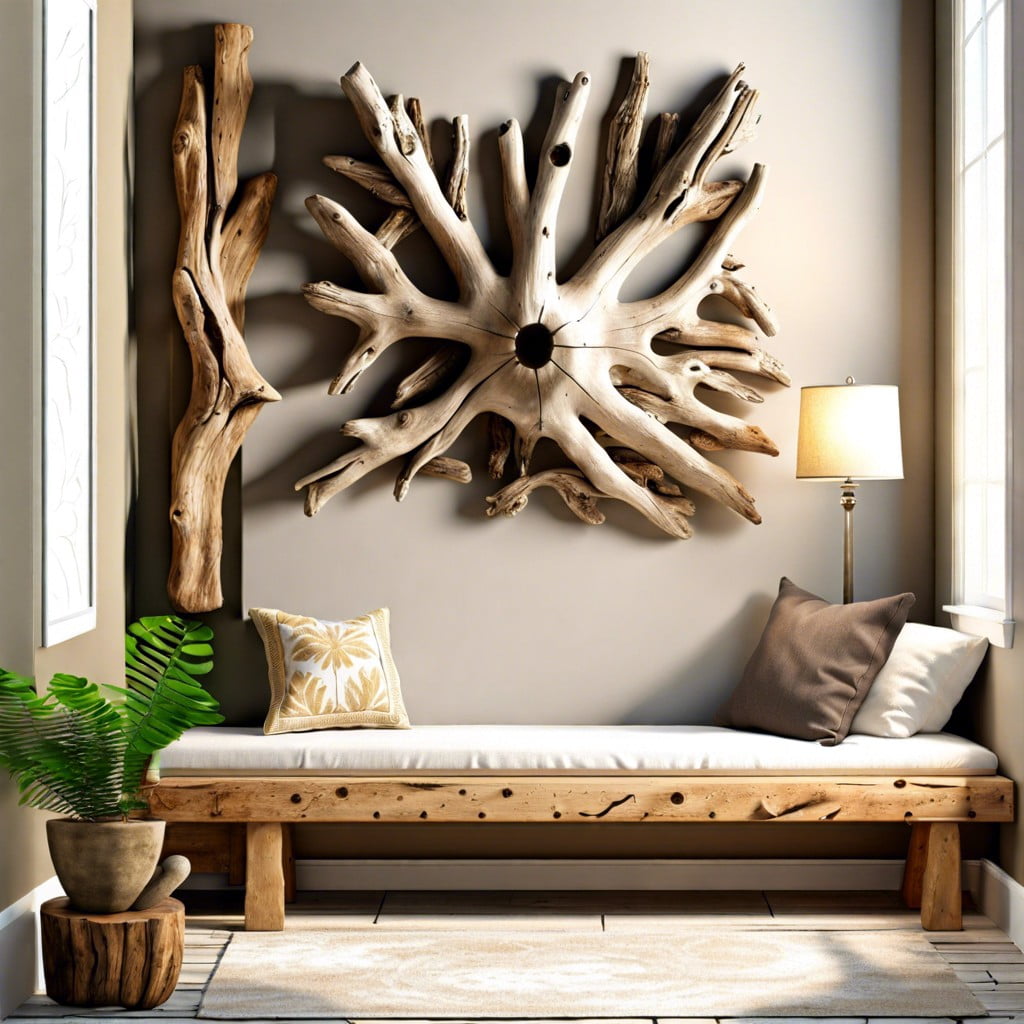
Driftwood, with its unique, weather-worn character, provides a rustic and organic aesthetic ideal for enhancing your home’s charm. Here’s inspiration on how you can use this nature’s gift:
1. Arrange smaller pieces into a circular or square pattern to create a visually appealing rustic centerpiece.
2. Use larger pieces as the base for mounting oceanic treasures, like shells or starfish, for a beach-themed art installment.
3. Consider lighting: Incorporate tiny LED lights for a magical, twinkling wall hanging.
4. Craft a mirror frame. Adhering driftwood pieces around a mirror can elevate a simple mirror into a statement piece.
Remember to thoroughly clean and dry the driftwood before use, ensuring that it’s free from possible insects and mold. Also, consider sealing it with a wood finish for longevity. Whether you’re going for a nautical theme or just a touch of the outdoors, driftwood is an excellent element to consider.
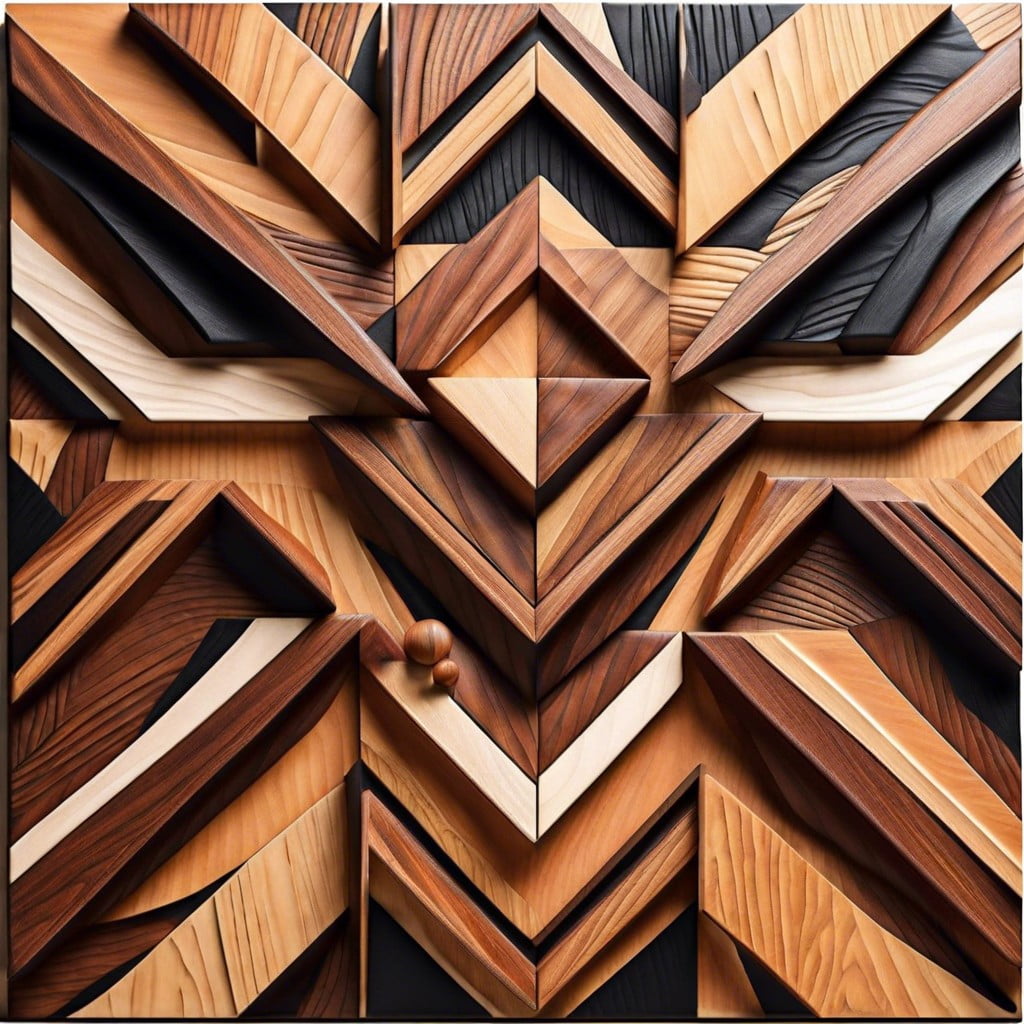
Wooden Mosaic Art
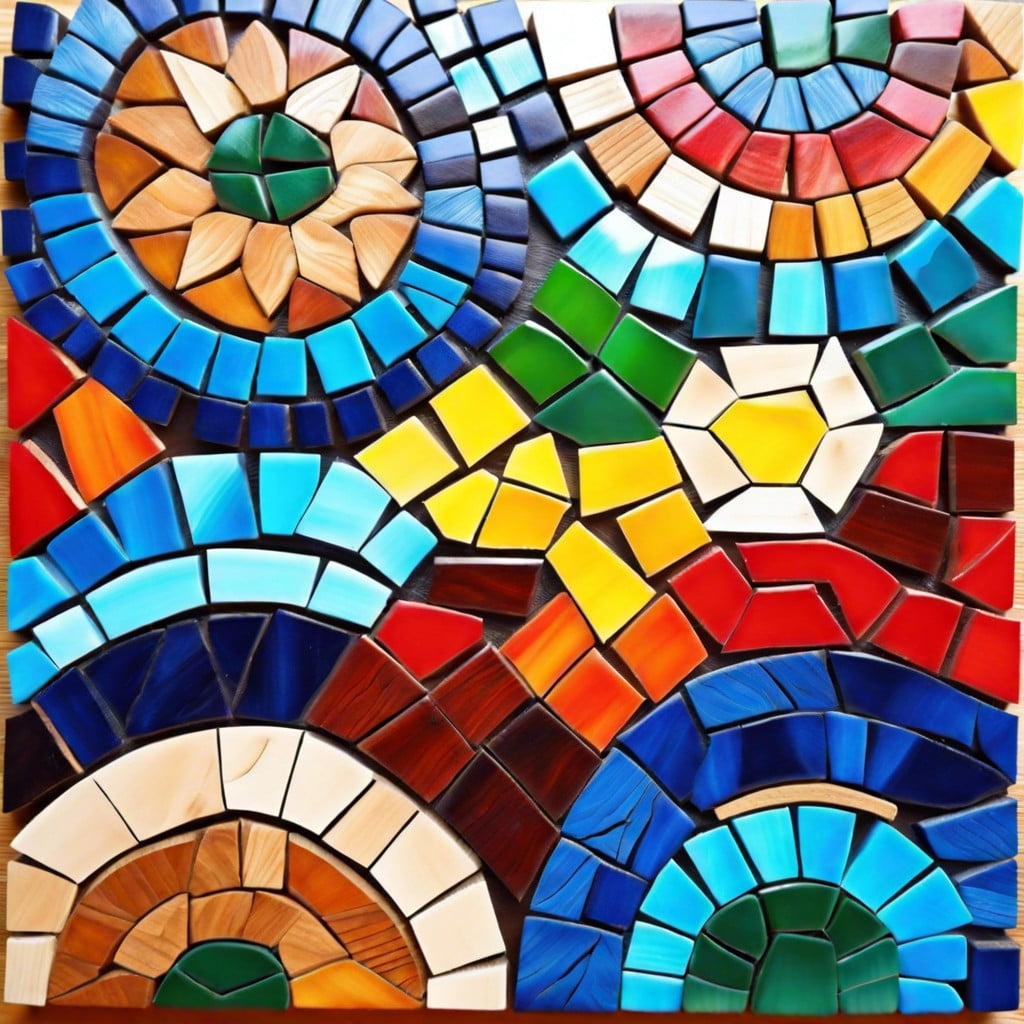
To start creating a wooden mosaic, determine the design or pattern beforehand. Opting for geometric patterns often simplifies the process for beginners.
Acquire various shades of wooden tiles or cut pieces of plywood for variety in color and texture. A scroll saw would be helpful in shaping your pieces to fit your design.
Then, piece your design together by applying a strong wood glue to attach each tile or wooden piece to the base. Remember to give your creation enough time to dry.
Finally, gently sand the top to even out any irregularities and apply varnish or sealant to safeguard your artwork from damage and create a polished, finished look.
Don’t be daunted. Embrace the organic imperfections of your wood pieces. They add charm and uniqueness to every mosaic art project.
Wooden Garden Statues

Carved from a single block or carefully constructed from separate elements, these enchanting figurines add a unique touch to your green space.
1. Choose the Right Wood: Hardwood like teak or oak with their high durability are perfect for outdoor settings.
2. Size Matters: As per the area of your garden, opt for either a large centerpiece or several smaller characters scattered around your space.
3. Form and Texture: Let your creativity flow. From rough-hewn rustic creations to sleek and polished designs, there’s no limit to forms your sculpture can take.
4. Complexity: Keep the complexity of your statue in mind. For a fun DIY project, simplistic figures such as turtles and birds are great. If you are more experienced, you can opt for intricate designs like fairies or gnomes.
5. Preservation: It’s important to apply a suitable sealant to your creation to protect it from the weather elements. This step will ensure longevity of your wooden masterpiece.
With these nuggets of knowledge, you’re well on your way to transform your garden into an artful oasis with your own tailor-made wooden garden statues.
Upcycled Wood Jewelry
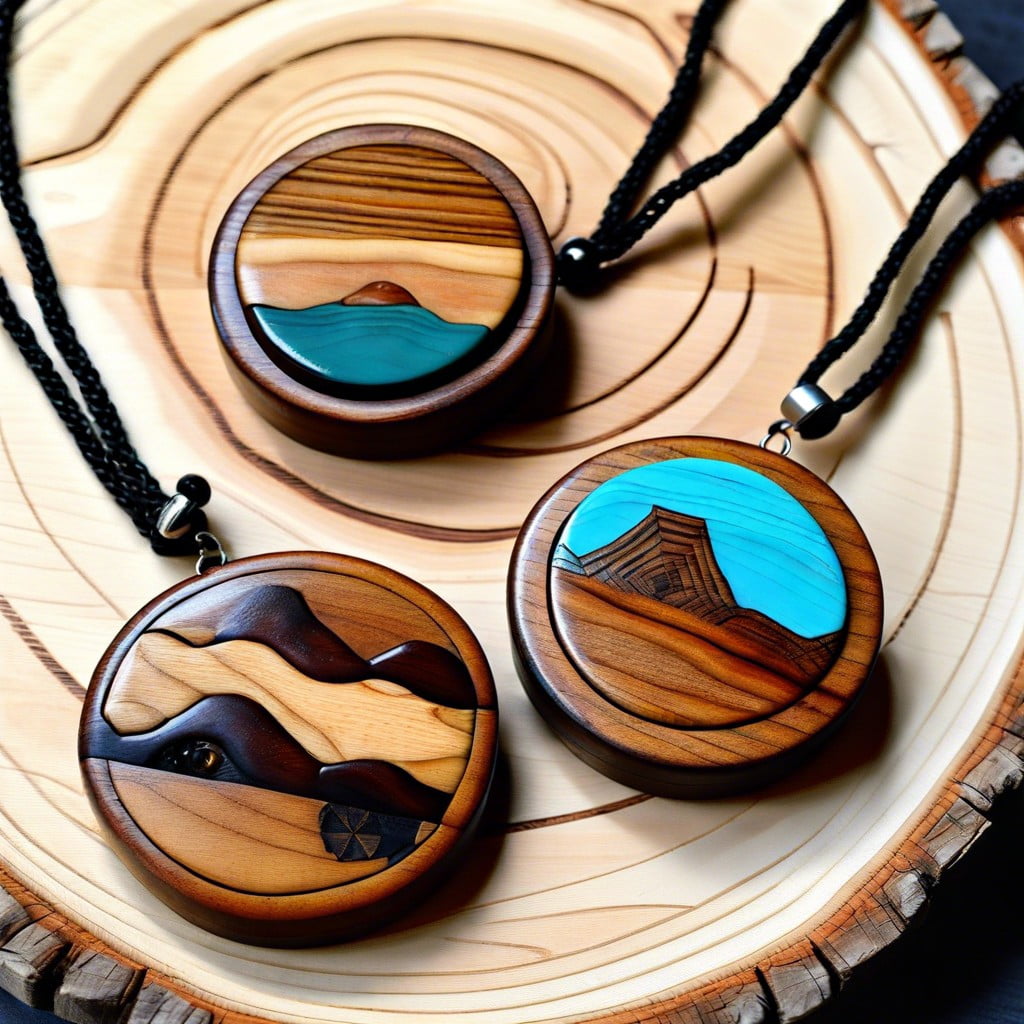
Eco-friendly and visually stunning, transforming discarded or leftover pieces of wood into unique jewelry pieces adds charm to your attire. Scraps of walnut, mahogany, or even driftwood can serve as a canvas for crafting earrings, pendants, or bracelets.
Honoring nature’s unique formations, embrace the wood’s grain, unusual shapes or knotholes, highlighting them instead of treating them as flaws. Apply sanding and polishing techniques to expose the hidden beauty of the wood, creating a natural sheen that can be enhanced with eco-friendly varnish or oil.
Lastly, consider incorporating elements like reclaimed metal, beads or recycled leather to design truly memorable pieces. The beauty of upcycled wood jewelry lies in the story each piece tells and the sustainability it promotes.
Barnwood Picture Frames

Crafting frames from old barnwood gives you rustic and unique pieces that enhance the charm of your photo memories. It’s an aesthetic blend of history and personal style, where every frame bears unique markings, knots, and grain characteristics from the wood’s original life.
1. Frames are not limited to pictures and can hold any cherished momento, including children’s art, pressed flowers, or patches from memorable trips.
2. For a personalized touch, consider using color on the borders. Pastel hues can soften the rough textures, while bold, bright colors can excite and draw the eye towards the frame.
3. Mixing different kinds of barnwood can create a contrasting and intriguing frame, with varying shades and textures.
4. Keep the natural, weathered surface on the outside of the frame for authenticity. But for the inside border where it touches the picture or glass, sand and seal the wood to prevent damage.
5. Consider the size and orientation of your frame design to complement the photo or artwork it’s meant for. A wide horizontal frame might accentuate a landscape print, while a narrow and tall frame can elongate a portrait.
6. Try incorporating metal elements like vintage nails, corner brackets, or wire for hanging for an industrial touch. This fusion of materials adds complexity and interest.
7. Use eco-friendly sealants to protect the wood and give it a slightly polished yet rustic look.
Hand-carved Wooden Bowls
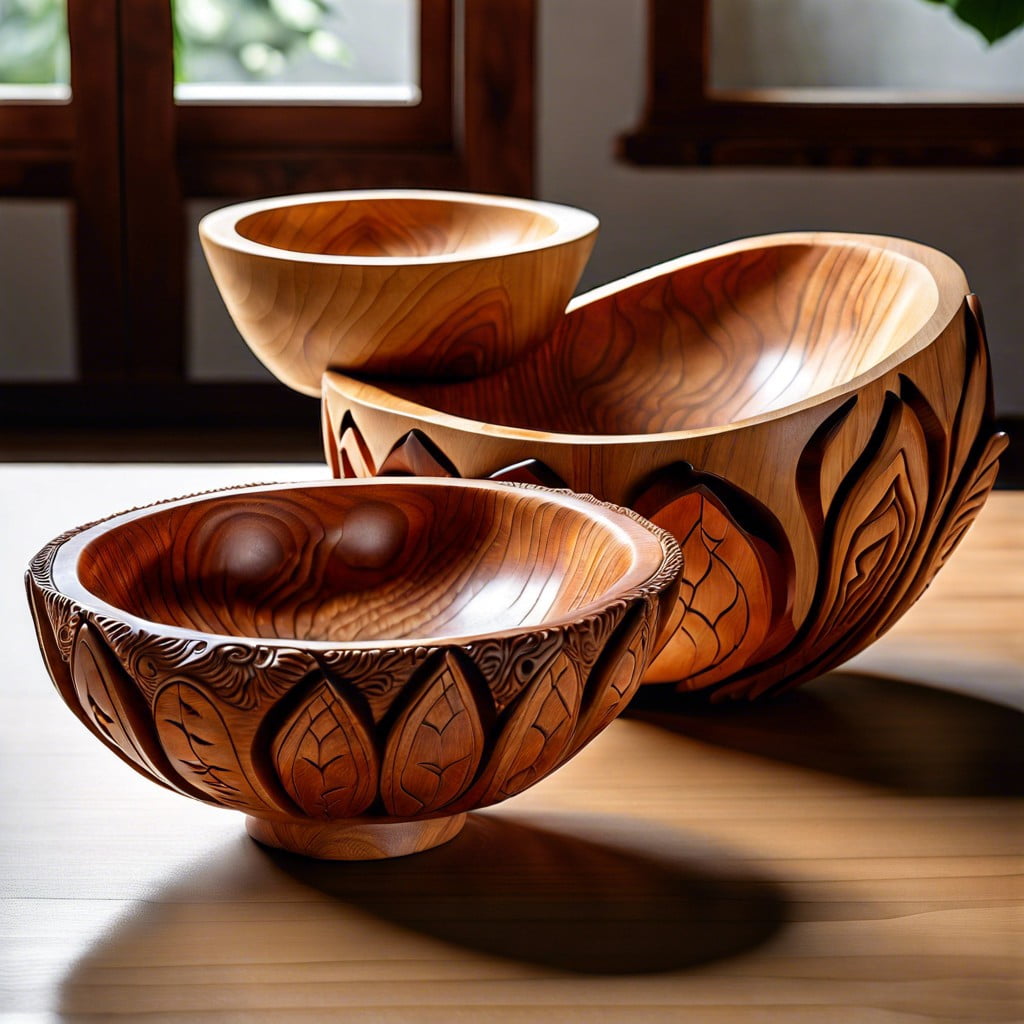
Carving bowls from wood involves both art and craftsmanship. Start by selecting your wood – hardwood like walnut, oak, or cherry creates durable, food-safe bowls. To begin, rough cut the wood using a bandsaw to form the bowl’s outer shape, before using a gouge tool to gently carve out the inside.
Every carved detail is an opportunity to express creativity, be it in the form of intricate swirl designs on the sides or a rough, rustic look that allows the beauty of the natural wood grains to shine through.
Practical yet artistic, each bowl is unique, reflecting the wood’s individual characteristics. They make stunning centerpieces or can be used for daily dining purposes. Remember to seal the wood with a food-grade finish to preserve the bowl’s beauty and durability. It’s a project that demands time and patience, but the end result is a one-of-a-kind piece of functional art.
Remember, woodcarving is a skill that requires practice. Learning proper technique and safety is important. Online tutorials or local woodworking classes can provide the needed guidance.
Abstract Wood Wall Decor
Achieving abstract wood wall decor is all about embracing the natural grain, texture, and color variations of wood. Aim to combine these elements creatively to produce visually interesting pieces.
Here are a few concepts to help you master this art:
- 1. The Art of Intentional Imperfection: Rather than seeking perfectly polished pieces, consider using wood in its raw form. Think knots, splits, or even bark edges. These natural imperfections can add depth to your artwork.
- 2. Playing with Tones & Grains: Using different types of wood in a single piece can have a significant impact. Light, medium, and dark-toned woods can add a dimension of complexity and create eye-catching contrasts.
- 3. Expression through Shapes: Don’t limit yourself to traditional squares or rectangles. Curves, circles, or freeform shapes can lend a more organic feel to the abstract design.
Remember, art is subjective. Embrace your unique vision and the whimsy of wood, letting it guide your creation.
Wooden Geometric Wine Rack
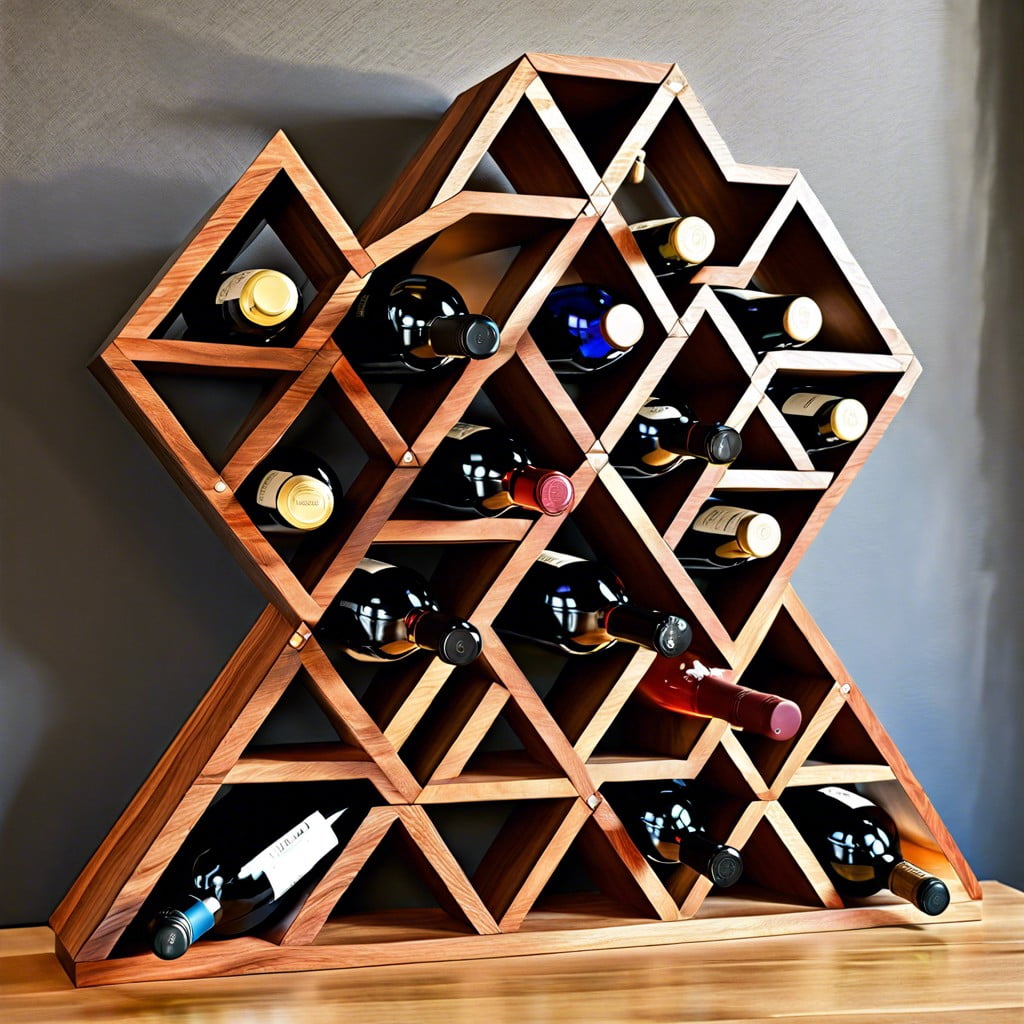
This striking piece can serve as both functional furniture and modernistic art for your home. The geometric structure not only stores wine bottles but imparts a sense of design aesthetics with its unique interplay of lines and angles.
Made of sturdy timber, it elevates your wine storage to a new level of style and innovation. Here are a few key ideas to consider:
- 1. The chosen wood should be strong enough to handle the weight of several wine bottles.
- 2. You can select a triangular, square, or hexagonal pattern for your wooden wine rack.
- 3. The intersections and corners should be perfectly measured and cut to create symmetrical shapes.
- 4. It can be wall-mounted or freestanding, depending on your space and preference.
- 5. Polishing or painting the wood can also enhance its appeal, making it stand out or blend with your current decor. Pair it with industrial lighting fixtures or modern paintings for a chic look.
- 6. Opting for wood types like cedar, redwood, or pine, known for their durability and fine grain, would add a warm natural look as well as longevity.
This project will not only challenge your craftsmanship but also reward you with a unique piece that showcases your wine collection in an artistic ambiance.
Reclaimed Wood Coffee Table
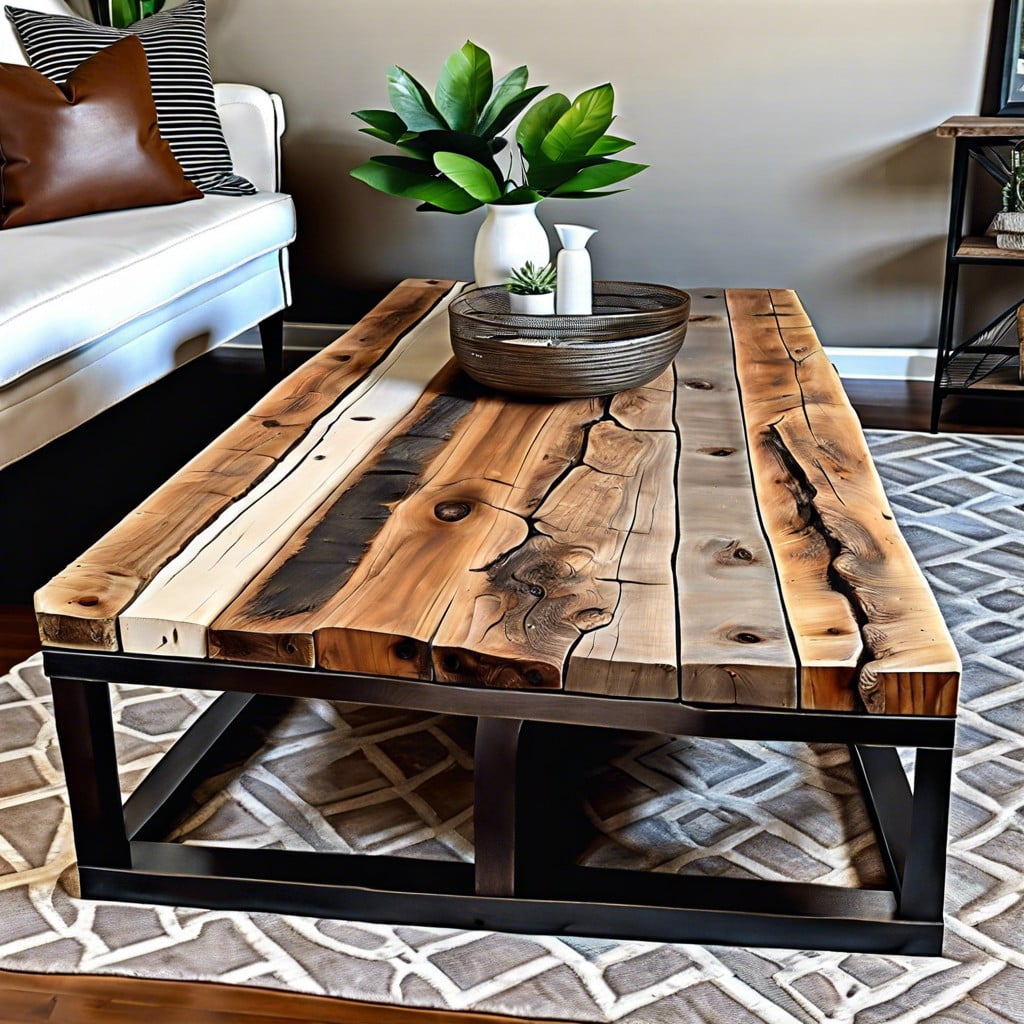
Utilizing reclaimed wood adds a rustic charm, as well as a commitment to environmental sustainability in your decor. Each piece, often salvaged from old barns and buildings, brings a unique history, enhancing the lived-in feel of your space.
Considerations when making coffee tables from reclaimed wood:
- Selecting the Wood: Choose with quality in mind. Look for hardwoods like oak or mahogany with minimal damage.
- Design: Think about your aesthetic. Maybe a thick, hefty tabletop for a bold statement, or a sleek, lightly-stained piece for a minimalist design.
- Finishing: Preserve the wood’s character while ensuring durability. Danish oil can strike the balance between showcasing the natural grain and providing ample protection.
- Pairing with Bases: Blend modern and rustic with a geometric metal base, or keep it classic with matching wooden legs.
- Allowing Imperfections: Embrace the knotholes, splits, and uneven edges – these quirks create character.
- Ensuring Stability: Use quality joinery techniques and adhere to proper dimensions to ensure a sturdy and functional table.
Remember, creativity is key. The beauty of a reclaimed wood coffee table is its ability to be both a functional centerpiece and a conversation starter.
Tree Branch Candle Holder
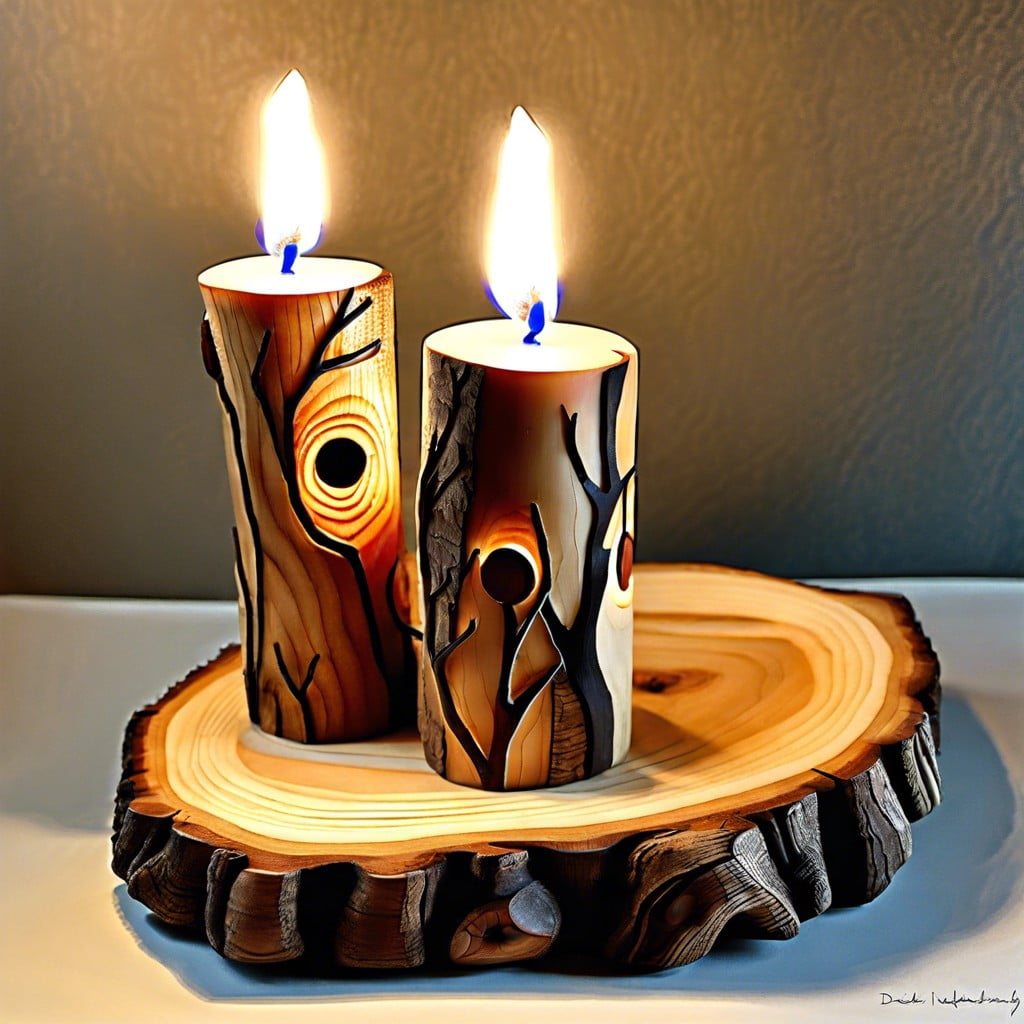
Harnessing the raw beauty of nature, transforming a simple branch into a unique candle holder can truly set a warm ambiance in any area. Here’s how the rustic charm can be achieved:
1. Material Selection: Opt for sturdy, non-diseased branches, ideally from hardwood trees.
2. Size and Shape: The choice here boils down to personal preference. From single mid-size branch for a subtle effect to larger multiple branch arrangements for a statement piece.
3. Cutting and Placement: Cuts should be straight and flat for stability. Always ensure the candles are evenly spaced and safely seated into the branch.
4. Finishing Touches: Leaving it natural is just as appealing as adding a touch of paint or varnish.
5. Safety Measures: Lastly, never leave candles unattended. A glass hurricane or votive candle holder can add extra safety.
This concept is all about imperfections, each piece fashioned exudes inherent uniqueness and beauty. It’s a testament to how straightforward items can create an out-of-the-ordinary, striking piece of decor.
Pallet Wood Wall Art
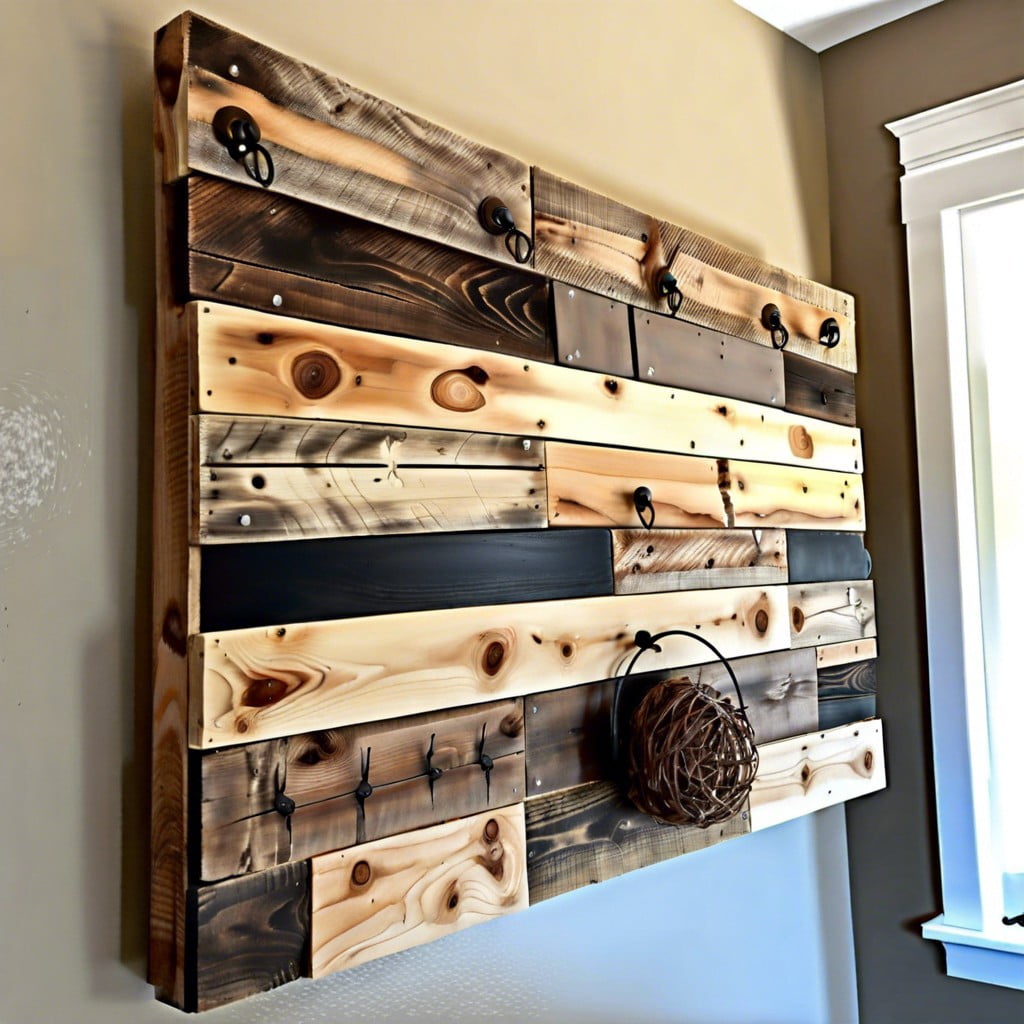
Creating a captivating feature doesn’t have to break the bank – repurposed wooden pallets can be your secret weapon. Sanded down for a smooth finish and varnished to protect it from the elements, your pallet can become a canvas for any design, from intricate geometric patterns to rustic scenic views.
Start by disassembling several shipping pallets to gather enough wood for your project. Then, it’s time to stenciling your design or freehand drawing it if you’re an experienced artist. Alternatively, for novice creatives, easy-to-follow designs like a herringbone pattern, simple garden scenes, or calligraphy quotes can be an excellent starting point.
Consider painting the design, staining the wood for a dark, sophisticated look or even leaving it natural to celebrate the authentic appeal of the pallet. Do not forget the importance of proper mounting stability, especially if you aim to create a larger piece. Remember, the beauty of your pallet wood wall art lies in your personal touch and the unique coarseness of reclaimed wood.
Marquetry, Using Inlaid Wood
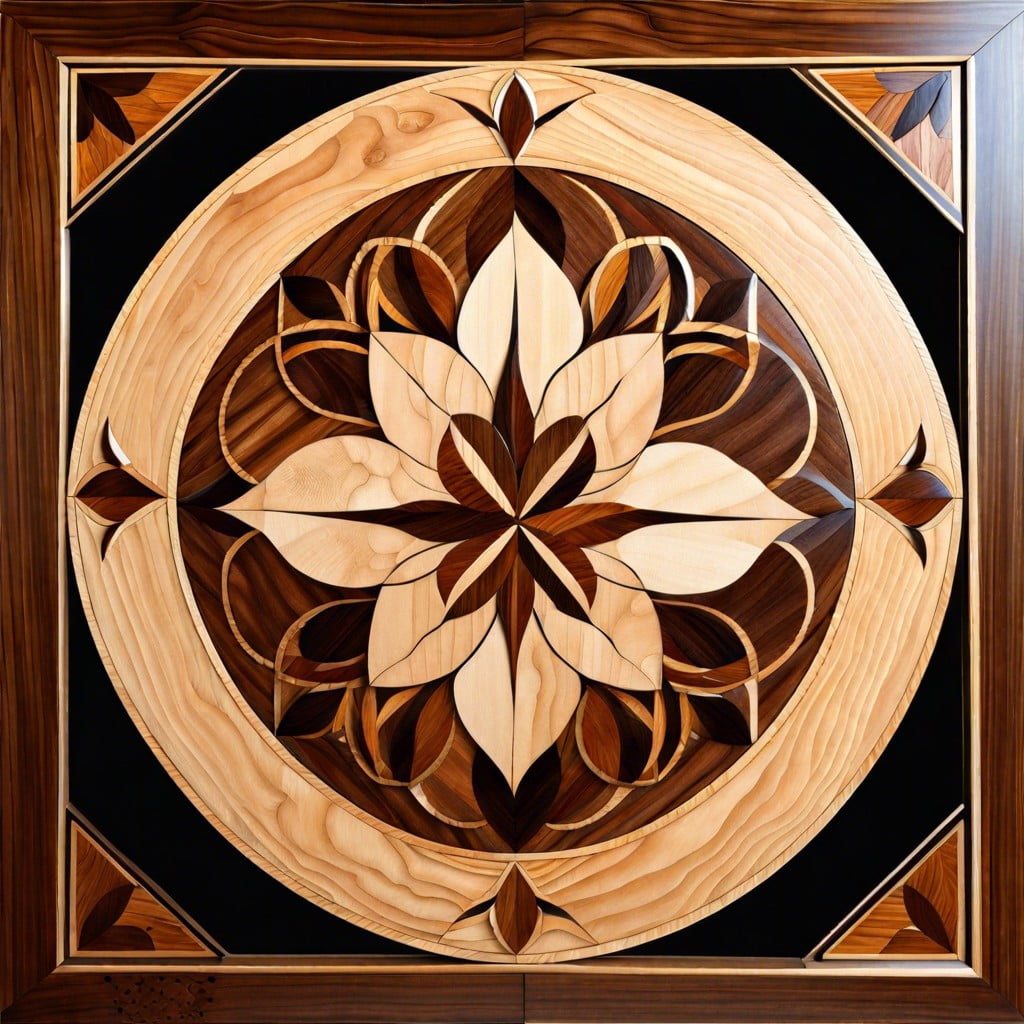
Renowned since the 16th century, Marquetry is indeed a testament to the beauty of intricate design with its skillful arrangements of veneers to create detailed, eye-catching patterns. Translating to ‘inlaid work’, this craft traditionally features motifs with inspiration stemming from nature themes to complex geometric patterns.
Exploring marquetry involves several key steps. Initially, there’s the selection of veneers based on color and grain patterns to establish the appearance of the final design. Subsequently, an intricate pattern should be carefully designed and traced on these veneers. Then, minuscule pieces are expertly cut using specialist tools like a fretsaw or a marquetry donkey. Aligning and affixing these veneer pieces on the wood core comes next to create the mesmerizing inlaid pattern.
Becoming proficient in marquetry not only demands patience but also precise control over tools and an appreciation for the aesthetic value embedded within each slice of wood. It’s an excellent way to give wood furnishings extra dimension and intriguing visual appeal.
The vast array of wood types available on the market gives every enthusiast the opportunity to experiment with a broad palette, enabling the creation of truly unique pieces that elevate the humble material of wood into a canvas for intricate artistry.
Wood Pyrography Art
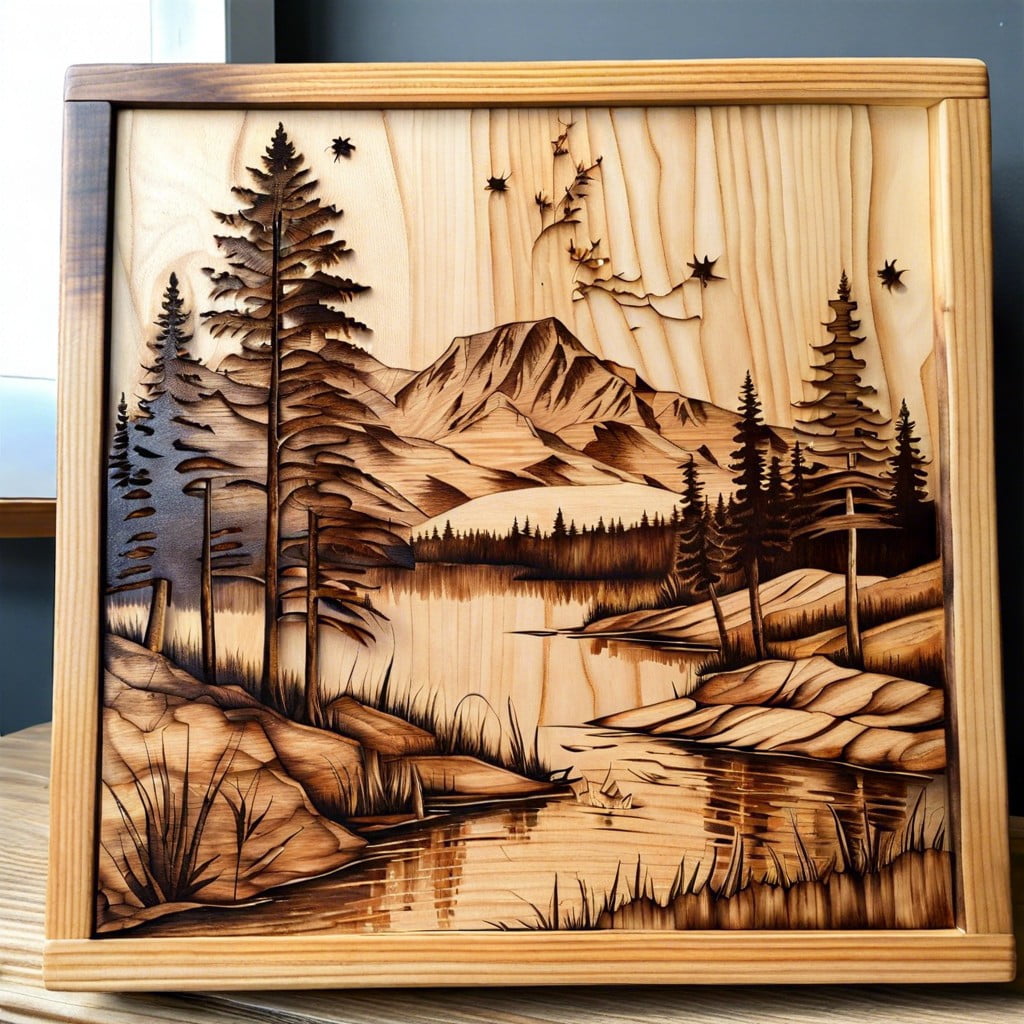
Delving deeper into this visually stimulating technique, one can only admire the variety and intricacy it offers. Pyrography is rooted in controlled artistry where heated tools etch patterns onto wood. From soft linework to shades and gradients, it wholly demonstrates the control and talent of the artist.
Here’s how the process unfolds:
- 1. Safety First: This art form requires a specialized pyrography pen. High temperatures can pose risks, therefore, it’s essential to follow safety guidelines strictly.
2. Sketch & Transfer: Artists often sketch their designs first on a piece of paper and then transfer them onto the wooden surface utilizing graphite paper.
3. Burn & Shade: Using the pyrography pen, artists carefully burn the lines into the wood. Skilled artists can create a variety of gradients, adding depth to their pieces.
4. Finishing Touches: Depending on individual style, colored pencils, watercolors, or oil-based finishes may be used for more vibrant artwork.
Endowed with patience and creativity, anyone can create exceptional pieces imbued with arresting beauty and personal touch. A powerful way to bring nature indoors.
Wooden Clock Designs
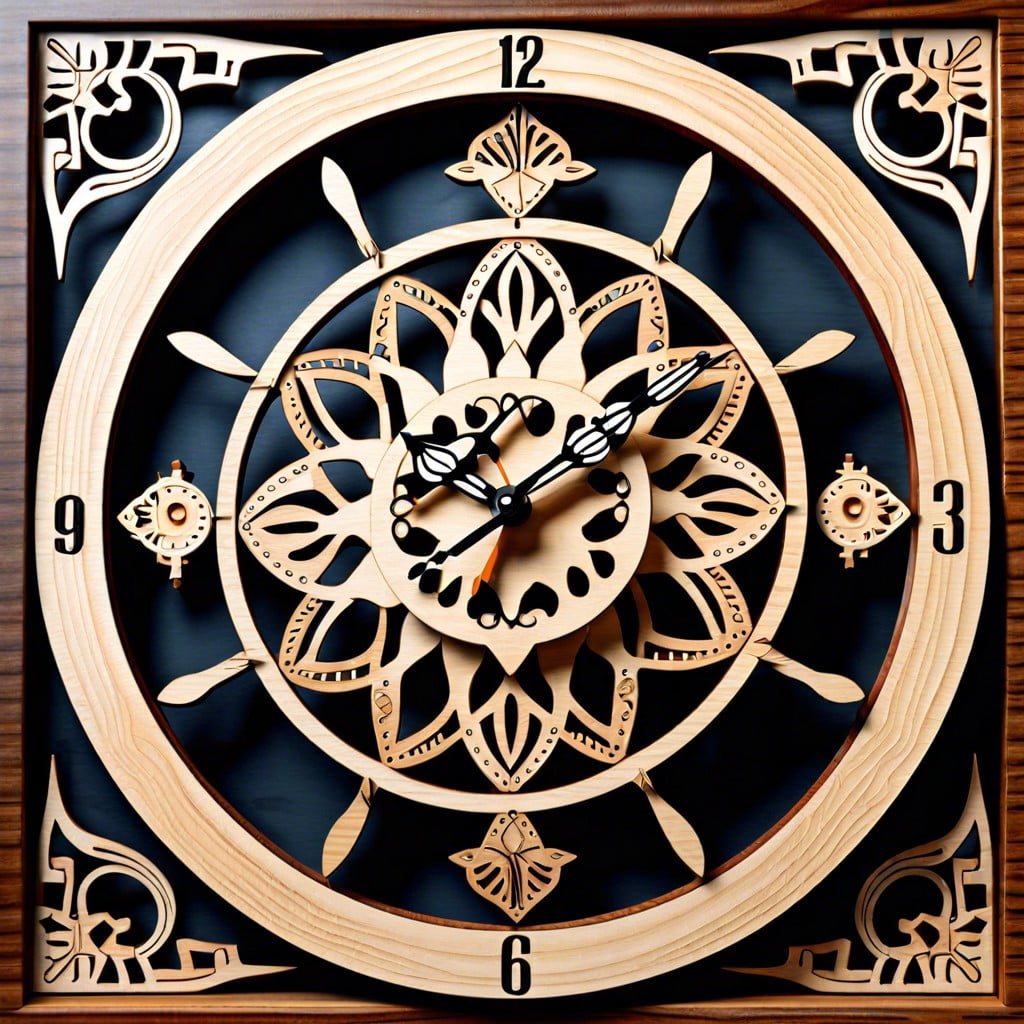
To begin, gather your necessary tools and materials such as different types of wood, clock movement kit, wood glue, and a drill. An essential part of creating these timekeepers is selecting the right type of wood. Hardwoods like oak, teak, and mahogany often make for sturdy and long-lasting pieces, though softer woods like pine may be easier for beginners.
Next, creativity truly comes to life in the design stage. This could range from minimalist, circular styles for a contemporary feel, to elaborate shapes inspired by nature, or even abstract forms for a truly unique touch. The beauty lies in the ability to tailor your clock to your space, environment, and personal style.
The art of wooden clock making is also an exercise in precision. The correct measurements are key to ensuring that your clock functions properly. For greater accuracy, use a template or stencil during the cutting process.
Finally, a hand-finished look can be achieved with varnish or wood oil. This step not only enhances the visual appeal but also provides protection to your craft.
In essence, wooden clock designs bring art and function together in perfect harmony, offering an innovative approach to timekeeping.
Handmade Wooden Toys

Unleashing one’s creativity onto blocks of wood creates handmade toys that kids adore while doubling as decorative pieces. Constructing a pull-along animal or a simple jigsaw puzzle offers challenging fun and serves as an unforgettable playmate for children.
The beauty in these designs lies in a back-to-basics approach. A rough sketch serves as the basis, from which each feature is carved out, sanded, and finally, painted. The toys can remain natural or be colored vibrantly but ensure to use non-toxic paints for safety.
Handmade wooden toys can take various forms, from vintage cars to fairy tale characters, depending on your preference or the child’s interests. Moreover, these creations foster a sense of warmth no plastic toy can duplicate. Lastly, creating themed sets, such as a farmyard or fairy kingdom, enhances their play and educative value.
Intricate Wooden Puzzle Boxes

Crafting these captivating containers offers an exceptional opportunity to bring elegance and mystery into any room. Incorporation of different types of wood adds layers of contrast and depth, elevating the visual appeal of the space.
1. Variety of Woods: Using various woods like cherry, maple, or walnut allows for a striking spectrum of colors and textures.
2. Unlocking Mechanisms: Quite often, boxes are designed with undisclosed ‘trick’ opening mechanisms that add intrigue.
3. Customization: Designs can range from simple to complex, even including personalized symbols or initials for a meaningful touch.
4. Tools: Basic woodworking tools such as saws, chisels, and a miter box often suffice for creating these boxes.
5. Finishing: A quality finish not only enhances the richness of the wood but also ensures longevity.
6. Multi-Functionality: Besides being decorative, they offer an interesting way to store small knick-knacks or precious items.
7. Skill Level: Whether you’re a beginner or a seasoned woodworker, there’s a puzzle box project that you can enjoy completing.
Intricately crafted wooden puzzle boxes are more than just a stylish décor item; they’re a conversation starter. Engage with the art of woodworking to bring a fresh and unique element to your home aesthetics.
DIY Wooden Lamp
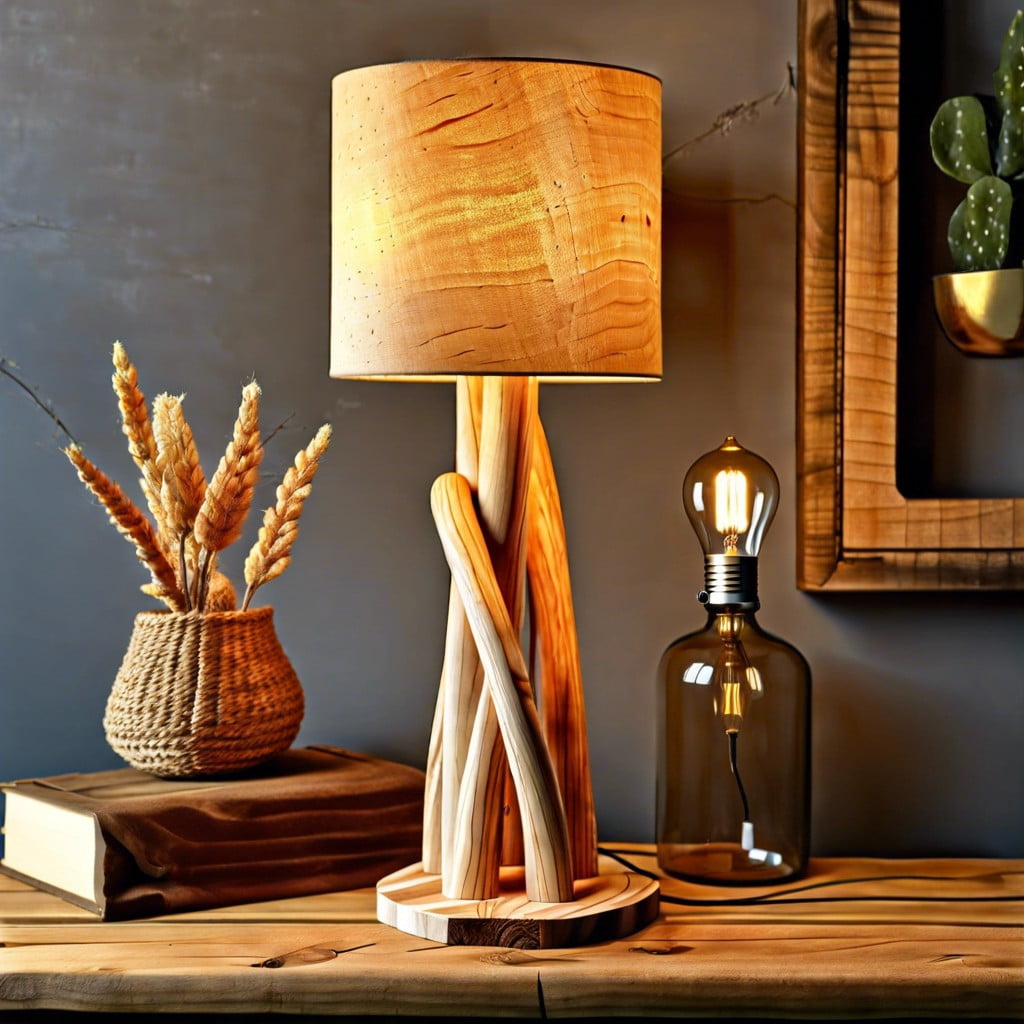
Creating a unique, DIY wooden lamp could amplify the rustic touch in your dwelling. Bring the natural elegance of wood into your spaces while casting a warm and welcoming glow.
Here’s a simple sequence to etch this idea into reality:
- 1. Select your wood: Opt for oak, pine, or walnut for sturdy and beautiful results.
- 2. Shape & Design: Either go with a block for a minimalistic outcome or carve intricate patterns for a more artistic outlook.
- 3. Hollow the center: Make enough room for the cord.
- 4. Selecting the right kit: There are pre-made lamp kits available online. Choose one that matches your decor.
- 5. Assemble: Follow the kit instructions to secure the light bulb socket, the cord, and finally, attach your handmade wooden base.
- 6. Safety Measures: Don’t forget to check your assembly for any potential fire hazards.
This is a flexible project, as the type of wood, carving details, and lamp size can be tailored to fit your space perfectly.
Wood String and Nail Art

Creating this type of art involves the strategic placement of nails on a wood panel, usually forming a specific design or pattern. Following this, a variety of thread or string colors are wrapped around these nails, thus filling the outline and bringing the design to life.
Consider these basic steps for a balanced and eye-catching result:
- 1. Select Wood: We recommend recycled or reclaimed wood for a rustic touch.
- 2. Outline Design: Draw a simple outline of your intended design on the wood.
- 3. Placing Nails: At every corner or curve of your design, hammer a nail.
- 4. String Attachment: Tie a string to a starting nail, and then criss-cross the design by wrapping the string around the nails.
- 5. Color Variation: Different string colors can add depth and dimension to the design. Switch between colors by tying a new string to a nail where the color change is desired.
This technique creates beautiful, personalized pieces, perfect as a gift or to adorn your own walls. Despite its simple process, patience and creativity are key to achieve an appealing result.
Live Edge Wood Furniture
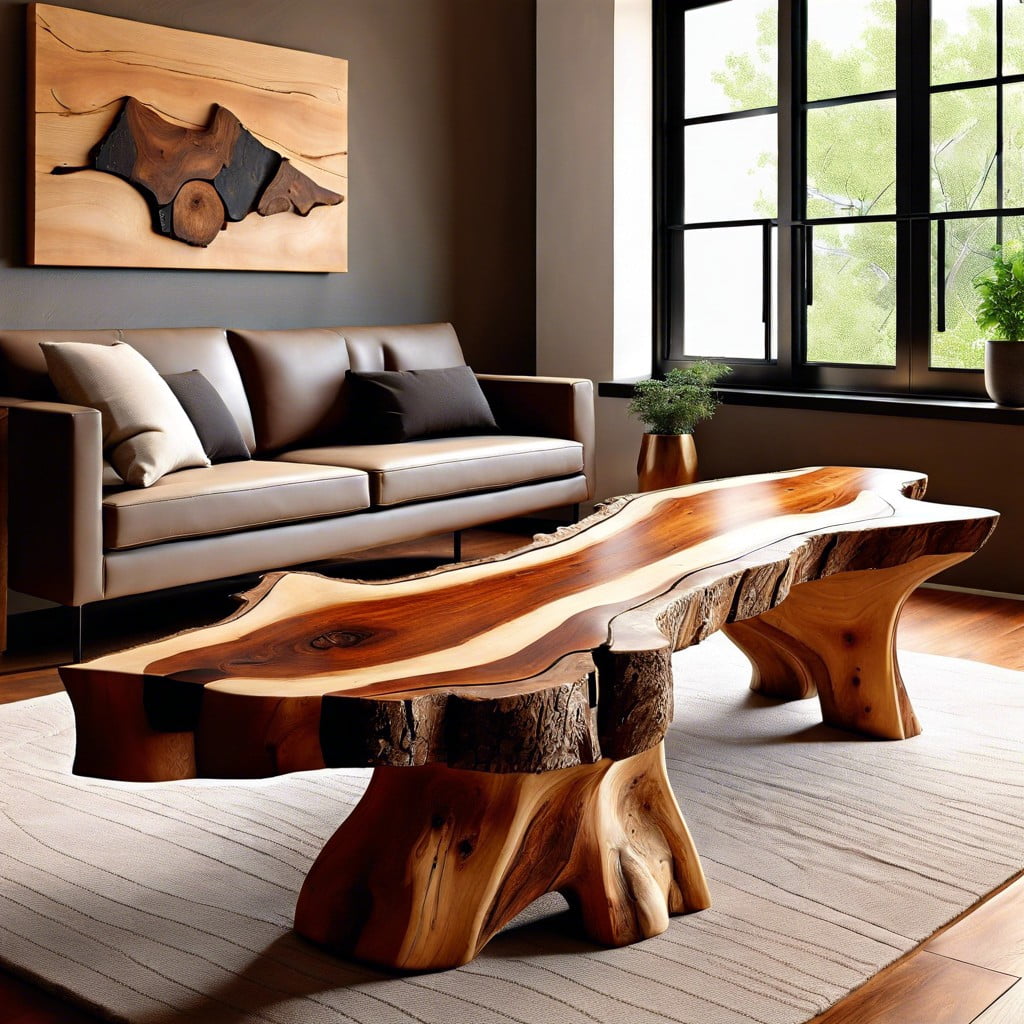
Embracing the natural beauty of wood, every live edge piece tells a story. These unique pieces showcase the raw edge of the wood, creating a natural, organic aesthetic. It’s not just about tables – chairs, consoles, benches, and shelves take on a new dimension with this approach.
1. The Type of Timber – For richer hues, walnut or mahogany would be a superior choice. Lighter tones can be achieved using ash or maple.
2. Cutting Approach – Retaining the natural edge of the wood is key. Each piece should be cut in such a manner that it highlights the unique qualities of the wood.
3. Crafting Process – An artisan’s touch is necessary to give the wood a smooth finished look, emphasizing its shape while maintaining its natural character.
4. Choosing the Right Piece – Each unique piece has its own personality – consider both function and form when choosing your live edge piece.
5. Maintenance and Care – Regular oiling will not only protect the wood but also enhance the grain and color over time.
6. Sustainability – Live edge furniture production often uses locally sourced wood, reducing environmental impact and supporting local economies.
Browse More
 Baking Soda and Vinegar Drain Cleaning: Simple Steps for a Clog-Free Life
 How Long Does It Take to Tile a Bathroom: Your Ultimate Time-Saving Guide
 Smelly Drain: Banish Odors with Easy Fixes
 How to Remove Bathroom Fan Without Losing Your Cool
 How to Remove Bathroom Vent Cover Without Losing Your Mind
Recap